
I spent three days grinding concrete on a job last month just so the floor wouldn’t click like a castanet. That level of obsession with the subfloor is what defines a true professional. When you find a leak in a shower valve, your first instinct might be to grab a hammer and smash your beautiful tile. That is the amateur move. A master installer knows that the real structural integrity of the home lives behind the wall. Most guys skip the leveling compound. They think the underlayment will hide the dip. It won’t. The same logic applies to plumbing. If you ignore the subsurface reality, the surface will eventually fail. Accessing a shower valve through the back wall is the surgical approach to home maintenance. It preserves the waterproof envelope of the shower while allowing for a direct mechanical fix of the brass hardware. We are talking about the physics of water migration and the chemistry of copper oxidation. If you have a damp spot on the carpet in the bedroom behind the bathroom, you have a structural engineering challenge on your hands. It is not just a leak. It is a slow motion assault on your floor joists and your peace of mind.
The anatomy of a hidden leak
Fixing a leaky shower valve through the back wall involves identifying the failure point in the mixing valve or the supply lines by cutting an access panel through the drywall or plaster in the adjacent room. This method avoids damaging the tile, grout, or waterproof membrane within the shower enclosure. The process requires precise measurements and an understanding of the plumbing stack. When water escapes a pressurized line, it follows the path of least resistance. Often, that path is down the supply pipe and into the subfloor. I have seen 3/4 inch plywood turn into oatmeal because a homeowner ignored a drip for six months. The copper pipes vibrate every time the water turns on. This is called water hammer. Over years, these vibrations can fatigue a solder joint or loosen a compression fitting on a modern cartridge. You need to understand the molecular bond of the solder. A cold joint will eventually weep. A weep turns into a drip. A drip turns into a nightmare of black mold and structural rot. To see what a properly designed bathroom looks like, you can explore showers that wow modern designs for 2025 before you start your repairs. It gives you a target for the finish quality you are trying to protect.
“A floor is only as good as the subfloor beneath it, deflection is the enemy of every joint.” – Master Flooring Axiom
The physics of the access hole
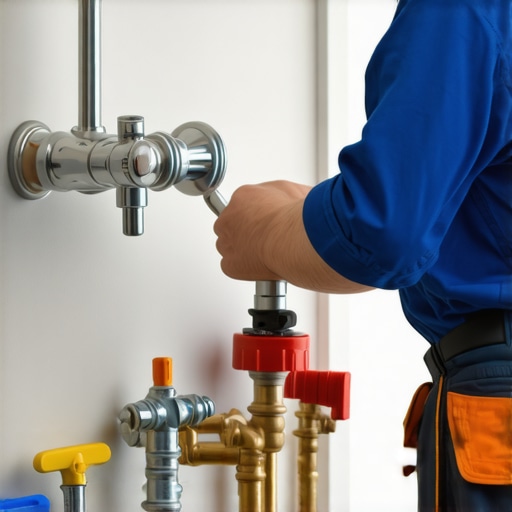
Cutting an access hole requires a drywall saw and a stud finder to locate the exact center of the valve body without severing electrical wires or nicking the plumbing. The hole must be large enough to allow for two hands and a pair of pipe wrenches to operate simultaneously within the wall cavity. You are looking for the mixing valve. This is the heart of the shower. It is usually a heavy brass casting that regulates the flow of hot and cold water. Inside that brass is a plastic or ceramic cartridge. If the leak is coming from the front, it is likely the cartridge O-rings. If the leak is at the back, you have a pipe failure. I always tell my apprentices that a wall is like a living organism. It needs to breathe, but it also needs to stay dry. Once you open that wall, you will smell it. That earthy, metallic scent is the smell of a failing subfloor. If the leak has been going on for a while, you might see the baseboards starting to pull away from the wall. This is because the wood is swelling from the bottom up. If you are dealing with trim issues, consider looking into baseboards makeover ideas to elevate your space to see how to properly reinstall them once the plumbing is dry.
| Valve Material | Expansion Rate | Corrosion Resistance | Typical Lifespan |
|---|---|---|---|
| Brass (High Lead) | Low | Excellent | 40+ Years |
| Plastic (PPO) | Medium | High | 15 to 20 Years |
| Stainless Steel | Very Low | Superior | 50+ Years |
| Copper Connections | High | Moderate | 30 to 40 Years |
The chemistry of the repair
Repairing the valve requires either replacing the internal cartridge or re-soldering the supply lines using lead free solder and a non corrosive flux. Heat management is the primary concern when working in a confined wall space to prevent ignition of the wooden studs or the fiberglass insulation. You have to use a heat shield. I use a heavy duty fire cloth. If you are sweating a joint, you are heating the copper to roughly 400 degrees Fahrenheit. The solder is an alloy of tin and other metals. It moves via capillary action. It is the same principle that causes water to ruin your grout if it is not sealed. If the water gets into the grout, it travels behind the tile. For those dealing with existing stains, grout restoration secrets for long lasting results can save you from a full tear out. When you are done with the plumbing, you have to ensure the area is 100 percent dry before closing the wall. I use a moisture meter. If the wood is above 12 percent moisture content, you are sealing in a rot bomb. I have seen guys close up a wall when it was still at 20 percent. Three years later, the whole floor was gone. Do not be that guy. Wait for the chemistry of the wood to stabilize.
The hidden danger of the subfloor
Subfloor moisture from a leaky valve can lead to hydrostatic pressure buildup that eventually forces water through the grout lines from the inside out. This phenomenon causes white efflorescence on the tile surface and eventually leads to the failure of the thin set bond. If you see white powder on your shower floor, you have a leak. It is not just soap scum. It is minerals being pulled from the mortar bed by the escaping water. While most people want the thickest underlayment, too much cushion actually causes the locking mechanisms on LVP to snap under pressure. In a shower, the equivalent mistake is using too much silicone where grout should be. Silicone is a surface fix. Grout is a structural filler. If you have messed up the appearance of your lines while trying to find the leak, you should learn how to refresh grout without replacing it to maintain the integrity of the shower floor. You need to understand that every material in that wall has a different coefficient of expansion. The brass expands at one rate. The wood studs at another. The tile at a third. This is why we leave expansion gaps. If you jam a valve tight against a stud, it will eventually snap a solder joint. It is simple physics.
- Inspect the mixing valve body for hairline fractures in the brass.
- Verify that the cartridge seating surface is free of mineral deposits.
- Check the p-trap for secondary leaks caused by the primary valve drip.
- Replace any wet insulation with new mineral wool for fire resistance.
- Apply a vapor barrier patch to the back of the cement board before closing.
Closing the surgical site
The final stage of fixing a shower valve through the back wall involves installing a permanent access panel rather than a simple drywall patch. This allows for future inspections and ensures that any future mechanical failure can be addressed in minutes rather than hours. I prefer a plastic or metal spring loaded panel. It sits flush against the wall. If the leak was in a hallway or bedroom, you can paint the panel to match. This is the mark of a pro. It says you know that machines break. You are planning for the future. While you are at it, check the rest of the bathroom for sustainability. Modern homes are moving toward eco friendly tile solutions for sustainable homes in 2025 which often feature better moisture management systems. Once the wall is closed, you need to clean the shower area thoroughly. Dust from the drywall can be acidic. It will eat into your stone or ceramic finish if left to sit. For the best results, use tile cleaning tips for a sparkling bathroom in 2025 to ensure your surfaces remain pristine. Remember that a shower is a system. The valve is the engine. The tile is the bodywork. The subfloor is the chassis. If any one of those fails, the whole thing is junk.
“Modern waterproofing relies on the chemical integrity of the bond between the substrate and the finish material.” – Tile Council Standards