
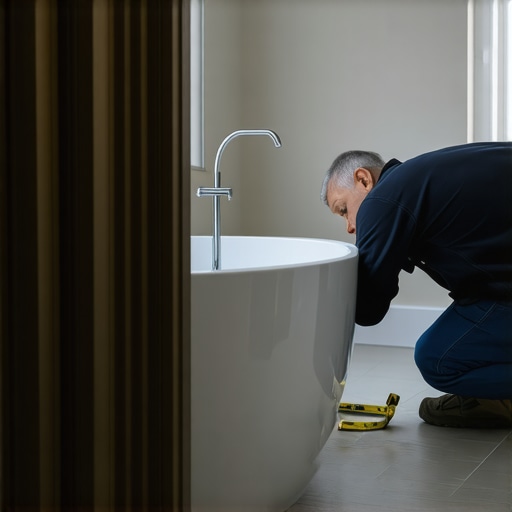
Professional Techniques for Fixing a Large Gap Between the Tub and the Floor
I spent three days grinding concrete on a job last month just so the floor wouldn’t click like a castanet. Most guys skip the leveling compound because they think the underlayment will hide the dip. It won’t. I was in a high-rise downtown, staring at a bathtub that looked like it was trying to escape the room. There was a 3/4-inch void between the porcelain and the ceramic tile. The previous installer tried to bridge it with a mountain of grout. It had cracked into a million pieces. That is what happens when you ignore the physics of deflection and the chemistry of bonding. A bathroom floor is a living, breathing structural assembly that must withstand the hydraulic weight of a filled tub and the shifting moisture levels of the home.
The reality of structural settling and subfloor voids
Fixing a large gap between the tub and the floor requires a mechanical understanding of subfloor deflection and material expansion. You must stabilize the void using a closed-cell backer rod before applying high-performance 100 percent silicone sealant to create a flexible, waterproof bridge that accommodates the weight of a full bathtub. Most homeowners see a gap and reach for the nearest tube of cheap painter’s caulk. That is a mistake that leads to rotted subfloors. When a standard alcove tub is filled with 50 gallons of water, it can weigh over 400 pounds, not including the person inside. This weight causes the floor joists to flex. If your floor-to-tub joint is rigid, it will snap. If it is empty, it will leak. We call this the L/360 rule in the industry, referring to the amount of allowable deflection over a given span. If your subfloor is bouncing more than 1/360th of its length, no amount of caulk will save you from the inevitable crack.
“A floor is only as good as the subfloor beneath it; deflection is the enemy of every joint.” – Master Flooring Axiom
The chemistry of the bond and why grout fails
Grout should never be used to fill the transition between a bathtub and a floor because it is a rigid cementitious product. Bathrooms require flexible movement joints at every change of plane to prevent stress fractures caused by thermal expansion and structural shifting during seasonal humidity changes. When you look at the molecular structure of Portland cement grout, it is essentially a lattice of microscopic crystals. It is fantastic for compression, but it has zero tensile strength. It cannot stretch. A bathtub is a vibrating, moving object. Every time you step in, the tub moves. If you have grout in that gap, the bond will break within months. Instead, we look toward grout restoration secrets for long-lasting results by utilizing color-matched siliconized acrylics or pure RTV silicones. You can read more about grout restoration secrets for long-lasting results to understand why maintaining these lines is vital for the health of your home.
The structural necessity of the backer rod
A backer rod is a flexible foam cylinder used to fill deep voids so that the sealant can form a proper Two-Point Bond. Without a backer rod, the sealant sticks to the bottom of the gap, creating a Three-Point Bond that causes the silicone to tear as the tub moves. If the gap is wider than 1/4 inch, you cannot just pump sealant into it. It will sag, sink, and fail to cure correctly. You need a 3/8-inch or 1/2-inch closed-cell backer rod. You compress this foam and jam it into the gap, leaving about 1/8 to 1/4 inch of space at the top for the silicone. This foam acts as a floor for your sealant. More importantly, it prevents the silicone from sticking to the subfloor. Silicone needs to be able to stretch like a rubber band between the tub and the tile. If it is stuck to the floor underneath as well, it cannot stretch, and it will pull away from the tub wall. This is a basic rule of waterproofing for showers and tubs that most DIY enthusiasts completely ignore.
Selecting the right sealant for heavy moisture
High-performance 100 percent silicone is the only acceptable material for a tub-to-floor transition because it offers up to 25 percent movement capability and is naturally resistant to mold and mildew. Avoid latex or acrylic caulks which shrink significantly during the evaporation-based curing process and eventually become brittle. When you are dealing with tile cleaning tips for a sparkling bathroom in 2025, you realize that silicone is much easier to maintain than porous materials. A high-quality silicone, such as those used in professional tile cleaning tips for a sparkling bathroom in 2025, creates a non-porous surface that doesn’t allow bacteria to take root. If you are worried about aesthetics, many manufacturers now produce silicone that is color-matched exactly to your floor grout. This provides the look of a seamless floor without the structural failure of a rigid joint.
| Material Type | Max Gap Width | Flexibility Rating | Lifespan |
|---|---|---|---|
| Standard Grout | 1/8 inch | None | 1-2 Years |
| Latex Caulk | 1/4 inch | Low | 3-5 Years |
| Siliconized Acrylic | 1/2 inch | Moderate | 5-8 Years |
| 100% RTV Silicone | 1 inch+ (with rod) | High | 20+ Years |
The 1/8 inch that ruins everything
Precision in the depth of your sealant bead is the difference between a repair that lasts decades and one that fails in a week. A bead that is too thin will lack the cohesive strength to hold, while a bead that is too thick will never fully cure in the center. I have seen guys try to fill a one-inch gap with nothing but caulk. It stays soft for weeks. Eventually, someone steps near the tub, the floor flexes, and the wet center of the caulk squishes out like toothpaste. You want a depth-to-width ratio of about 1 to 2. If your gap is 1/2 inch wide, your silicone should be about 1/4 inch deep. This is why the backer rod is not optional. It is the architectural foundation of the joint. If you are working on modern showers that wow modern designs for 2025, you know that the cleanest lines are achieved through this precise mechanical backing. Learn more about showers that wow modern designs for 2025 to see how professional transitions are executed.
How to install the repair properly
The installation process requires a surgically clean environment and a specific sequence of compression and tooling to ensure the sealant penetrates the microscopic pores of the tub and tile. Use denatured alcohol to remove all old residue and oils before applying new materials. Follow this checklist to ensure you don’t have to do the job twice.
- Remove all old grout and caulk using a multi-tool or a sharp razor.
- Vacuum the gap to remove all dust and debris.
- Wipe the surfaces with denatured alcohol or 90 percent isopropyl alcohol.
- Measure the gap and select a backer rod that is 25 percent wider than the opening.
- Press the backer rod into the gap using a blunt tool.
- Apply painter’s tape to the tub and the floor to create clean lines.
- Apply a continuous bead of 100 percent silicone.
- Tool the joint with a soapy finger or a specialized caulking tool.
- Remove the tape while the silicone is still wet.
“Movement joints in tile installations shall be kept free of all grout and mortar; they must be filled with a professional grade sealant.” – TCNA Handbook Standards
Baseboards and trim as a secondary solution
For exceptionally large gaps caused by improper tub leveling, a PVC baseboard or shoe molding can be used as a decorative cover. This must be fastened only to the floor or the tub, never both, to allow for independent movement. Sometimes the gap is so large that a silicone bead looks unsightly. In these cases, we look at chic baseboard designs that transform rooms in 2025. A small piece of moisture-proof PVC trim can hide a multitude of sins. However, you must still waterproof the gap underneath the trim. The trim is the ‘hat’ that hides the repair, but the silicone is the ‘umbrella’ that keeps the water out. Check out chic baseboard designs that transform rooms in 2025 for ideas on how to finish the look. If you need more specific ideas, look at baseboards makeover ideas to elevate your space.
Climate factors and local moisture challenges
Regional humidity levels significantly impact how much your floor and subfloor will expand or contract throughout the year. In dry climates like Phoenix, the wood subfloor might shrink, widening the gap, while in humid areas like Houston, the expansion can put immense pressure on the tub apron. If you live in an area with high seasonal variance, you must use a sealant with the highest possible movement rating. A cheap product will simply shear off the surface when the house breathes. This is also why eco-friendly tile solutions for sustainable homes in 2025 often focus on stable substrates like Schulter boards or cement backers that don’t react as violently to moisture as plywood does. You can explore eco-friendly tile solutions for sustainable homes in 2025 for better subfloor options.
Final checks for a permanent fix
Before you call the job done, perform a stress test by filling the tub halfway and checking for any separation in the new joint. The weight of the water should not cause the silicone to pull away if you have used the backer rod and silicone method correctly. If you notice the joint pulling, your subfloor might have excessive deflection that requires more than just a surface fix. In some cases, you may need to go into the crawlspace or the room below to sister the joists. But for 90 percent of homes, a properly engineered movement joint is all that stands between a beautiful bathroom and a rotten floor. If you are struggling with your bathroom layout or have more questions about showers with a style trendy ideas for small bathrooms, you can see our guide on showers with a style trendy ideas for small bathrooms or simply contact us for expert advice on your specific flooring project.