
How to Fix a Leak in a Tiled Shower Floor Without Tearing It Out
I spent three days grinding concrete on a job last month just so the floor wouldn’t click like a castanet. Most guys skip the leveling compound. They think the underlayment will hide the dip. It won’t. I saw the same laziness in a bathroom last week. A homeowner called me because their $10,000 tile job was weeping through the subfloor into the kitchen below. The installer had skipped the pre-slope, thinking the thick-set mortar would compensate for a sagging joist. It did not. The result was a stagnant pool of water sitting against the liner, eventually finding a microscopic pinhole in the corner fold. You do not always need a sledgehammer to fix these disasters, but you do need to understand the physics of water travel. Fixing a leak without a total tear out involves surgical precision and an understanding of capillary action. We are going to look at the chemistry of sealants and the structural integrity of your grout lines to save your home from the rot.
The myth of the waterproof tile surface
Fixing a shower leak without a total tear out requires identifying if the failure is in the grout, the drain assembly, or the topical sealer. While a full pan failure requires replacement, localized leaks can often be mitigated by epoxy injections, grout rejuvenation, and penetrative sealants that bridge micro-fissures. Many people believe that the ceramic or porcelain tiles on their floor are the primary water barrier. This is a dangerous misconception. Tile is merely a wear layer. The real work happens at the waterproofing membrane or the pan liner level. If your grout is cracked, water is not just sitting there. It is being pulled by gravity and surface tension into the mud bed. Once that sand-and-cement bed becomes saturated beyond its capacity to breathe through the weep holes, you have a leak. We start by checking the most common failure points: the transition where the floor meets the wall and the area surrounding the drain flange.
“A floor is only as good as the subfloor beneath it; deflection is the enemy of every joint.” – Master Flooring Axiom
The first step in any non-invasive repair is the flood test. You plug the drain and fill the base with two inches of water. Mark the water line with a wax pencil. If the level drops over twenty-four hours, your pan is compromised. If it stays, the leak is likely in the supply lines or the splashing occurring above the baseboards and wall tile. If the pan is the culprit, we look at the grout. Cementitious grout is porous. Over time, the polymers break down. You can use a moisture meter, specifically a pinless one designed for masonry, to map the saturation levels. If the readings are off the charts near the grout lines but lower in the center of the tiles, you have a topical penetration issue. You should consider grout restoration secrets for long-lasting results to address these structural weaknesses before they rot your joists.
The ghost in the expansion gap
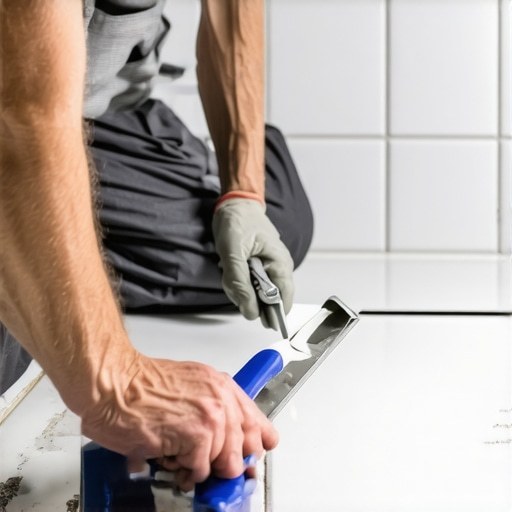
Expansion gaps in a shower are the spaces at the perimeter where the floor meets the wall which must be filled with 100 percent silicone rather than hard grout. These gaps allow the shower pan to move independently of the walls during thermal expansion and contraction cycles. When an installer runs hard grout into these corners, the grout inevitably cracks because the house moves. Even a millimeter of movement can create a fissure that acts as a vacuum for water. I have seen countless showers where the leak was not in the floor at all, but in the lack of a flexible sealant at the change of plane. If you find cracks in your corners, the fix is to scrape out the old grout using a carbide-tipped tool. You must be careful not to puncture the liner behind it. Once clean and dry, you apply a high-grade silicone. This is not the cheap stuff from the bargain bin. You need a product with a high Shore A hardness rating that still maintains elasticity. This simple fix can stop 40 percent of reported shower leaks.
[IMAGE_PLACEHOLDER_1]
Why your subfloor is lying to you
Your subfloor may appear solid while hiding a saturated core that slowly degrades the structural integrity of your tile assembly. Even if the surface looks dry, moisture vapor transmission can push upwards, weakening the bond between the thin-set and the tile, leading to hollow sounds and cracked grout. The physics of a shower floor are complex. Underneath your tile is a mortar bed. In older homes, this is a thick layer of sand and Portland cement. This bed is designed to be a “wet-bed,” meaning it can hold some moisture which then drains through weep holes into the drain assembly. However, if those weep holes are clogged with thin-set, the water has nowhere to go. It sits. It stagnates. It begins to smell like a swamp. This is where the contrarian data comes in: most people think adding more sealer is better. But if you seal the top while the bottom is wet, you trap the moisture. This leads to something called efflorescence, where minerals are pushed to the surface, leaving white, crusty deposits. You must ensure the bed is bone-dry before attempting any topical fix. Using a dehumidifier in the bathroom for seventy-two hours is a mandatory step that most impatient contractors skip.
The physics of hydrostatic pressure
Hydrostatic pressure occurs when water accumulates in the mortar bed and creates enough force to find the path of least resistance through your waterproofing. By clearing the drain weep holes and using penetrative sealers, you can alleviate this pressure and redirect the water flow into the plumbing. If the leak is occurring near the drain, the problem is often the clamping ring. The drain assembly has a top piece that screws down onto a lower piece, sandwiching the waterproof liner. If these bolts are loose, water will bypass the drain and go straight into the subfloor. You can often access these bolts by removing the drain grate. Tightening them and applying a bead of underwater-grade epoxy can solve the leak without removing a single tile. This is a surgical strike that requires a steady hand and a borescope to see what is happening inside the pipe. If you are dealing with a more modern integrated system like those seen in showers that wow modern designs for 2025, the repair might involve specialized topical membranes that bond directly to the existing tile surface.
| Sealant Type | Viscosity | Application Case | Longevity |
|---|---|---|---|
| Silicone 100% | High | Corner joints and transitions | 10+ Years |
| Epoxy Grout | Medium | High-wear floor areas | 20+ Years |
| Penetrative Sealer | Low (Water-like) | Porous stone and cement grout | 1-3 Years |
| Polyurethane | Very High | Structural cracks in concrete | 15+ Years |
The chemistry of epoxy intervention
Epoxy injection involves using a low-viscosity resin that is forced into grout cracks to rebond the tile and create an airtight, waterproof seal. This method is effective for localized leaks where the tiles are still structurally sound but the bedding has minor voids. When I talk about epoxy, I am not talking about the stuff you buy at a hardware store to fix a broken vase. We use industrial-grade resins with a specific gravity that allows them to flow into the tightest cracks. You can actually use a syringe to inject these resins into the grout lines. Once the epoxy cures, it is harder than the tile itself. It creates a monolithic surface. This is a great way to how to refresh grout without replacing it while simultaneously addressing water penetration. You must be precise. If you leave a haze on the tile, it is permanent. This technique requires a master’s touch and a deep understanding of the chemical bond between the resin and the silicate in the grout.
“Water is the universal solvent; given enough time, it will find a way through any barrier not installed with absolute precision.” – TCNA Handbook Guidance
The 1/8 inch that ruins everything
A shower floor must have a minimum slope of 1/4 inch per foot toward the drain to ensure proper drainage and prevent water from pooling against the grout lines. A deviation of as little as 1/8 inch can cause a birdbath effect that leads to chronic leaking and mold growth. If your floor was not sloped correctly from the start, water will sit in the corners. This water eventually wins the battle against your sealer. If you have a low spot, you can sometimes fix it by overlaying a new layer of tile, but that increases the weight on the joists. A better way is to use a high-build epoxy coating that can be feathered out to create the necessary pitch. It is a technical maneuver that involves calculating the mill-thickness of the coating to ensure it doesn’t create a trip hazard at the drain. You should also check the baseboards outside the shower. If they are swollen, the water is already traveling through the wall studs. You might need to look at baseboards makeover ideas to elevate your space after the leak is sealed to hide the evidence of the past moisture damage.
The Leak Detection Checklist
- Check for loose or “hollow” sounding tiles by tapping with a plastic mallet.
- Inspect the silicone bead at the floor-to-wall transition for peeling or mold.
- Use a dye test by putting food coloring into a bucket of water and pouring it specifically on suspect areas.
- Verify that the drain weep holes are clear of debris and old mortar.
- Measure the moisture levels in the adjacent room’s wall to see if the leak is lateral.
- Examine the grout for “pinholes” which indicate the grout was mixed with too much water.
The last thing you want is to ignore a small damp spot. It will buckle. It will rot. It will cost you five times as much next year. If the leak is caught early, these topical and chemical solutions can extend the life of your shower by a decade. Always finish the job by applying a high-quality penetrative sealer to the entire floor. This doesn’t make the floor waterproof, but it makes it water-resistant, giving the drainage system more time to do its job. For those looking for more sustainable options, you can explore eco-friendly tile solutions for sustainable homes in 2025 to see how modern materials are changing the game in waterproofing. Remember, a dry house is a healthy house. Do not let a 1/8 inch gap ruin your sanctuary. Treat the repair with the same respect you would a structural beam. Precision is the only thing that keeps the water in the pipes and out of your crawlspace.