
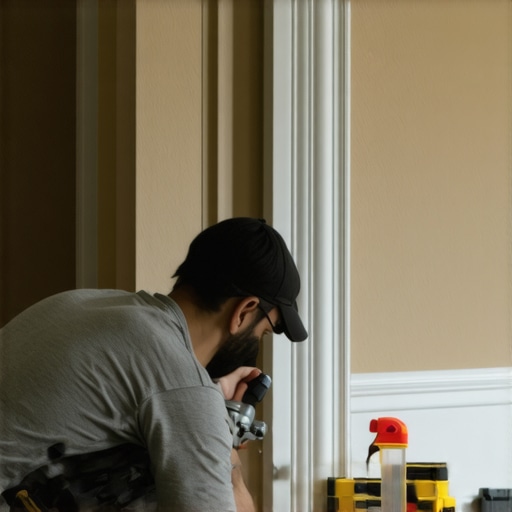
I spent three days grinding concrete on a job last month just so the floor wouldn’t click like a castanet. The homeowner thought it was the wood, but it was the slab. When the floor moves, the baseboard follows, and that is where your corner goes to die. Most guys skip the leveling compound and they think the underlayment will hide the dip. It won’t. I’ve seen $20,000 installations ruined because an installer refused to acknowledge the physics of the substrate. If your baseboard is pulling away, do not reach for the crowbar yet. You are likely dealing with a structural shift or a moisture-driven contraction that can be corrected with a precise mechanical and chemical bond. Most homeowners want the thickest underlayment, but too much cushion actually causes the locking mechanisms on LVP to snap under pressure, which in turn pulls your trim apart at the miters.
The physics of the failing miter
A loose baseboard corner is caused by hygroscopic movement in the wood fibers and structural settling of the building envelope. To fix it without removal, you must utilize high-torque fasteners like trim screws or cyanoacrylate adhesives to bridge the gap and re-establish a tight, permanent mechanical connection between the two pieces. The wood in your home acts like a lung. It breathes in moisture during the humid months and exhales it during the dry winters. This expansion and contraction happens at different rates for different materials. A piece of medium-density fiberboard (MDF) will swell differently than a piece of solid pine or oak. When the miter joint was originally cut, it was likely tight, but as the framing lumber behind the drywall dries and shrinks, the corner studs pull away from each other. This creates a vacuum behind the drywall, causing the nails to pull through the soft core of the trim. To understand why your baseboard is failing, you have to look at the baseboards makeover ideas to elevate your space that prioritize structural integrity over simple aesthetics. A floor is only a surface, but the baseboard is the transition point that manages the tension between the horizontal and vertical planes.
“A floor is only as good as the subfloor beneath it; deflection is the enemy of every joint.” – Master Flooring Axiom
Why your subfloor is lying to you
Subfloor deflection and uneven slabs are the primary reasons baseboard corners separate after installation. When a floor dips even an eighth of an inch, the downward pressure of foot traffic causes the floor to pull the baseboard downward, snapping the adhesive or nails that hold the corner miter together. The reality of modern construction is that concrete slabs are rarely flat. They have humps and valleys. If you install a floating floor or even a glue-down product over a slab with a 3/16 inch dip over 10 feet, the floor will flex. This flex creates a lever effect. Every time you walk near the wall, the floor pulls the baseboard. Eventually, the miter opens up. If you are dealing with a tile installation, this movement can also crack the grout restoration secrets for long-lasting results because grout has zero tensile strength. You cannot fix a baseboard without acknowledging what is happening beneath it. If the subfloor is moving, the trim will never stay tight. I always tell my apprentices that they aren’t just trim carpenters, they are structural forensic experts. You have to find the movement before you can stop the gap.
The 1/8 inch that ruins everything
Precision in trim work is measured in fractions of a millimeter because even a tiny gap allows air and moisture to infiltrate the wood. Fixing a loose corner requires cleaning the joint of old caulk, applying a high-strength resin, and pinning the material back into the wall studs using a 2.5 inch trim screw. Many DIYers try to just pump more caulk into a loose corner. This is a temporary fix that will fail within one season. Caulk is a filler, not a fastener. To actually fix the corner, you need to use the chemistry of modern adhesives. I prefer a two-part cyanoacrylate system. You apply the thick resin to one side of the miter and the activator spray to the other. When they touch, they create a molecular bond in seconds that is stronger than the wood itself. But you can’t just glue it. You have to anchor it. Use a thin-shank trim screw. Unlike a nail, a screw has threads that grip the wooden stud behind the drywall. You sink the head below the surface, and that corner will never move again. This is especially vital when you are dealing with chic baseboard designs that transform rooms in 2025 where the profiles are intricate and difficult to align.
Tool and Material Comparison for Baseboard Repair
| Method | Required Tool | Durability Rating | Best Application |
|---|---|---|---|
| Pneumatic Pinning | 23-Gauge Pinner | Moderate | Light MDF trim |
| Mechanical Fastening | #7 Trim Screws | Maximum | Solid wood and warped studs |
| Chemical Bonding | Two-Part CA Glue | High | Tightening open miters |
| Surface Filling | Acrylic Caulk | Low | Cosmetic finishing only |
The chemistry of the perfect bond
The secret to a permanent baseboard fix lies in the shear strength of the adhesive used to bridge the gap between the mitered faces. Polyurethane adhesives and specialized wood glues provide the flexibility needed to withstand the minor vibrations and shifts that occur in a residential home. When you are working in a bathroom or near tile cleaning tips for a sparkling bathroom in 2025 environments, you have to consider the humidity. A bathroom is a torture chamber for wood. The steam from the shower causes the baseboards to expand rapidly. If the corner isn’t bonded chemically, the miter will blow open. I’ve seen guys try to use hot glue. Don’t do that. Hot glue becomes brittle and will snap. You need something with a bit of elongation. The bond must be able to stretch slightly without breaking. This is why we use a combination of mechanical force and chemical bonding. You screw the board to the wall to handle the heavy lifting, and you glue the miter to handle the fine details. If you have tile floors, make sure you aren’t pinning the baseboard directly into the tile or the grout lines. You want to hover just a hair above it to allow for the floor to breathe.
“Wood moves. Anyone who tells you otherwise is trying to sell you a plastic floor.” – NWFA Technical Manual
Step by step guide to the no-teardown fix
To fix a loose baseboard corner without removal, you must systematically clean the joint, apply an adhesive, and mechanically compress the boards back into their original position against the wall framing. This process avoids the risk of damaging the drywall or the paint on the rest of the board. Follow these steps for a professional result.
- Use a utility knife to carefully scrape out old, dried caulk from the inside of the gap.
- Check for a stud using a high-density sensor. You need wood to bite into, not just hollow drywall.
- Apply a thin layer of specialized wood glue or CA glue into the open miter.
- Use a trim screw or a 15-gauge finish nailer at a 45-degree angle to pull the corner tight.
- If using a screw, countersink the head and fill with a matching wood putty or spackle.
- Wipe away excess adhesive immediately with a damp cloth to prevent staining.
- Re-caulk the top edge with a high-quality siliconized acrylic.
Regional climate impacts on trim stability
Regional humidity levels dictate how much your baseboards will move throughout the year. In high-humidity areas like Houston or Florida, wood trim will swell significantly, meaning you must leave a slightly larger expansion gap at the bottom that is covered by the baseboard. In dry climates like Phoenix, the wood will shrink so much that your miters will almost certainly open up if they aren’t glued properly during installation. This is why acclimation is the most ignored step in flooring. You can’t take wood from a 90 percent humidity warehouse, put it in a 30 percent humidity house, and expect it to stay the same size. It will shrink. It will buckle. If you are working in a basement where moisture is high, consider using PVC or composite baseboards that don’t react to vapor. This is a common strategy when designing showers with a style trendy ideas for small bathrooms where water is always present. The baseboard needs to be as resilient as the floor itself. If the corner is loose because of water damage, you must address the source of the leak before attempting a repair, especially near showers or grout lines that may have failed. For more information on maintaining your space, you can check our privacy policy or reach out via our contact us page.