
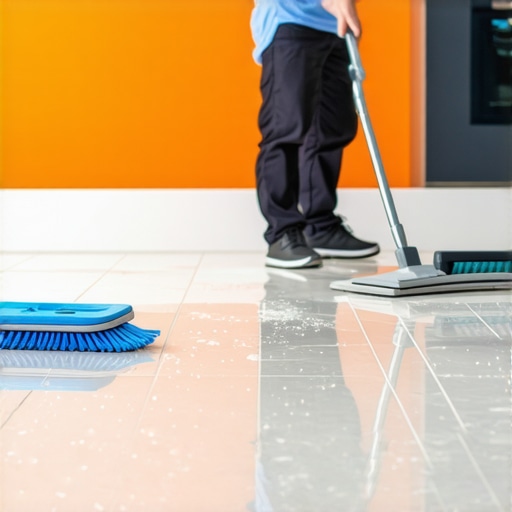
I spent three days grinding concrete on a job last month just so the floor wouldn’t click like a castanet, but the real nightmare started after the grout dried. The homeowners thought they could just wipe it down with a damp rag. They were wrong. Every time they stepped on that porcelain, it sounded like they were walking on a beach. That fine, white silica dust is an abrasive. If you do not remove it using the right mechanical and chemical sequence, you are essentially sandpapering your brand new investment into oblivion. I have seen fifteen thousand dollar installations ruined in a week because a cleaning crew used the wrong pH solution or a mop that just pushed the grit deeper into the micro-pores of the stone.
The microscopic reality of construction debris
Renovation dust consists of abrasive silica, gypsum, and cement particles that lodge into the microscopic pores of tile and grout. Removing this grit requires a three stage process of dry extraction, chemical neutralization, and mechanical suspension to prevent permanent scratching or dulling of the surface finish during the final cleanup phase. Construction debris is not like the dust on your bookshelf. It is heavy, jagged, and chemically active. When you look at a porcelain tile under a microscope, it is not actually smooth. It has peaks and valleys. When cementitious grout dries, it leaves behind a polymer-modified residue that acts like a magnet for airborne drywall dust. This creates a concrete-like film that bonds to the surface. If you try to scrub this off without a surfactant, you will create micro-scratches that will catch dirt for the rest of the floor’s life. This is why professional installers obsess over the first wash.
Why a standard mop is your worst enemy
Standard cotton or sponge mops are designed for surface dirt but fail during post-renovation cleanup because they lack the fiber density to trap fine silica particles. These tools typically redistribute grout haze across the surface and push abrasive grit into the grout joints, which can lead to structural weakening of the bond over time. You need a high-denier microfiber or a specialized industrial vacuum with a HEPA filter that can handle 0.3 microns. A regular shop-vac will often just blow the finest, most dangerous particles back into the room through the exhaust. This dust settles on everything. It gets into the baseboards and stays there until the first humid day when it turns into a paste. I tell my clients that the first five cleanings after a renovation are the only ones that matter for the long-term health of the floor. You are not just cleaning. You are finishing the installation.
“A floor is only as good as the subfloor beneath it; deflection is the enemy of every joint.” – Master Flooring Axiom
The chemistry of grout haze and calcium silicate
Grout haze is a byproduct of the hydration process where cement particles and polymers crystalize on the surface of the tile as the water evaporates. Neutralizing this bond requires a mild acidic solution for cement-based grouts or a specialized alkaline emulsifier for epoxy-based systems to break the molecular attachment without damaging the grout joint itself. Most people grab a bucket of water and some vinegar. That is a mistake for certain stones like marble or travertine. The acidity of vinegar will etch the calcite in the stone, leaving dull spots that no amount of cleaning can fix. You need to understand the Janka scale and the mineral composition of your floor. If you are dealing with porcelain, you have more leeway, but the grout itself is still susceptible to acid erosion. We use buffered acids that specifically target the calcium carbonate in the haze while leaving the pigment of the grout untouched. It is a delicate balance of chemistry that ensures grout restoration secrets for long-lasting results are maintained from day one.
Managing the vertical transition at the baseboards
The intersection where the floor meets the wall is the primary collection point for construction grit because gravity and airflow patterns deposit the heaviest particles in the expansion gaps. Cleaning these areas requires a detail brush and a vacuum with a crevice tool to prevent the grit from migrating back onto the main floor during daily traffic. When you are looking for chic baseboard designs that transform rooms in 2025, you have to consider the cleaning gap. If the baseboard is installed too tight to the tile without a shoe molding, you will never get the dust out. I always recommend a 1/8 inch gap filled with a color-matched 100 percent silicone sealant. This prevents the abrasive dust from sitting in a dark corner where it can grind away at the tile edges. A floor is a moving system. It expands and contracts. If there is grit in that gap, it acts like a file every time the house shifts.
Restoring the sanctuary of modern showers
Shower installations represent the highest risk for post-renovation grit because the vertical surfaces allow water-borne silt to settle into the lower grout lines and the drain assembly. Effective cleanup involves a top-down saturation method using deionized water to prevent mineral spotting while the grout finishes its 28-day cure cycle. If you have invested in showers that wow modern designs for 2025, do not ruin them by using a harsh scrubber on the first day. The grout is still technically curing. It is soft. If you go in there with a stiff nylon brush to get the renovation dust off, you will pull the pigment right out of the joint. You want to use a low-pressure rinse and a soft microfiber cloth. For those looking at showers with a style trendy ideas for small bathrooms, remember that smaller tiles mean more grout. More grout means more haze. It is a mathematical reality that requires more patience during the cleanup phase.
| Material Type | Recommended pH | Grit Sensitivity | Acclimation Time |
|---|---|---|---|
| Porcelain | 7.0 to 8.5 | Low | 24 Hours |
| Marble | 7.0 (Strict) | High | 72 Hours |
| Travertine | 7.0 (Strict) | High | 72 Hours |
| Slate | 6.0 to 7.0 | Medium | 48 Hours |
| Ceramic | 7.0 to 8.0 | Medium | 24 Hours |
A protocol for mechanical extraction
Mechanical extraction involves the use of specialized tools to lift particles off the surface rather than dragging them across it. Using a dual-bucket system ensures that the grit is deposited in a separate reservoir, preventing the recirculation of abrasives onto the clean tile surface. The first bucket contains your cleaning solution. The second bucket is for rinsing your tool. If you only use one bucket, you are just washing your floor with liquid sandpaper after the first three square feet. This is the most common mistake I see. People get lazy. They see the water turn gray and keep going. That gray water is full of silica. You might as well be using a belt sander. For the best results, follow tile cleaning tips for a sparkling bathroom in 2025 which emphasize the use of distilled water for the final pass to avoid streaks.
- Use a HEPA-certified vacuum for the initial dry pass.
- Mop with a dual-bucket system using pH-neutral cleaner.
- Change the rinse water every 100 square feet.
- Use a white nylon pad for stubborn grout haze spots.
- Dry the floor immediately with a clean microfiber towel to prevent spotting.
- Apply a high-quality sealer only after the grout has cured for the manufacturer-recommended time.
The ghost in the expansion gap
Expansion gaps are required around the perimeter of every tile installation to accommodate structural movement, but they often become a graveyard for renovation debris. If these gaps are not cleared before the final caulking or baseboard installation, the debris will eventually work its way out and scratch the floor. I have been on jobs where the tile was perfect, but the owner complained about a crunching sound. We pulled the baseboards and found a pound of drywall mud and tile spacers jammed into the gap. That debris was preventing the floor from moving. The result was a tented tile in the middle of the room. A floor is an engineering project. Every piece needs room to breathe. If you are looking for eco-friendly tile solutions for sustainable homes in 2025, ensure your installer is using low-VOC silicones in those gaps instead of hard grout. Hard grout in an expansion gap is a recipe for a cracked floor.
“Grout is not a glue; it is a filler. The strength of the installation lies in the thin-set coverage and the cleanliness of the substrate.” – TCNA Handbook Methodology
Why your subfloor is lying to you
Subfloor moisture can migrate upward through the tile joints during the weeks following a renovation, carrying dissolved minerals that create a white, powdery substance known as efflorescence. This is often mistaken for renovation dust but requires a completely different chemical approach to resolve. If you clean your floor and the white grit comes back the next day, you have a moisture problem. It is not dust. It is salt. The water in the concrete slab is evaporating and bringing minerals to the surface. You cannot just wash this away with water because water is what causes it. You need to identify the source of the moisture. If you need to fix this, look into how to refresh grout without replacing it to see if a color-sealant can block the moisture path. I always use a moisture meter before I lay a single tile. If the slab is over 4 percent moisture, we don’t start. It is that simple. Most guys skip this step. They think the underlayment will hide the dip or the dampness. It won’t. The 1/8 inch that ruins everything is usually the height of a bubble in a level that someone decided to ignore.