
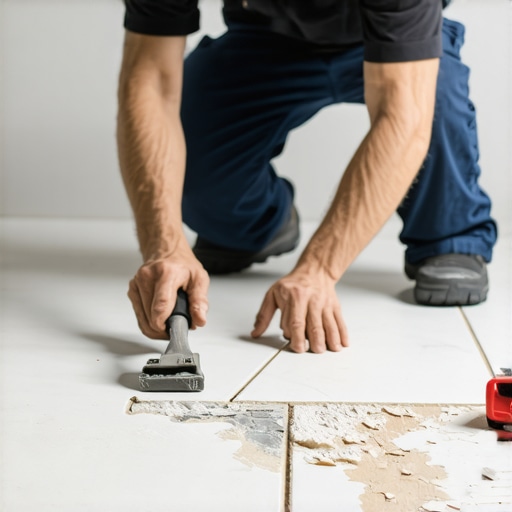
The hollow sound of a failing installation
Fixing a loose floor tile without a full teardown requires identifying the specific void beneath the ceramic or stone and filling it with a low-viscosity structural adhesive through the grout lines. This surgical approach preserves the surrounding integrity while restoring the mechanical bond to the substrate. I spent three days grinding concrete on a job last month just so the floor wouldn’t click like a castanet because most guys skip the leveling compound. They think the underlayment will hide the dip. It won’t. I have seen thousands of square feet of expensive porcelain ruined because an installer trusted a 1/4 inch notch trowel to bridge a 1/2 inch valley in the slab. When you walk across a floor and hear that distinctive hollow thud, you are hearing the death rattle of your thinset. It means the bond has sheared. The physics of the situation are simple. If there is air where there should be stone and cement, the tile will eventually crack under the load of human traffic.
The mechanical bond between a tile and its subfloor is a crystalline structure formed as the thinset hydrates. If that structure is disturbed before it reaches full strength, or if the subfloor deflects beyond the L/360 industry standard, the crystals snap. You are left with a tile that looks fine but moves when stepped on. This movement is the enemy. It grinds the remaining mortar into dust, creating an even larger void. Most homeowners assume the only fix is to break the tile and start over, but that is a messy, risky gamble. You might break three adjacent tiles trying to pry up one. Instead, we use the science of capillary action and high-strength resins to perform a structural injection. It is the flooring equivalent of a root canal.
Why your subfloor is lying to you
Subfloor deflection and moisture vapor transmission are the primary reasons tiles lose their bond to the underlying surface over time. Even a floor that feels solid to the touch can have enough microscopic flex to break the brittle bond of traditional cementitious mortars. Deflection is the technical term for how much a floor bends under weight. If your joists are spaced too far apart or your plywood is too thin, the tile has no choice but to pop. Many people do not realize that wood and tile have different expansion rates. Wood grows with humidity. Tile does not. Without a proper uncoupling membrane, the wood pulls away from the tile, leaving it floating in space. This is why checking the moisture levels in the crawlspace is just as important as the tile work itself.
“A floor is only as good as the subfloor beneath it; deflection is the enemy of every joint.” – Master Flooring Axiom
Before you attempt a repair, you must determine if the issue is localized or systemic. If every tile in the room sounds hollow, you have a structural failure that no amount of glue will fix. But if it is just one or two units near a high-traffic transition or a heavy appliance, an injection repair is the perfect solution. You should also look at the condition of your grout restoration secrets. If the grout is crumbling, it is a sign that the tile is moving too much. Fixing the grout without fixing the loose tile is like painting over a crack in a foundation. It is a temporary mask for a structural problem. You need to stabilize the unit first, then worry about the aesthetics of the joint.
The surgical approach to loose ceramics
The injection method involves drilling small holes into the grout lines and pumping a specialized liquid adhesive into the void beneath the tile. This technique works best with water-thin adhesives that can travel through the narrow channels under the tile to find the empty pockets where the thinset has failed. You start by identifying the exact perimeter of the hollow sound by tapping the tile with a plastic mallet or a heavy coin. Mark the hollow spots with blue painter’s tape so you do not lose track of the target area. Once marked, you will use a masonry bit to drill into the grout, not the tile itself. This is a high-precision task. One slip and you have a chipped tile that cannot be ignored.
After drilling your entry points, you must clear the dust. A vacuum with a HEPA filter is your best friend here. If there is dust in the void, the adhesive will bond to the dust instead of the tile and the slab. It creates a weak slurry that will fail within weeks. I always use a can of compressed air to blow out the holes after vacuuming. You want that cavity as clean as possible. When the adhesive is injected, it spreads out like a puddle. You will know you have filled the void when the liquid starts to back up out of the holes or appears in an adjacent drill site. It is a messy process, so keep damp rags nearby to wipe up any overflow before it cures on the face of the porcelain.
Adhesive chemistry and the micro gap
Modern floor repair adhesives are often formulated from high-strength acrylics or epoxies that remain flexible after curing to accommodate minor floor movements. Unlike traditional thinset, which is rigid and brittle, these resins can withstand the vibration and slight shifting of a residential home. The chemical bond of a modified thinset is strong, but once it breaks, it cannot heal itself. The injection resin acts as a bridge, filling the micro-gap and creating a new structural connection that is often stronger than the original installation. This is particularly important in areas like showers with modern designs, where water ingress can further degrade a failing bond.
The viscosity of the adhesive is the most important factor. If the glue is too thick, it will not flow. It will just sit under the hole you drilled, creating a single pillar of support while the rest of the tile remains unsupported. If it is too thin, it might run off into the subfloor if there are larger cracks in the slab. You are looking for a consistency similar to heavy cream. This allows gravity and capillary action to pull the material into the furthest reaches of the hollow spot. Once the injection is complete, you must weigh the tile down. I use heavy buckets of water or stacks of spare tiles. This ensures the tile is pressed firmly into the adhesive and prevents it from sitting higher than the surrounding floor once the glue dries.
Comparing repair methods for structural integrity
Choosing between a full replacement and a targeted injection depends on the number of loose tiles and the availability of matching materials. In many cases, homeowners do not have extra tiles from the original dye lot, making a replacement nearly impossible to hide. A replacement involves the risky removal of the tile and the painstaking task of scraping old mortar off the subfloor without damaging the waterproof membrane or the heating cables that might be buried underneath. For many, the risk to the underlying systems is too high.
| Feature | Injection Repair | Full Tile Replacement |
|---|---|---|
| Time Required | 2-4 Hours | 24-48 Hours |
| Risk of Damage | Very Low | High (Adjacent tiles) |
| Cost Factor | Minimal | Moderate to High |
| Dust Production | Negligible | Significant |
| Structural Bond | Resin-based (Flexible) | Cementitious (Rigid) |
As shown in the table, the injection method is superior for isolated failures. It avoids the massive dust clouds created by grinding out old thinset. If you are dealing with a historic home or a custom installation, preserving the original tile is the priority. However, if the subfloor is rotten or the tile itself is cracked, you have no choice but to tear it out. If you do go the replacement route, make sure to look into eco-friendly tile solutions for any new materials you bring into the home. Sustainability in flooring is about longevity, and a floor that doesn’t need to be replaced every decade is the most sustainable option of all.
The 1/8 inch that ruins everything
Small errors in subfloor preparation or expansion gaps often manifest as loose tiles years after the initial installation. Every floor needs room to breathe. If the tile is installed tight against the baseboards with no perimeter expansion gap, the entire floor acts as a single rigid sheet. When the house settles or the temperature shifts, that sheet has nowhere to go but up. This creates tension that eventually snaps the bond of the weakest tiles. It usually happens in the middle of a large room where the cumulative expansion is at its peak. I always leave a 1/4 inch gap at the walls, which is then covered by the chic baseboard designs chosen for the room.
The precision of the 1/8 inch rule also applies to the subfloor flatness. The TCNA specifies that for large format tiles, the subfloor should not vary by more than 1/8 inch over ten feet. If your floor has a dip and you try to fill it with extra thinset, you are creating a recipe for failure. Thinset is meant to be a thin bond, not a structural filler. As it dries, it shrinks. The thicker the layer, the more it shrinks, which can actually pull the tile away from the slab during the curing process. This is the irony of flooring. Sometimes trying to fix a level issue with more product actually causes the very hollow sound you were trying to avoid.
Grout restoration as a structural seal
Once the tile is stabilized and the adhesive has cured for at least 24 hours, the final step is to restore the grout to seal the injection sites and protect the floor from moisture. Grout is more than just a decorative filler. It acts as a buffer between tiles, distributing the lateral pressure across the entire surface. When you drill into it for a repair, you create a path for water to reach the subfloor. If you are working in a bathroom or a kitchen, this is a disaster waiting to happen. You must use a high-quality grout that matches the existing color and texture to ensure the repair is invisible. You can find more details on this in our guide on long-lasting grout restoration.
Check the consistency of your grout. It should feel like peanut butter. Push it deep into the holes you drilled, making sure there are no air pockets left behind. After a few minutes, wipe the surface with a lightly damp sponge. Do not use too much water, or you will wash the pigment out of the grout, leaving the repair spots lighter than the rest of the floor. This is a common mistake that ruins a perfectly good structural repair. Once the grout is dry, applying a sealer can provide an extra layer of protection, especially in high-traffic areas where spills are frequent. Properly sealed grout will keep your floor looking new for years and prevent the moisture issues that lead to loose tiles in the first place.
A checklist for invisible tile repairs
Follow these steps to ensure your floor stays solid for another twenty years without a single hammer swing. Accuracy is the difference between a pro job and a hack job.
- Identify the hollow area by tapping with a plastic mallet or coin.
- Mark the boundaries with painter’s tape to visualize the void.
- Select a masonry drill bit slightly smaller than the grout joint width.
- Drill at least two holes per tile to allow air to escape as adhesive enters.
- Vacuum and blow out all dust from the injection points.
- Inject the low-viscosity adhesive slowly until it resists or overflows.
- Clean excess adhesive immediately with a damp cloth or mineral spirits.
- Weight the tile with at least 40 pounds of distributed load for 24 hours.
- Refill the drill holes with matching grout once the adhesive is fully cured.
- Seal the grout to prevent future moisture penetration into the repair zone.
While most people want the thickest underlayment, too much cushion actually causes the locking mechanisms on modern floors to snap under pressure, and the same logic applies to tile. You want a firm, unyielding base. Too much flex is the enemy. This contrarian truth is why we spend so much time on the slab before the first tile ever touches the floor. If you follow these steps, you will have a floor that doesn’t just look good but performs like a structural component of the house.
“Standard ceramic tile installations over wood subfloors require two layers of structural wood panels to ensure the assembly does not exceed deflection limits.” – TCNA Handbook for Ceramic Tile Installation
The science of the bond is non-negotiable. Whether you are dealing with a kitchen floor or trendy small bathroom showers, the physics remain the same. Moisture, movement, and poor preparation are the three horsemen of floor failure. By using the injection method, you are effectively reversing the damage of poor preparation. It is a smart, clean, and effective way to extend the life of your flooring investment. Just remember that the goal is not just to stop the noise, but to restore the structural unity of the surface. A floor that moves is a floor that is failing. A floor that is still is a floor that will last a lifetime.