I spent three days grinding concrete on a job last month just so the floor wouldn’t click like a castanet. Most guys skip the leveling compound. They think the underlayment will hide the dip. It won’t. I have seen it a thousand times in the last twenty five years. You step into a shower and hear that sickening crunch or feel a slight shift under your heel. It is the sound of a failure that started months ago. Most homeowners panic and think they need a full tear out of their showers that wow, but if the waterproofing membrane is still intact, you can perform a surgical repair. This is not about being cheap. It is about understanding the structural engineering of a wet area and using chemistry to fix a physical bond failure.
The physics of the hollow click
A hollow sound indicates a mechanical debonding of the thin-set adhesive from either the tile backer or the tile itself. This void, known in the trade as a drummy tile, creates a pocket where hydrostatic pressure and capillary action allow water to sit. Over time, this stagnant water breaks down the polymer chains in modified thin-set, turning a small wiggle into a structural collapse. When you tap your tiles with a plastic mallet, you are listening for the resonant frequency of a solid mass. A high pitch means a solid bond. A low thud means the air gap has already won. The movement is usually caused by deflection. If the joists under your shower are bouncing even a fraction of an inch, the rigid grout lines will snap. Once the grout is gone, water enters. Once water enters, the bond is toast. You can learn more about managing these surfaces in my guide on grout restoration secrets for long lasting results.
“A floor is only as good as the subfloor beneath it; deflection is the enemy of every joint.” – Master Flooring Axiom
Why your shower pan is failing
The primary cause of loose shower tiles is poor thin-set coverage or a lack of proper back-buttering during the initial installation. TCNA standards require ninety five percent coverage in wet areas, but most builders barely hit seventy percent. This leaves microscopic air channels where moisture accumulates. In humid climates, this moisture never evaporates. It stays trapped under the tile, slowly dissolving the calcium carbonate in the grout and the silicates in the adhesive. If you live in a high humidity area, your shower is under constant attack from vapor pressure. The adhesive bond is a chemical lock. If the installer did not use a modified thin-set with high polymer content, the bond is brittle. Brittle things break under the weight of a person showering. This is why we see so many failures in showers with a style that prioritizes looks over the structural integrity of the mud bed.
The surgical injection method
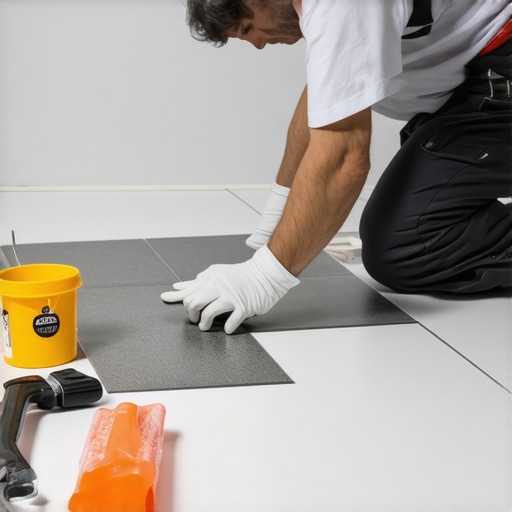
Fixing a loose tile without removal requires the injection of a low viscosity structural epoxy or a specialized tile repair resin. This technique involves drilling small holes into the grout joints around the affected tile and pumping in a high strength adhesive that flows into the voids. You are essentially rebuilding the bedding layer from the inside out. You must use a diamond tipped masonry bit and a slow speed drill. If you go too fast, the heat will crack the porcelain. Once the holes are drilled, you use a HEPA vacuum to suck out any dust or dried thin-set particles from the cavity. Then, you inject the resin until it starts to bleed out of the adjacent holes. This ensures the entire void is filled. After the resin cures, which usually takes twenty four hours, you can use techniques for how to refresh grout without replacing it to seal the holes and make the repair invisible.
| Material | Bond Strength (PSI) | Cure Time | Viscosity |
|---|---|---|---|
| Modified Thin-set | 250-400 | 24 Hours | High (Thick) |
| Injectable Epoxy | 1200+ | 12 Hours | Low (Watery) |
| Acrylic Resin | 300 | 6-8 Hours | Medium |
The microscopic reality of adhesive chemistry
The bond between a tile and the substrate happens at a molecular level where the cementitious crystals grow into the pores of the tile. If the tile was not cleaned of its manufacturing dust before installation, those crystals grew into dust, not tile. When we inject a structural resin, we are using a material with a much smaller molecular size than cement. This allows it to penetrate the capillary pores of the substrate. This is particularly vital in showers where the moisture vapor transmission rate is high. A standard repair with more thin-set will fail because thin-set cannot bond to dried thin-set. Epoxy can. It creates a covalent bond that is often stronger than the original tile.
Steps for a successful surgical repair
- Identify the hollow tiles using a sounding tool or a heavy coin.
- Mark the grout lines with painter’s tape to prevent chipping.
- Drill three to four injection ports at the corners of the loose tile.
- Vacuum the ports thoroughly to remove debris and moisture.
- Inject the low viscosity resin until the void is completely saturated.
- Weight the tile down with a heavy, flat object to ensure a level set.
- Clean the excess resin immediately with denatured alcohol.
- Regrout the holes after the resin has fully cured.
“Coverage of the bonding material shall be 95 percent or greater for natural stone tiles and 95 percent for all tiles in wet areas.” – TCNA Handbook for Ceramic, Glass, and Stone Tile Installation
The ghost in the expansion gap
Many tiles come loose because the installer failed to leave a movement joint at the perimeter of the shower floor. Every structure moves. Wood expands with humidity. Concrete settles. If your tile is butt-jointed against the wall with grout instead of a flexible sealant, there is nowhere for that energy to go. The floor buckles. This is why I always check the chic baseboard designs and the transition to the wall. You need a 1/8 inch gap filled with 100% silicone. If you don’t have this, the pressure will eventually pop your tiles off the floor again, regardless of how much epoxy you inject. It is a game of physics. You cannot stop the house from moving, so you must give the floor room to breathe.
Maintenance after the repair
Once the tile is stable, you must ensure that the rest of the floor is protected from moisture intrusion. This means regular cleaning and sealing. I recommend checking out tile cleaning tips for a sparkling bathroom in 2025 to keep the surface pristine. If water gets back under the tile through a different cracked grout line, the hydrostatic pressure will eventually find a new weak point. A repaired floor is only as strong as its weakest seal. Keep the grout lines intact and the silicone fresh at the corners. If you are unsure about the state of your shower, it is always better to contact us for a professional evaluation before a small loose tile becomes a rotted subfloor catastrophe.