
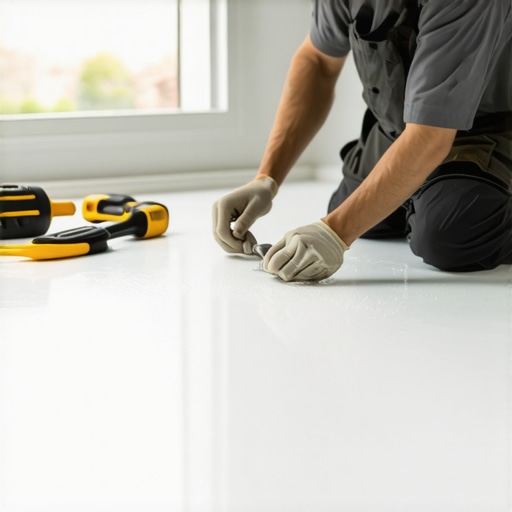
Most guys skip the leveling compound. They think the underlayment will hide the dip. It won’t. I spent three days grinding concrete on a job last month just so the floor wouldn’t click like a castanet. That same obsession with the foundation applies to your bathroom. A scratched shower base is rarely just a surface issue. It is often the result of structural flexing or abrasive grit that has compromised the polymer integrity of the pan. If you see a scratch, you are looking at a valley in a mountain range of acrylic or fiberglass. Fixing it requires more than a quick wipe. You need to understand the molecular behavior of the material under heat and friction. I have seen thousands of these pans in my twenty five years. Most people treat them like plastic toys, but they are engineered surfaces that require mechanical precision to restore.
The anatomy of an acrylic scratch
Fixing a scratched shower base involves removing the surrounding material to level the surface and then polishing it back to a factory shine. You must use progressively finer abrasives to eliminate the visibility of the gouge. This process relies on the refractive index of the material. When a scratch is deep, light hits the jagged edges and reflects at odd angles, making the damage visible. By smoothing those edges into a gentle, microscopic slope, you allow light to pass through or reflect evenly, effectively hiding the repair from the naked eye. This is not magic. It is geometry and physics applied to a thermoplastic surface. If you are dealing with showers that wow, you cannot afford a botched DIY job that leaves a dull spot in the center of the pan.
“A floor is only as good as the subfloor beneath it; deflection is the enemy of every joint.” – Master Flooring Axiom
The physics of abrasive grit selection
You do not start with a heavy hand. I start with 600 grit wet and dry sandpaper. This is the baseline for most light surface scratches. If the scratch is deep enough to catch your fingernail, you might need to drop down to 400 grit, but you must be careful. Acrylic is a soft material. It is a long chain of methyl methacrylate molecules. If you create too much heat through friction, you will melt the polymer rather than sand it. This leads to gumming. The paper gets clogged. The surface gets wavy. I always keep a spray bottle of water mixed with a single drop of dish soap. This acts as a lubricant and a coolant. It carries the slurry of removed acrylic away from the work area, preventing the grit from becoming a grinding paste that creates deeper swirls. You are looking for a uniform matte finish before you ever think about moving to the higher grits. It requires patience and a steady hand. If you rush, you leave pig tails. These are curly cues of deep scratches that only show up once you apply the final polish.
| Repair Method | Grit Range | Best Use Case | Expected Durability |
|---|---|---|---|
| Light Buffing | 3000 to 5000 | Surface scuffs only | Permanent |
| Wet Sanding | 600 to 2000 | Fingernail depth scratches | Permanent |
| Epoxy Fill | N/A | Cracks and deep gouges | 5 to 10 years |
| Full Refinishing | 220 to 1500 | Widespread dullness | Variable |
The chemical bond of polishing compounds
Once you have worked your way up through 800, 1000, 1500, and 2000 grit, the surface will look hazy but smooth. This is where the chemistry happens. A professional grade polishing compound contains aluminum oxide or cerium oxide particles suspended in a liquid carrier. These particles are incredibly fine. They do not cut the plastic. They burnish it. Use a high speed buffer, but keep it moving. If you stay in one spot for more than a second, the heat buildup will distort the pan. I have seen guys burn a hole right through a fiberglass unit because they were trying to be too thorough. You want the compound to break down as you work it. It starts as a paste and turns into a dry film. That transition is when the maximum gloss is achieved. This is the same level of detail required for tile cleaning tips that actually work. You are not just cleaning. You are restoring the surface tension of the material.
Why subfloor stability dictates pan life
A shower base that is not set in a mortar bed will flex every time you step on it, leading to stress fractures. These fractures look like scratches but they are actually structural failures of the gel coat. If you fix the scratch without fixing the flex, the scratch will return. I always tell my clients that the pan is only the skin. The mortar bed is the bone. When I install a pan, I mix a dry pack of sand and cement. I pile it up so the pan has to be squeezed down into it. This ensures 100 percent contact. If there is a void, the acrylic will bend. Bending leads to tension. Tension leads to cracks. You can sand until your arms fall off, but if that pan is moving, you are wasting your time. You should also check how the base interacts with the wall. If the baseboards makeover ideas you implemented do not account for moisture at the floor to wall transition, you are inviting rot into your subfloor. Rot softens the wood. Soft wood allows the pan to sink. It is a cycle of failure that starts with a simple scratch.
- Assess the scratch depth with a 10x jeweler loupe.
- Clean the area with denatured alcohol to remove all waxes.
- Wet sand in a circular motion starting with 600 grit.
- Progress to 1000, 1500, and 2000 grit with constant lubrication.
- Apply a high quality automotive grade polishing compound.
- Seal the surrounding grout to prevent water intrusion.
The ghost in the expansion gap
Every floor moves. The shower base is no different. It expands and contracts with the temperature of the water. If you have tiled right up to the base without a proper expansion gap filled with 100 percent silicone, the tile will put pressure on the acrylic. This pressure can cause the surface to flake or scratch at the edges. I have seen beautiful installations ruined because someone used hard grout instead of caulk at the change of plane. Hard grout does not move. It is brittle. When the pan expands, the grout acts like a chisel. It will chip the gel coat. It will create scratches that look like impact damage. You need a soft joint. This is a fundamental rule of the TCNA. You must respect the movement of materials. If you ignore the physics of expansion, your repairs will fail within a single season of use.
The 1/8 inch that ruins everything
Precision in flooring is measured in sixteenths of an inch, and shower pans are no exception to this rule. If your subfloor is out of level by even an eighth of an inch over the span of the pan, the water will not drain correctly and the weight distribution will be uneven. This uneven weight is what causes the micro-scratches that eventually turn into dull spots. Water sits in the low spots. Minerals in the water, like calcium and magnesium, precipitate out as the water evaporates. These minerals are harder than the acrylic. When you step on them or wipe them with a sponge, you are essentially rubbing sandpaper into your floor. Leveling the subfloor is the only way to prevent this. I spend more time with my level and my grinder than I do with the actual flooring. It is the invisible work that makes the visible work last. While most people want the thickest underlayment or the flashiest fixtures, too much cushion or an unlevel base actually causes the structural mechanisms of the unit to fail under pressure. It is a hard truth that many homeowners do not want to hear. They want a quick fix. There are no quick fixes in structural engineering.