
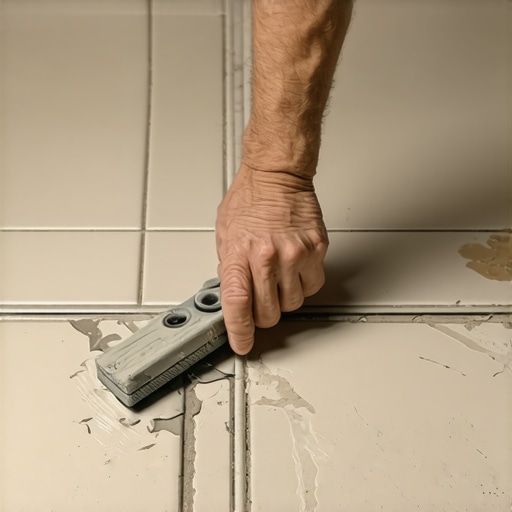
The mechanical failure of an overfilled joint
To fix grout that is too high in the tile joints, you must mechanically remove the excess material using a grout saw, a multi-tool with a diamond blade, or a carbide-tipped scraper until the grout sits just below the tile shoulder. This process requires surgical precision to avoid chipping the glazed edges of the surrounding tiles.
I spent three days grinding concrete on a job last month just so the floor wouldn’t click like a castanet. Most guys skip the leveling compound. They think the underlayment will hide the dip. It won’t. I have spent twenty five years on my knees, smelling like WD-40 and oak dust, fixing the messes left behind by installers who think a sponge is a magic wand. When grout is left too high, it is not just an eyesore; it is a structural liability. High grout creates a lip that catches mop fibers, skin cells, and microscopic debris. Over time, the mechanical pressure of foot traffic hitting that raised ridge causes the grout to crack at the microscopic level, leading to total joint failure. This is why understanding the physics of the subfloor and the chemistry of the bond is the only way to ensure a floor lasts half a century.
Why your installer left a mess
Installers leave grout too high because they fail to follow the proper hydration and cleanup timelines required by Portland cement based materials. If the grout is not struck with a damp sponge at the precise moment of initial set, the polymers begin to lock the material in place above the tile shoulder.
The chemistry of grout is a volatile dance of calcium silicate hydrate gel and aggregate suspension. When you mix a bag of modified thin-set or grout, you are initiating a series of exothermic reactions. If the water-to-powder ratio is off by even a few percentage points, the slump of the material changes. A lazy installer will leave the grout flush with the tile surface to save time on the second and third wash. This is a violation of industry standards. The grout should always be slightly recessed, sitting at the bottom of the tile’s chamfer or beveled edge. When it sits high, it creates a convex surface that is prone to crumbling. If you are dealing with moisture in showers, high grout acts as a dam, preventing water from reaching the weep holes or the drain properly. You can find more about managing these spaces in our guide on showers with a style trendy ideas for small bathrooms.
“A floor is only as good as the subfloor beneath it; deflection is the enemy of every joint.” – Master Flooring Axiom
The physics of the grout shoulder
The tile shoulder is the curved or angled edge where the face of the tile meets the vertical side of the joint. Grout must reside below this point to protect the edge from impact and to allow for the natural expansion and contraction of the tile assembly under thermal loads.
Think about the crystalline structure of the cured grout. It is a rigid, brittle matrix. Tile, especially porcelain, has a very different coefficient of thermal expansion than the cementitious grout. If the grout is piled high over the shoulder, the lateral pressure from the tile expanding in the summer heat will crush the top layer of the grout. This creates a fine powder that you will find yourself sweeping up every morning. This is not just a cleaning issue. It is a sign that your floor is eating itself. To prevent this, the joint must be excavated. You cannot simply wipe it with a wet rag once it has cured. You are now in the realm of mechanical abrasion. For those looking to maintain their surfaces after the fix, following tile cleaning tips for a sparkling bathroom in 2025 is essential for long term durability.
Tools for the surgical removal of excess material
Effective tools for lowering high grout include the oscillating multi-tool with a diamond grit blade, the manual carbide-tipped grout rake, and the precision Dremel attachment. Each tool offers a different level of control and risk, with manual tools being safest for beginners and power tools reserved for seasoned professionals.
Using an oscillating tool is like performing heart surgery with a chainsaw if you do not have a steady hand. The vibration frequency must be tuned to the density of the grout. If the grout is a soft, non-sanded variety used in narrow joints, a manual rake is usually sufficient. However, if you are dealing with a heavily sanded grout in a half-inch joint, you need the mechanical advantage of a motor. The diamond grit on the blade is designed to chew through the silica sand and the Portland cement matrix without grabbing the tile, provided you keep the blade perfectly vertical. If the blade tilts, you will scar the porcelain, and there is no fixing a scarred tile. You also need to consider the dust. Crystalline silica is a respiratory hazard. You should always use a vacuum with a HEPA filter right at the source of the cut. For those who want to avoid the mess of a full replacement, learning how to refresh grout without replacing it can save you thousands in labor costs.
The chemical bond of modified thin-set
Modified thin-set and grout contain latex or acrylic polymers that increase the tensile strength and decrease the porosity of the final product. These polymers make the grout significantly harder to remove once it has fully cross-linked, necessitating the use of diamond-abrasives for any height adjustments.
When you look at grout under a microscope, you see a forest of interlocking crystals. The polymers fill the voids between these crystals, creating a hydrophobic barrier. This is great for keeping your subfloor dry, but it is a nightmare when the grout is too high. The bond is so strong that the grout becomes a monolithic part of the tile edge. If you try to chip it out with a hammer and chisel, you will take the corner of the tile with it. You must use friction to turn the solid grout back into dust. This is why I always tell homeowners that the prep work is where the money is. If the subfloor is not level, the tile will lippage. If the tile has lippage, the installer will often try to hide it by overfilling the grout joints. It is a cascade of bad decisions that leads to a ruined floor. Keeping the grout at the right level is part of the grout restoration secrets for long lasting results that most contractors will not tell you.
Comparing grout removal methods
| Method | Control Level | Risk of Tile Damage | Best Use Case |
|---|---|---|---|
| Manual Grout Rake | High | Low | Narrow joints, soft grout |
| Oscillating Multi-Tool | Medium | High | Large areas, hard sanded grout |
| Dremel with Grout Bit | Very High | Medium | Precision corners, detail work |
| Chemical Softeners | Low | Low | Aiding manual scraping only |
The 1/8 inch that ruins everything
An extra 1/8 inch of grout height can be the difference between a floor that lasts 30 years and one that fails in five. This excess material creates a pivot point for furniture legs and foot traffic, leading to localized crushing and eventual debonding of the grout from the tile wall.
Precision is everything in flooring. We measure in thirty-seconds of an inch. When a homeowner tells me their floor feels ‘gritty’ even after cleaning, I know exactly what happened. The grout is sitting too high, and the sand particles are being sheared off by the friction of shoes. This creates a permanent sandpaper effect on your floor. You are literally walking on the destruction of your own grout. To fix this, you must be methodical. Mark the high spots with a pencil. Do not trust your eyes alone; run a credit card across the joint. If the card hits a bump, that grout is too high. You need to scrape it down until the card slides smoothly over the gap. This level of detail is what separates a Master Architect of flooring from a guy with a bucket and a trowel.
“Grout joints should be filled to the shoulder of the tile; any excess material left on the face or above the chamfer creates a point of mechanical failure.” – TCNA Handbook Standards
A checklist for grout perfection
- Check moisture levels of the subfloor before any work begins to ensure the bond will take.
- Vacuum the joints to remove any loose debris before attempting to lower the grout height.
- Use a straight edge to guide your manual rake or power tool to prevent slipping.
- Wear a P100 respirator to protect against crystalline silica dust during the grinding process.
- Inspect the tile edges for any pre-existing chips that might be exacerbated by vibration.
- Wipe the area with a microfiber cloth frequently to check your progress.
- Re-seal the grout once you have achieved the desired depth to maintain the moisture barrier.
Transitions between tile and baseboards
The intersection of high grout and baseboards creates a cleaning nightmare and a visual break in the room’s geometry. Grout should never be used as a substitute for caulk at the baseboard line, as the rigid grout will crack when the walls and floor move independently.
I have seen people try to ramp the grout up to meet the baseboards. It looks like a kindergarten project. The floor and the wall are two different planes that move at different rates. If you have high grout at the perimeter, it will eventually snap and leave a jagged, ugly line. You need to scrape that grout back and leave a clean expansion gap. This gap should be filled with a color-matched 100 percent silicone sealant. This allows the floor to breathe and the house to settle without destroying your hard work. If you are looking to upgrade the look of your room after fixing the floor, check out baseboards makeover ideas to elevate your space or explore chic baseboard designs that transform rooms in 2025. Proper perimeter joints are a hallmark of a professional installation.
Environmental considerations for the modern home
Choosing sustainable materials and methods for grout repair reduces the volatile organic compounds (VOCs) in your home and ensures a healthier living environment. Modern grout formulas are moving away from heavy metals and toward more eco-friendly, rapid-setting chemistries.
The flooring industry is changing. We are seeing more demand for eco-friendly tile solutions for sustainable homes in 2025. This means we have to be more careful with how we handle repairs. Grinding down old grout releases whatever was in that mix twenty years ago. Sometimes it is best to use low-dust methods or wet-scraping to keep the air clean. While most people want the thickest underlayment for comfort, too much cushion actually causes the locking mechanisms on LVP to snap under pressure, and the same principle applies to tile subfloors. If the subfloor deflects, the grout will pop out regardless of how high or low it is. You have to solve the structural problem first. Only then can you focus on the aesthetics of the joint. If you need help or have questions about a specific project, you can always contact us for expert guidance. Flooring is a science, and every fraction of an inch matters.
Final thoughts for the field
Fixing high grout is a tedious, dusty, and essential task. It requires a deep understanding of the material properties and a steady hand with the tools of the trade. By lowering the grout to the proper depth, you protect the tile edges, improve cleanability, and ensure the structural integrity of the entire floor assembly. Never settle for an overfilled joint. Your floor deserves the precision of an architect and the grit of a master installer. Keep your tools sharp and your levels true, and your floors will stand the test of time.