
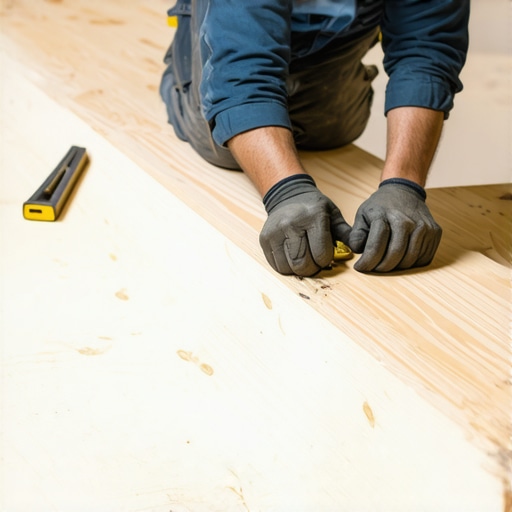
I spent three days grinding concrete on a job last month just so the floor wouldn’t click like a castanet. Most guys skip the leveling compound and think the underlayment will hide the dip. It won’t. If the subfloor isn’t flat, the baseboard will never sit flush. You can buy the most expensive one-inch thick solid maple baseboard in the world, but if your floor has a dip, you will see a shadow line that screams amateur hour. I have spent 25 years on my knees with a miter saw and a moisture meter, and I can tell you that thick baseboards are not just trim. They are a structural engineering challenge that requires an understanding of wood movement and geometry. When you are dealing with baseboards that exceed three-quarters of an inch in thickness, the margin for error disappears. Every degree of out-of-square wall translates into a massive gap at the heel or the toe of the miter. I smell like sawdust and floor wax today, and I am here to tell you how to do this right.
The physics of the perfect miter cut
The best way to miter corners on thick baseboards involves measuring the exact wall angle with a digital protractor and dividing by two to set your saw. Because thick material has more surface area on the cut face, even a half-degree error creates a visible void that wood filler cannot fix. You must account for the thickness by using a high-tooth count carbide blade to prevent fiber tear-out at the exit point of the cut. Thick baseboards, especially those made of solid hardwood or high-density fiberboard, exhibit significant resistance to the blade. This resistance generates heat, which can slightly expand the material during the cut itself. You need a 10-inch or 12-inch compound miter saw that is calibrated to dead zero. If your fence is even slightly out of alignment, your miters will never close. I always use a scrap piece of the exact same thickness to test the fit before I waste a twenty-foot stick of expensive molding. This isn’t just about aesthetics, it is about the integrity of the joint.
Why your walls are lying to you
Drywall build-up at the corners is the primary reason why a standard forty-five degree cut fails on thick baseboards. Mud and tape create a bulge that pushes the back of the board out, making the corner wider than ninety degrees. You have to find the actual angle of the corner, which is rarely a perfect square. When I walk onto a job site, I expect the walls to be crooked. Thick baseboards accentuate these flaws because they cannot be easily bent or flexed into place like thin, cheap contractor-grade trim. If you try to force a thick board against a bowed wall, you will snap the miter joint or pull the nails right through the drywall. This is where we look at baseboards makeover ideas to elevate your space to understand how different profiles react to wall irregularities. A flat-shaker profile is much less forgiving than a molded profile because there is no shadow line to hide a slight gap.
“A floor is only as good as the subfloor beneath it; deflection is the enemy of every joint.” – Master Flooring Axiom
The molecular bond of mitered joints
Using a combination of aliphatic resin wood glue and cyanoacrylate adhesive ensures that a thick baseboard miter will never pull apart during seasonal humidity shifts. Wood is a hygroscopic material, meaning it absorbs and releases moisture. In the summer, your baseboards will swell. In the winter, they will shrink. If you only use nails to hold a miter together, the wood will win and the joint will open. I apply wood glue to the entire face of the miter for long-term strength and a few dots of instant-bond adhesive to act as a temporary clamp. This creates a chemical bond at the cellular level. For thick boards, this is vital because the force of the wood moving is much higher than in thin trim. I have seen wide-plank walnut floors cup so badly they looked like potato chips because the installer didn’t respect the moisture. The same applies to your trim. If you are working in a bathroom with showers with a style that increases local humidity, your joinery must be bulletproof.
| Material Type | Janka Hardness | Expansion Rate | Recommended Adhesive |
|---|---|---|---|
| Solid White Oak | 1360 | High | PVA + CA Glue |
| High Density Fiberboard | N/A | Low | CA Glue + Construction Adhesive |
| Pine (Softwood) | 420 | Medium | PVA Wood Glue |
| Poplar | 540 | Medium | PVA Wood Glue |
The 1/8 inch that ruins everything
A gap of just one-eighth of an inch at the bottom of your baseboard can indicate a subfloor that is out of level, which will eventually cause the miter to stress and crack. When the floor sinks, the baseboard follows, pulling the mitered corner apart. This is why I insist on checking the floor flatness before the first board is cut. If I find a dip, I either scribe the baseboard to the floor or use a leveling compound. This is especially true when transitioning from baseboards to tile cleaning tips and shower areas where water resistance is key. If you are installing baseboards over tile, you need to ensure the grout restoration secrets are applied so the baseboard sits on a solid, clean surface. Any debris under the board will telegraph through to the miter joint at the top.
- Use a digital angle finder for every single corner without exception.
- Apply wood glue to both faces of the mitered joint.
- Use 18-gauge brad nails for the corners and 15-gauge finish nails for the studs.
- Back-cut the miters by one degree to ensure the front edges touch first.
- Acclimate the material in the room for at least 72 hours before cutting.
The chemistry of acclimation and moisture
The moisture content of your thick baseboards must be within two percent of the subfloor and framing members to prevent catastrophic joint failure. I never pull trim off a cold truck and start cutting. The wood is alive. If you take a board from a humid warehouse and nail it into a bone-dry house in Phoenix, those miters will open up by an eighth of an inch within a week. I use a pin-style moisture meter to check the wood and the drywall. If the wood is at 12 percent and the house is at 6 percent, you are asking for a heartbreak. This is the same principle I use for eco-friendly tile solutions for sustainable homes in 2025 where material stability is the priority. Thick wood has more internal tension. When it dries too fast, it twists. A twisted baseboard will rip a miter joint apart regardless of how many nails you use. You have to respect the biology of the timber.
“Wood moves. Your job as an installer is to give it a place to go without ruining the finish.” – Master Flooring Axiom
The ghost in the expansion gap
Leaving a small expansion gap behind the baseboard allows the flooring material to breathe without putting pressure on the mitered corners. If you jam a thick baseboard tight against a floating floor, the floor will buckle, and the pressure will force the baseboard miters to pop. I have seen homeowners who thought their waterproof LVP was invincible, only to find it buckling because they locked it under heavy baseboards and kitchen islands. You need to leave that quarter-inch gap and let the baseboard hover just a hair above the floor or use a shoe molding if necessary. In high-end architectural work, we prefer a clean line, which means the subfloor must be perfect. When we look at chic baseboard designs that transform rooms in 2025, we see a trend toward thicker, simpler profiles. These profiles show every flaw. There is no ornate molding to hide a bad cut. It is just you, the saw, and the math. If you get the math wrong, the ghost of the bad cut will haunt that room for as long as the house stands. I always back-bevel my miters. This means I cut the back of the board at a slightly steeper angle than the front. This ensures that the visible part of the joint is tight, even if the wall corner is slightly less than 90 degrees. It is a trick of the trade that separates the mechanics from the DIYers.
The final seal and structural integrity
The last step in securing a thick baseboard miter is the mechanical fastening into the wall studs, avoiding the hollow space between them where the board can vibrate. I use a stud finder for every piece. Nailing into just the drywall and the bottom plate is not enough for a one-inch thick oak board. You need the 15-gauge nail to penetrate at least an inch and a half into the solid lumber of the house frame. This keeps the board from cupping over time. If you are working near wet areas, ensure your how to refresh grout without replacing it knowledge is current, because moisture wicking up through the bottom of the baseboard is a silent killer of miter joints. Seal the bottom edge of the board with a bit of primer or sealer before installation if you are near a bathroom or kitchen. It takes an extra ten minutes, but it prevents the wood from swelling from the bottom up. Precision is not an accident. It is the result of a hundred small decisions made correctly. I don’t care about the aesthetic if the engineering is flawed. Build it to last, or don’t build it at all.