
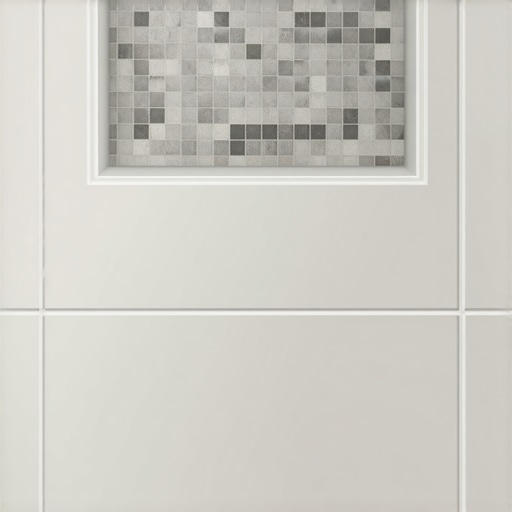
Most guys skip the leveling compound and the proper wall preparation. They think the underlayment will hide the dip or that the tile will magically align. It won’t. I spent three days grinding concrete on a job last month just so the floor wouldn’t click like a castanet, and then I moved to the bathroom where the shower niche was a total disaster. The previous installer used a dull blade and tried to hide the jagged, raw chips with a thick layer of grout. It looked like a kindergarten art project. I had to rip out the entire back wall because the waterproofing was compromised by his hack-job cuts. If you do not respect the physics of the tile edge, the water will eventually find its way into the substrate and rot your studs. A shower niche is not just a shelf for shampoo, it is a structural intrusion into a wet environment that requires perfect execution.
The reality of the raw edge
Hiding the raw edge of a cut tile in a shower niche requires the use of bullnose profiles, metal trim strips, or mitered edges to create a professional finish. These methods ensure that the porous bisque of the tile is protected from moisture and the aesthetic transition remains clean. A raw cut edge is visually distracting and prone to holding onto soap scum and hard water deposits. When we talk about the raw edge, we are talking about the internal clay or porcelain body of the tile that is exposed when the factory glaze is sliced away. In high-end masonry, we look at the Mohs hardness scale to determine how that edge will react to a diamond blade. A porcelain tile with a high density will chip less than a soft-bodied ceramic, but even the best tile looks unfinished if you leave that sharp, unglazed surface visible. You need to plan your layout so that these edges are tucked away or covered by a specialized trim piece. Ignoring this step leads to a shower that looks cheap and fails prematurely. For those looking for broader inspiration, checking out showers that wow modern designs for 2025 can provide insight into how these transitions are handled in luxury builds.
Bullnose tiles and the finished profile
Bullnose tile is a specialized trim piece with a rounded edge designed to transition from a tiled surface to a wall or to finish the corners of a niche. This is the traditional method for finishing a shower. The rounded edge is glazed just like the face of the tile, which creates a continuous look. However, many modern tile series do not offer matching bullnose pieces. If you are working with a large format porcelain, you might be out of luck for a factory bullnose. In those cases, you have to get creative with grinding and polishing. You cannot just put a raw edge against another raw edge and hope for the best. The gap will be uneven and the grout will eventually crack because the bond to a cut edge is never as strong as the bond to a glazed edge. I have seen guys try to use a belt sander on ceramic tile to create their own bullnose, but unless you have a wet-polishing kit and a series of diamond pads ranging from 50 to 3000 grit, you will never get that factory shine. It is a labor-intensive process that most DIYers underestimate. If you are interested in sustainability, consider eco-friendly tile solutions for sustainable homes in 2025 which often feature durable, through-body porcelain that hides edges better than glazed ceramic.
“A floor is only as good as the subfloor beneath it; deflection is the enemy of every joint.” – Master Flooring Axiom
Metal trim as a structural solution
Metal trim strips, often called Schluter profiles, provide a clean and modern way to cap the raw edge of a tile using aluminum or stainless steel. These profiles are L-shaped or square-edged and sit underneath the tile, held in place by the thin-set. The metal flange covers the cut edge completely. This is my preferred method for 2025 because it eliminates the need for expensive bullnose pieces and works with any tile thickness. When you are installing these, you have to be precise. If your niche is not perfectly square, the metal trim will highlight the crookedness like a neon sign. I always use a laser level to set my niche heights. You also have to consider the chemistry of the metal. In a shower, you want anodized aluminum or stainless steel to prevent corrosion. The thin-set used to bond the tile must also be compatible with the metal. I use a high-polymer modified thin-set to ensure the metal does not pull away over time. This creates a waterproof seal when combined with the proper corner tapes. If your trim is not set correctly, water can pool behind it, leading to the need for grout restoration secrets for long-lasting results down the line.
The chemistry of the mitered edge
A mitered edge involves cutting the back of the tile at a forty-five degree angle so two tiles meet at a perfect ninety-degree corner. This is the hallmark of a master installer. It is also the most difficult and fragile way to hide a raw edge. You are essentially creating a sharp point of porcelain that is very easy to chip during installation. I use a wet saw with a brand new diamond blade to make these cuts. The trick is to not cut all the way to the glaze. You leave about a sixteenth of an inch of the bisque, then hand-sand the rest. This creates a small gap that you fill with color-matched epoxy resin rather than standard grout. Standard cementitious grout is too brittle for a mitered joint and will flake out. The epoxy bond is chemical and structural, meaning it actually fuses the two tiles together. While most people want the thickest underlayment, too much cushion actually causes the locking mechanisms on LVP to snap under pressure, and similarly, too much movement in a wall will snap a mitered tile joint. The wall must be rock solid. If there is any flex in the studs, those beautiful mitered corners will crack within six months.
Why grout fails on exposed edges
Grout is a porous material designed to fill joints, not to act as a decorative cap for a raw tile edge. When installers try to slope grout over a raw edge to hide it, they are creating a point of failure. Grout has very little tensile strength. As the house shifts and the shower goes through thermal expansion and contraction, that thin layer of grout over the edge will crumble. You will be left with a jagged edge that cuts your fingers and allows water to seep behind the tile. If you find yourself in this situation, you might need to know how to refresh grout without replacing it, but that is only a temporary fix for a structural problem. The right way is to ensure the tile edge is physically covered by a trim or a glazed surface. This is why planning the layout of your niche is the most important part of the job. You start from the center of the niche and work your way out so that you have even cuts on both sides, and you always prioritize the visibility of the finished edge over the convenience of a quick cut.
Polish the clay to a mirror finish
Polishing the raw edge of a through-body porcelain tile allows you to leave the edge exposed while still looking finished and professional. This only works with through-body porcelain where the color goes all the way through the material. If you try this with a cheap glazed ceramic, you will just see the red or white clay body. I use a variable speed polisher and a set of resin-bonded diamond pads. You start with a coarse 50-grit pad to remove the saw marks and then progress through the grits. By the time you hit 3000-grit, the edge of the tile is as shiny as the surface. It is a dusty, wet, and miserable job, but the result is a zero-clearance transition that looks like it was carved from a single block of stone. This technique is often used in minimalist designs where metal trim would look too busy. It requires a steady hand and a lot of patience. If you mess up, you have to start the cut over. There is no hiding a bad polish job. For those looking to upgrade other parts of their home after finishing the bathroom, baseboards makeover ideas to elevate your space can provide that final touch of class.
“A floor is only as good as the subfloor beneath it; deflection is the enemy of every joint.” – Master Flooring Axiom
Technical comparisons for edge treatments
The choice of how to finish your niche depends on your budget, the tile material, and the desired aesthetic. Here is a breakdown of the most common methods I use in the field.
| Method | Durability | Skill Level | Cost |
|---|---|---|---|
| Bullnose Tile | High | Intermediate | Medium |
| Metal Trim | High | Beginner | Low |
| Mitered Edge | Medium | Expert | High |
| Polished Edge | High | Expert | Medium |
| Pencil Liner | High | Intermediate | High |
Essential steps for a professional finish
If you want to hide those raw edges like a pro, you need to follow a strict protocol. Do not skip these steps or your niche will look like garbage.
- Measure the niche opening and account for the thickness of the tile and the thin-set on all four sides.
- Dry-fit every piece of tile and trim before you mix a single bag of thin-set.
- Use a high-quality diamond blade and change it if you see any sparking or chipping.
- Apply a waterproof membrane like Kerdi or RedGard to the inside of the niche and let it cure fully.
- Set the bottom piece of the niche first with a slight pitch toward the shower floor for drainage.
- Check for level and square at every single step of the installation.
Common mistakes that ruin showers
Using regular caulk to hide a gap between a raw edge and a wall is a recipe for mold growth and aesthetic failure. Caulk is meant for movement joints, not for masking poor craftsmanship. Another mistake is not considering the thickness of the tile when framing the niche. If you use a thick stone tile, your niche opening will shrink significantly. I always tell homeowners to buy their soap and shampoo bottles first so we can size the niche appropriately. Nothing is worse than finishing a beautiful niche and finding out the shampoo bottle doesn’t fit because you didn’t account for the half-inch of tile and thin-set on the top and bottom. Also, never use wood trim or baseboards near a shower niche. It sounds obvious, but I have seen people try to use PVC baseboards to trim out a niche. It looks terrible and the adhesive will fail in the steam. Stick to tile, stone, or metal. For more on proper trim usage, see chic baseboard designs that transform rooms in 2025 for the dry areas of your home.
Elevating the space with detail
When you focus on the microscopic details of the niche, you elevate the entire bathroom. It is the difference between a contractor-grade flip and a custom-built home. Whether you are using showers with a style trendy ideas for small bathrooms or a massive walk-in wet room, the niche is the focal point. Take the time to clean your tile edges with a diamond hand pad even if you are using trim. A clean cut allows the tile to sit flatter against the substrate. Use a spacer that matches the rest of your shower walls to keep the lines continuous. If you are struggling with keeping the tile clean during this process, tile cleaning tips for a sparkling bathroom in 2025 will help you maintain that professional look. Remember, the niche is where the water hits most directly. If your edges are raw and your grout is sloppy, you are inviting moisture to sit and dwell in the pores of the tile. Keep your cuts tight, your miters sharp, and your metal trim level. If you have questions about specific materials or need a referral for a specialist, feel free to contact us or review our privacy policy for how we handle your project data.