
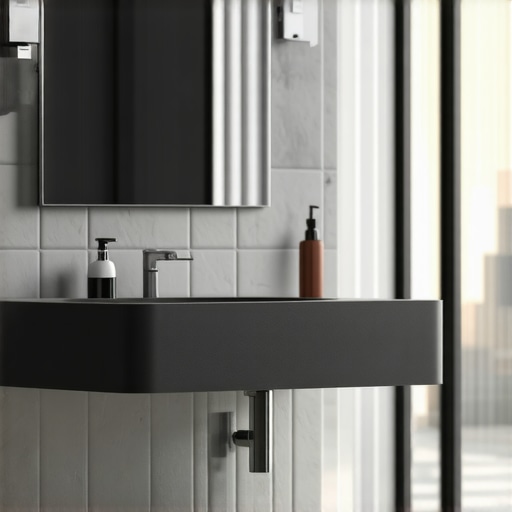
The structural myth of the floating cabinet
Installing a floating vanity requires precise structural blocking and high-tensile fasteners to manage the heavy cantilevered load on tile surfaces. Most homeowners see a beautiful sleek box hanging on a wall and think it is held up by magic or a few simple screws. It is not. If you do not understand the physics of shear force and the brittle nature of porcelain or ceramic tile, you are building a liability. I spent three days grinding concrete on a job last month just so the floor wouldn’t click like a castanet, and that same level of obsessive prep applies to walls. A vanity full of toiletries and a stone countertop can easily weigh 200 pounds. Without proper backing, that weight will pull the tile right off the substrate or snap the fasteners. You need to look past the glaze of the tile and into the skeleton of the wall. This is not a cosmetic upgrade. This is a structural engineering task that requires you to respect the material limits of your bathroom. We are talking about the intersection of moisture management, masonry drilling, and load-bearing timber. If you get this wrong, you will be looking at a shattered sink and a cracked wall within six months. It will fail. You must treat the wall like a bridge and the tile like a skin.
The physics of shear force and cantilever loads
A floating vanity exerts significant downward pressure and outward pulling force on the top mounting rail and the tile surface. When you hang a 21 inch deep cabinet from a wall, you are creating a lever. The weight of the countertop pulls the top of the cabinet away from the wall while pushing the bottom of the cabinet into the tile. This creates a crushing force on the lower tile courses and a tension force on the upper anchors. Most people assume the tile provides strength. It does not. Tile is a decorative veneer. If you fasten into the tile alone, the expansion and contraction of the house will cause the tile to pop or the grout to crumble. You can find more about maintaining these joints in my guide on grout restoration secrets for long-lasting results. The actual load must be transferred directly into the wall studs or, preferably, into solid 2×10 wood blocking installed between the studs. I once saw a $3,000 vanity tear a hole through the drywall because the installer used toggle bolts instead of structural screws. The toggle bolts held, but the drywall didn’t. When you add a heavy quartz top, you are increasing the fulcrum effect. You need to ensure the wall is perfectly plumb. If the wall has a bow, your vanity will stress the tile unevenly, leading to hairline fractures in the glaze.
“A floor is only as good as the subfloor beneath it; deflection is the enemy of every joint.” – Master Flooring Axiom
Why your wall studs are lying to you
Finding and verifying the exact center of your wall studs is the most critical step before drilling into your expensive tile. Standard stud finders often struggle with tile and cement board. They give ghost readings or miss the center by half an inch. In a floating vanity install, being off by half an inch means you miss the meat of the wood and hit the edge, leading to a weak connection. You need to map the wall before the tile goes up. If the tile is already there, you have to use a small masonry bit to find the wood through the grout lines where the holes will be hidden. Don’t trust the 16 inch on-center rule blindly. Plumbers often notch or move studs to accommodate drain pipes for showers that wow modern designs for 2025. If a plumber cut a 2 inch notch in your 2×4 stud to run a vent, that stud no longer has the structural integrity to hold a cantilevered vanity. You have to inspect the plumbing layout. If the wall is a wet wall, it is likely built with 2×6 studs which give more depth, but they are also more prone to having large holes for the waste line. You need to ensure your fasteners are long enough to penetrate the tile, the thin-set, the backer board, and at least 2 inches into solid wood. Anything less is a gamble.
Drilling through porcelain without shattering your soul
Drilling through vitrified porcelain requires diamond-tipped hole saws and constant water cooling to prevent thermal shock and cracking. Standard carbide bits will work on ceramic, but porcelain is dense and hard. If you try to force a regular bit through porcelain, it will overheat, dull instantly, and potentially crack the tile. I prefer using a water-delivery system or a wet sponge held against the bit. Start the drill at a 45 degree angle to create a notch so the bit doesn’t skat across the tile. Once the notch is established, slowly bring the drill to 90 degrees. Do not use the hammer setting. Hammering will vibrate the tile and break the bond with the thin-set. While most people want the thickest underlayment or the strongest adhesive, too much pressure during drilling actually causes the tile to snap because it has nowhere to flex. You are creating a precise entry point for the structural screws. Once you are through the tile and backer board, switch to a standard wood bit for the pilot hole into the stud. This prevents the threads of the screw from binding in the tile, which can lead to the vanity not sitting flush against the wall. If you leave a gap, the vanity will bounce, and that vibration will eventually destroy your tile cleaning tips for a sparkling bathroom in 2025 effort because dust and moisture will collect in the void.
| Fastener Type | Substrate Compatibility | Max Load Capacity | Risk Factor |
|---|---|---|---|
| #14 Structural Screw | Solid Wood Blocking | 300+ lbs | Low |
| Toggle Bolt | Hollow Drywall/Tile | 50 lbs | Extreme |
| Lag Bolt 1/4 inch | 2×4 Studs | 200 lbs | Medium |
| Masonry Anchor | Concrete/Brick | 150 lbs | Low |
The secret of the internal blocking
Installing horizontal 2×10 blocking between the studs provides a massive target for vanity mounting and ensures weight is distributed across multiple vertical members. If you are in the middle of a renovation, do not let your contractor skip this. It takes twenty minutes and costs ten dollars in lumber. You screw the 2x10s flat between the studs at the height where the vanity mounting rail will sit. This allows you to place screws exactly where the vanity needs them, rather than being forced to align the vanity with wherever the studs happen to be. This is especially important for modern designs that may not have traditional widths. If your vanity is 30 inches wide, you might only hit one stud if you don’t have blocking. One stud is not enough. You need at least three points of contact. The blocking also prevents the studs from twisting under the weight. Wood is organic and moves. Under a heavy load, a single stud can bow slightly. If it bows, the tile on top of it will experience stress. Blocking ties the entire wall together into a rigid diaphragm. This is the same logic we use when preparing a floor for large format tiles to ensure there is no deflection. You can see how this structural mindset translates to aesthetics in my piece on chic baseboard designs that transform rooms in 2025.
Managing the transition to baseboards and floors
Floating vanities expose the wall and floor beneath them, making the alignment of baseboards and the quality of the tile finish paramount. In a traditional vanity, you can hide messy tile cuts and missing baseboards behind the cabinet. With a floating unit, everything is visible. You must plan your tile layout so that full tiles are visible under the vanity. If you have a tiny sliver of tile at the wall, it will look amateurish. Furthermore, you need to decide if the baseboards makeover ideas to elevate your space will run behind the vanity or stop at the sides. I prefer running the baseboard continuously if the vanity is high enough, as it creates a cleaner, more intentional look. However, this requires the vanity to have a slight offset or a notch to clear the baseboard. If you don’t account for this, the vanity will sit 1/2 inch off the wall, and your fasteners will be under bending stress. Use a high-quality silicone caulk to seal the gap between the vanity and the tile. This prevents moisture from getting behind the unit where it can rot the cabinet box or cause mold growth in the grout. For those looking for sustainable options, check out eco-friendly tile solutions for sustainable homes in 2025 to see how recycled materials perform under these stresses.
The checklist for a permanent installation
- Verify blocking location and stud density before starting tile.
- Use a level to mark the exact horizontal mounting line on the tile.
- Select diamond hole saws specifically rated for the tile hardness.
- Apply painter’s tape over the drill site to prevent the bit from walking.
- Pre-drill all holes to prevent the wood studs from splitting.
- Check the vanity cabinet for squareness before tightening the fasteners.
- Seal the vanity-to-tile interface with 100 percent silicone.
- Inspect the plumbing for leaks immediately after the weight is applied.
The chemistry of the bond and the grout line
Grout is not an adhesive and should never be relied upon to support any portion of the vanity weight or to seal structural gaps. Grout is porous and brittle. When the vanity is loaded, it will settle slightly. This settlement is measured in fractions of a millimeter, but it is enough to crack grout. This is why we use silicone at change-of-plane joints. If you are struggling with old grout, you might want to look at how to refresh grout without replacing it before you hang the new vanity. The relationship between the vanity and the tile is one of pressure. You want the pressure to be even. If one screw is tighter than the others, it pulls the cabinet unevenly and creates a pressure point on the tile. Use a torque-limiting driver if you have to. I always hand-tighten the final few turns. You can feel the wood grab. You can feel the vanity pull snug against the wall. If you feel a pop, you’ve cracked the tile or stripped the wood. That’s the moment your heart sinks. Avoid it by taking your time. The vanity should feel like it is part of the house, not just something hanging on it. If you have a small bathroom, consider the layout carefully, perhaps looking at showers with a style trendy ideas for small bathrooms to ensure the vanity doesn’t interfere with the door swing or the shower glass. Every inch matters when you are working in tight quarters. The floating vanity is a great tool for making a space feel larger, but only if the installation is flawless. A crooked vanity or a cracked tile will make even the most expensive bathroom look cheap. Do the work. Respect the physics. Build it to last a lifetime. If you need professional advice, don’t hesitate to contact us for a consultation on your specific bathroom layout.