
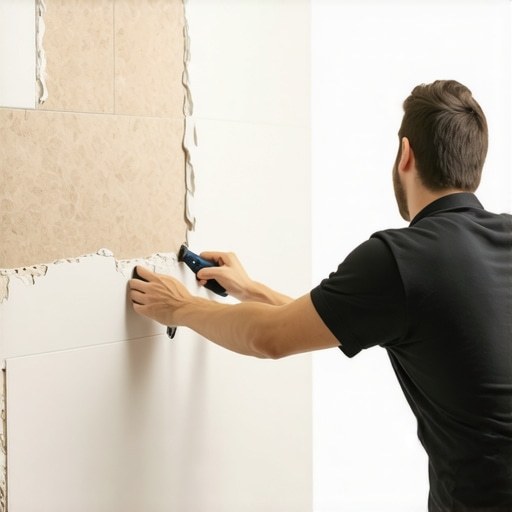
I spent three days grinding concrete on a job last month just so the floor wouldn’t click like a castanet. Most guys skip the leveling compound. They think the underlayment will hide the dip. It won’t. When you are putting a 12×24 inch tile on a bathroom wall, that dip becomes a shadow that screams at you every time you turn on the vanity light. I have seen guys try to butter up a wall to hide a half inch bow. It always ends with the tile sliding down the wall or popping off in a year because the mortar was too thick to cure properly. I have spent 25 years on my knees with a moisture meter and a level. I know that a floor or a wall is a performance surface. It is not just a pretty pattern. If you ignore the physics of the substrate, the chemistry of the adhesive will eventually fail you. This is why you must treat every installation like a structural engineering project. Small bathrooms present the toughest challenge for large format tiles because you have zero margin for error in the corners. If your wall is out of plumb by even a quarter inch, your grout lines will look like a bolt of lightning instead of a straight line.
The 1/8 inch that ruins everything
Large format tiles require a substrate flatness within 1/8 inch over 10 feet to prevent lippage and structural failure. Standard thin-set cannot compensate for wall irregularities because it shrinks during the curing process, pulling the tile inward and creating uneven edges that ruin the aesthetic and bond. This flatness requirement is non-negotiable. When you are dealing with a tile that has one side longer than 15 inches, the physics of the material changes. Porcelain is rigid. It does not bend to follow the curve of a poorly framed wall. If the wall bows out, the center of the tile will be hollow. If the wall bows in, the edges will stick out. This is called lippage. You feel it when you run your hand over the tile, but in a small bathroom, you see it every time the light hits the wall from the side. You must use a straight edge to find these high and low spots before the first bag of mortar is even opened. If you find a dip, you must fill it with a cement-based patching compound. If you find a hump, you must grind it down. This is the part of the job that smells like concrete dust and sweat, but it is the only way to ensure a flat finish. For those looking for inspiration on the final look, showers with a style trendy ideas for small bathrooms can provide a vision once the hard work of prep is done.
“A floor is only as good as the subfloor beneath it; deflection is the enemy of every joint.” – Master Flooring Axiom
Why your bathroom wall is never flat
Most bathroom walls are built with wooden studs that have bowed over time or were never straight from the lumber yard. Installing large format tile over these surfaces without a proper backer board and shimming process will lead to cracked grout lines and tiles that eventually pull away. Wood is an organic material. It moves. It breathes. It warps. When you introduce the weight of large format porcelain, which can weigh over 4 pounds per square foot, you are asking a lot of that wood. You need a stable substrate like cement board or a high-density foam board. But even the best backer board will follow the curve of a crooked stud. This is where you have to be an architect. You shim the studs until they are perfectly plumb. You are creating a foundation. If you skip this, your tile layout will drift as you move up the wall. By the time you reach the ceiling, your 1/16 inch grout joint might have grown to a half inch just to keep things level. If you are struggling with existing tile issues, you might want to read about how to refresh grout without replacing it before you decide to tear everything out for a new LFT installation.
| Metric | Standard Ceramic | Large Format Porcelain |
|---|---|---|
| Nominal Size | 12×12 or smaller | 15 inches or larger on one side |
| Flatness Tolerance | 1/4 inch in 10 feet | 1/8 inch in 10 feet |
| Mortar Requirement | Standard Thin-set | LHT (Large and Heavy Tile) Mortar |
| Lippage Risk | Low | Extreme |
The chemistry of suction and sag
Large and Heavy Tile mortar is engineered with polymers that provide high initial tack and minimal shrinkage to support the weight of the tile on vertical surfaces. Using regular thin-set for large format wall tiles will result in sagging where the tile slides down the wall before the bond sets. This is about thixotropic properties. Think of it like peanut butter. It is thick when it sits there, but it becomes fluid when you work it. LHT mortar holds the tile in place through mechanical and chemical bonds. You must back-butter every tile. This means applying a thin layer of mortar to the back of the tile with the flat side of the trowel before placing it against the notched ridges on the wall. This ensures 95 percent coverage. In a wet environment like a shower, any air pocket behind the tile is a place where mold can grow. If you want a bathroom that stays clean, checking tile cleaning tips for a sparkling bathroom in 2025 is a good start, but a proper mortar bond is the real secret to longevity. The mortar must be mixed to a specific consistency. If it is too wet, the tile will sag. If it is too dry, it will not wet out the back of the tile. You are looking for a mix that stands up in ridges without slumping.
The geometry of small spaces
Layout planning in a small bathroom requires centering the tile on the most visible wall to avoid small, sliver cuts in the corners that draw the eye to the room’s imperfections. Measuring the total wall width and subtracting the tile and grout widths will determine the exact starting point for a balanced look. You do not just start in a corner. You find the center. If your center line leaves you with a two inch piece at the wall, you shift your starting point. You want the pieces on the left and right to be equal. This creates a sense of scale. In a small room, large tiles actually make the space feel bigger because there are fewer grout lines to break up the visual field. However, those few grout lines must be perfect. Using a mechanical lippage control system is essential. These clips and wedges lock the tiles together at the same height until the mortar cures. It prevents one tile from sinking deeper than the neighbor. For those interested in the environmental impact of these materials, eco-friendly tile solutions for sustainable homes in 2025 offers insight into choosing porcelain with recycled content.
- Check for plumb walls using a 6-foot professional level.
- Apply a liquid or sheet waterproofing membrane for all wet areas.
- Back-butter every single tile for maximum surface coverage.
- Use a mechanical lippage control system to prevent uneven edges.
- Mix LHT mortar in small batches to prevent skinning over.
The ghost in the expansion gap
Expansion gaps at the perimeter of the tile installation allow for the natural movement of the building structure without putting pressure on the tile faces or grout joints. Filling these perimeter gaps with hard grout instead of flexible 100 percent silicone sealant will lead to cracked tiles and popped joints. Buildings move. They settle. They expand with heat and contract with cold. If your tile is shoved tight against the floor and the ceiling, it has nowhere to go when the house shifts. The pressure will build up until the weakest point fails. Usually, that is the grout. Sometimes, it is the tile itself. You must leave a 1/8 inch gap at every change of plane. This means where the wall meets the floor and where two walls meet in a corner. You fill these gaps with color-matched caulk. This is not a shortcut. It is a requirement. If you are finishing the bottom of the wall, you might consider how chic baseboard designs that transform rooms in 2025 can hide these essential movement joints while adding a polished look. Even your baseboards need to be installed with movement in mind. Using baseboards makeover ideas to elevate your space can help bridge the gap between the tile and the rest of the room.
“Maximum allowable variation for large format tile is 1/8 inch in 10 feet from the required plane.” – TCNA Handbook
Grout and the structural margin of error
Grout is the most vulnerable part of the installation and must be mixed with distilled water or a polymer additive to ensure color consistency and strength. Choosing the right grout width for large format tile is a balance between aesthetic preference and the need to mask slight variations in tile sizing. Most modern porcelain tiles are rectified. This means they were ground to an exact size after firing. This allows for very thin grout lines, sometimes as small as 1/16 of an inch. But thin lines are harder to fill. You must use a non-sanded grout or a high-performance cement grout for these tight joints. If the joint is too narrow, the grout may not penetrate deep enough to create a lasting bond. If you have older installations that look dingy, you can find help with grout restoration secrets for long lasting results. When working in a small bathroom with steam from the shower, the grout must be sealed or be naturally resistant to moisture. Epoxy grout is an option, but it is a nightmare to work with for a beginner because it sets fast and is very sticky. Stick to high-quality polymer-modified cement grouts for the best balance of workability and durability. For a complete look at high-end designs, see showers that wow modern designs for 2025.
Final Inspection
Installing large format tile is not a weekend hobby for the faint of heart. It is a technical discipline. You must be part chemist to understand the mortar, part mathematician to calculate the layout, and part grunt to do the heavy lifting. If you take the time to fix the substrate and use the right materials, your small bathroom will look like a luxury spa for decades. If you rush the prep, you will be looking at cracks and shadows by next season. Do it right the first time. Respect the 1/8 inch rule. Trust the LHT mortar. And never, ever skip the back-buttering. For more information on our standards, visit our privacy policy or contact us for expert advice.