
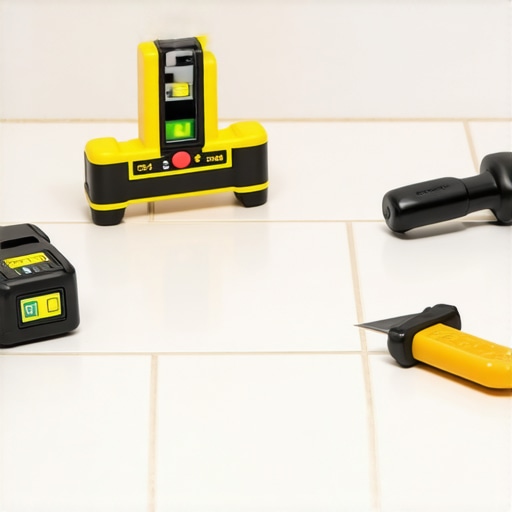
How to Level a Bathroom Floor Before Tiling to Avoid Trip Hazards
Most guys skip the leveling compound. They think the underlayment will hide the dip. It won’t. I spent three days grinding concrete on a job last month just so the floor wouldn’t click like a castanet. That experience stays with you. When you are dealing with a bathroom, a 1/8 inch dip is not just a cosmetic flaw. It is a lawsuit waiting to happen. A trip hazard in a wet environment like a shower is a recipe for disaster. If your subfloor is out of plane, your tile will have lippage. Lippage means one edge of a tile sits higher than the adjacent one. It catches toes. It ruins the look of high-end grout. I have seen beautiful stone work destroyed because the installer was too lazy to pull out a straightedge and some self-leveling underlayment.
The 1/8 inch that ruins everything
Leveling a bathroom floor requires achieving a surface deviation of less than 1/8 inch over a 10 foot span to ensure tile stability and prevent trip hazards. This technical standard is non-negotiable for large format tiles. When you ignore this, you invite structural failure. Most homeowners think they can just use more thin-set to bridge the gap. That is a lie. Thin-set is an adhesive, not a filler. As it cures, it shrinks. If you have a thick glob under one corner and a thin layer under the other, the shrinkage will pull the tile down unevenly. You end up with a mountain range instead of a floor. It makes installing baseboards a nightmare because you will see huge gaps at the bottom. I have walked into hundreds of bathrooms where the baseboard looks like a wavy snake because the floor beneath it is a rolling hill. It is embarrassing.
“A floor is only as good as the subfloor beneath it; deflection is the enemy of every joint.” – Master Flooring Axiom
Why your subfloor is lying to you
Subfloor inspection involves checking for deflection, moisture content, and structural integrity using a 10 foot straightedge and a moisture meter. Just because it looks flat does not mean it is level. Wood subfloors are notorious for crowning at the joists and sagging in between. Concrete slabs in older homes often have settled, creating bowls in the center of the room. You have to understand the physics of the house. In high-humidity regions like the Gulf Coast, wood subfloors expand and contract like a breathing lung. If you do not account for this movement, your tile will crack and your grout will turn to powder. I always tell people that the showers are the most sensitive areas. A slope that goes the wrong way can lead to standing water and mold. You need to be precise. You need to be obsessive. If you do not have sawdust under your nails and a sore back from checking every square inch, you probably are not doing it right.
The chemical bond of a perfect substrate
Self-leveling underlayment or SLU is a polymer-modified cementitious product that flows like water to create a perfectly flat surface for tile installation. This is where the chemistry gets interesting. You cannot just pour this stuff onto dry wood or old concrete. You need a primer. The primer is a bonding agent that seals the pores of the substrate. If you skip the primer, the thirsty wood or concrete will suck the water right out of the leveling compound. This causes the compound to dry too fast, leading to pinholes and a weak bond. It will eventually de-laminate. You will hear a hollow sound when you walk on it. That is the sound of a failing floor. I use a soft-bristled broom to work the primer into the substrate. It has to be tacky but not wet before the pour. This is about molecular migration and creating a monolithic slab that can handle the weight of heavy showers and furniture.
Comparison of leveling methods for bathroom substrates
Choosing the right material depends on the depth of the dip and the type of subfloor. Not all compounds are created equal. Use the table below to determine which structural path to take for your bathroom project.
| Method | Maximum Depth | Drying Time | Best Use Case |
|---|---|---|---|
| Self-Leveling Underlayment | 5 inches | 4 to 24 hours | Whole room flattening for large tile |
| Floor Patching Compound | 1/2 inch | 30 to 90 minutes | Filling small divots and seam gaps |
| Dry-Pack Mortar (Mud Bed) | No limit | 24 to 72 hours | Creating slopes in shower pans |
| Shimming Subfloor | Variable | N/A | Correcting major structural joist sag |
The ritual of self-leveling underlayment
Applying self-leveling compound demands precise water ratios, high-speed mixing, and rapid distribution to ensure the product reaches its maximum flow potential. This is a high-speed game. Once the water hits the powder, the clock starts. You have about 10 to 15 minutes of working time. I always have a helper. One guy mixes while I pour. We use a spiked roller to release air bubbles. These bubbles are the enemy. They create tiny craters that weaken the surface. If you are working in a bathroom with complex plumbing for modern showers, you must dam off the drains. I have seen guys pour five gallons of leveler down a toilet flange. That is a five thousand dollar mistake. Use foam tape or weather stripping to create a perimeter barrier. This allows for expansion. A floor needs to breathe at the edges. If you pour it tight against the wall, the floor has nowhere to go when the temperature changes. It will buckle. It is a law of physics.
The physics of lippage and grout longevity
Tile lippage occurs when uneven substrates cause the edges of ceramic or porcelain tiles to sit at different heights, leading to grout failure and safety hazards. When a floor is not level, the grout joints are under constant stress. Every time someone steps on a tile that has a void beneath it, the tile flexes. That flex breaks the bond of the grout. Soon, you see cracks. Then the grout starts to fall out in chunks. People think they have a cleaning problem, but they actually have a subfloor problem. If you want a floor that lasts thirty years, you spend the extra time on the prep. I see people looking for cleaning tips when they should be looking for a jackhammer. You cannot clean your way out of a bad installation. The geometry of the tile demands a flat plane. Especially with the trendy large-format tiles that are popular now. They have zero tolerance for error.
“Consistency of the substrate is the primary determinant of the longevity of the finish floor.” – TCNA Handbook Standards
Moisture barriers and the coastal humidity trap
Vapor emissions from concrete slabs can cause adhesive failure and mold growth if a moisture barrier is not properly integrated into the leveling process. If you live in a place like Seattle or Miami, the humidity is your constant shadow. Concrete is a sponge. It pulls moisture from the earth. If you trap that moisture under a layer of leveler and tile without a barrier, it will find a way out. Usually, it pushes the tiles up or creates an efflorescence that ruins your grout. I always perform a calcium chloride test before I pour. It tells me how many pounds of moisture are coming off that slab. If it is too high, I use an epoxy moisture mitigator. It is expensive. It is a pain to apply. But it is the only way to sleep at night. You do not want a call in six months saying the floor is lifting in the bathroom. That is a call that costs you money and your reputation.
Protecting the transition and baseboards
Transition strips and baseboard installation provide the finishing touches that hide expansion gaps while ensuring a smooth path between different flooring types. Once the floor is level and the tile is set, you have to manage the height difference between the bathroom and the hallway. If you leveled the floor correctly, this transition should be minimal. I hate bulky T-moldings. They look cheap and they are a trip hazard themselves. I prefer a marble threshold or a schluter strip for a clean look. This ties into the overall aesthetic. If you look at chic baseboard designs, you will see that they all rely on a flat floor to look their best. Any gap under the baseboard is a place for dust and spiders to hide. I caulk the bottom of my baseboards in bathrooms to prevent water from seeping under the tile. It is about layers of protection.
Final checklist for a zero hazard floor
Before you even think about opening a box of tile, run through this list. If you miss one step, you are gambling with the quality of the finish. I have seen pros fail because they got cocky. Stay humble and follow the process.
- Remove all old adhesive, paint, and wax from the subfloor surface.
- Check the joist spacing and subfloor thickness to ensure it meets the L/360 deflection standard.
- Seal all gaps in the subfloor with a quick-setting patch to prevent the leveler from leaking into the basement.
- Apply the recommended primer using a brush or roller and allow it to become tacky.
- Mix the self-leveling underlayment with a high-torque drill and a mixing paddle to ensure no lumps.
- Pour from the furthest corner toward the exit, using a gauge rake to maintain consistent depth.
- Wait the full cure time before walking on the surface or applying thin-set.
The goal is a surface that is as flat as a billiard table. When you slide a level across it, you should not see any light underneath. That is the mark of a craftsman. That is how you avoid trip hazards. It takes time. It takes effort. But at the end of the day, you have a floor that is safe, beautiful, and permanent. Do not let anyone tell you that you can skip the prep. They are usually the ones who are out of business in five years. Build it right. Build it once.