
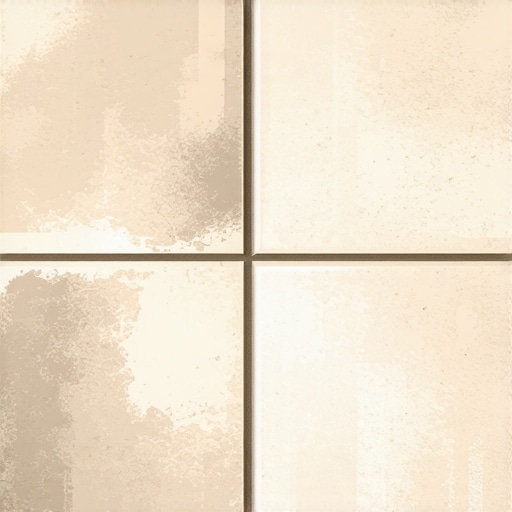
Professional Secrets for Matching New Grout to Existing Surfaces
I spent three days grinding concrete on a job last month just so the floor would not click like a castanet. Most guys skip the leveling compound and think the underlayment will hide the dip. It won’t. This same level of neglect happens with grout. Homeowners think they can just buy a bag of ‘eggshell’ and it will match the twenty year old lines in their bathroom. It never does. I once walked into a project where the owner tried to patch a shower floor. The new grout was bright white and the old grout was a dingy grey. It looked like a zebra. Matching grout is not about picking a color from a cardboard strip. It is about chemistry, physics, and the reality of how minerals age under foot traffic and moisture. If you want a floor that looks like a single continuous surface, you have to understand the microscopic life of the grout joint. This is where the amateurs fail and the pros earn their keep.
The physics of pigment degradation in cementitious bonds
Grout color changes over time because of UV exposure, chemical leaching from cleaning agents, and the accumulation of organic matter within the porous structure of the Portland cement. Matching new grout requires assessing the current state of the existing matrix rather than its original manufactured specifications. This process involves stripping away surface contaminants to see the true mineral state beneath. Most grout is a mixture of sand and cement. Over years, the pigments wash out. The calcium carbonate in your water supply leaves a white film. This film acts like a filter. If you match your new grout to that dirty film, you are making a permanent mistake. You must understand that grout is essentially a liquid rock that cures over several days. The rate of evaporation during that cure determines the final shade. Faster drying leads to lighter colors. Slower drying leads to darker shades. This is why grout restoration secrets for long-lasting results are so vital for a professional finish. You are not just painting. You are engineering a chemical bond.
The ghost in the grout joint
The visual discrepancy between new and old grout is caused by the refractive index of surface minerals and the depth of the joint. When new grout is installed next to old, the difference in porosity creates a visual break that the human eye detects as a flaw. I have seen guys try to match grout by holding up a wet sample to a dry floor. That is a rookie move. Grout always dries lighter than it looks in the bucket. To get a real match, you have to mix a small batch and let it cure for at least twenty four hours. Use a hair dryer if you are in a rush, but realize that heat curing can shift the color toward the lighter end of the spectrum. You also have to consider the height of the grout line. If the old grout is recessed, the shadow it casts will make it look darker than it actually is. This is a common issue when people look at tile cleaning tips for a sparkling bathroom in 2025 and expect miracles without addressing the structural depth of the joint. We are talking about fractions of a millimeter that determine if a patch is invisible or an eyesore.
“A floor is only as good as the subfloor beneath it; deflection is the enemy of every joint.” – Master Flooring Axiom
Why your subfloor is lying to you
Subfloor movement is the primary cause of grout cracking, which leads homeowners to seek a color match for repairs. If the plywood or concrete slab beneath your tile is flexing, no amount of high quality grout will stay in place. You have to fix the movement before you fix the color. I have been on jobs where the floor felt solid but the grout was turning to powder. That is a sign of vertical deflection. The tiles are rubbing against each other and grinding the grout into dust. If you try to match new grout to this environment without addressing the subfloor, you are wasting your time. The new grout will crack within weeks. This is especially true near chic baseboard designs that transform rooms in 2025 where the wall meets the floor. That transition point is a high stress area. You should use a color matched caulk there instead of rigid grout. Caulk allows for the expansion and contraction that happens as the seasons change. In high humidity areas like Houston or the swampy coastal regions, wood subfloors expand significantly. In dry areas like Phoenix, they shrink. Your grout match must account for these environmental forces or it will fail the moment the weather turns.
The 1/8 inch that ruins everything
Precision in grout joint width is the difference between a professional installation and a DIY disaster. Even a slight variation in the width of the gap between tiles will change how the color is perceived by the eye. Narrow joints make grout look darker because there is less surface area to reflect light. Wide joints look lighter. If you are patching an area where the tiles were not spaced perfectly, you will never get a perfect color match. It is a geometric impossibility. I tell my apprentices to measure the joint at three different points with a digital caliper. If the variation is more than ten percent, we have to blend the grout colors. Mixing two different bags of grout to find the middle ground is an art form. You have to weigh the dry powder on a scale. Do not eyeball it. If you use one scoop of ‘sandstone’ and two scoops of ‘desert tan,’ you better write that down. You will need that exact ratio if you run out of mix halfway through the bathroom. People think they can remember. They can’t. The sawdust under my nails has taught me that documentation is the only way to ensure consistency.
| Grout Type | Porosity Level | Color Stability | Best Use Case |
|---|---|---|---|
| Standard Cementitious | High | Moderate | Low traffic residential floors |
| High-Performance Cement | Medium | High | Commercial kitchens and entries |
| Epoxy Grout | Zero | Excellent | Showers and steam rooms |
| Urethane Grout | Low | Superior | Large format tiles with thin joints |
The surgical extraction of the old matrix
Removing old grout requires a steady hand and a diamond blade to avoid damaging the edges of the ceramic or stone tiles. You cannot simply smear new grout over the old because the bond will be weak and the color will bleed through. You need to remove at least two thirds of the depth of the existing grout. This creates a mechanical key for the new material to grab onto. I use an oscillating tool with a vacuum attachment. Dust is the enemy of a good bond. If there is a layer of dust in the bottom of the joint, the new grout will sit on top of it like a scab. It will eventually pop out. Once the joint is clean, you should wipe the edges of the tile with denatured alcohol. This removes any skin oils or soap scum that could prevent the grout from sticking. If you are working in showers with a style trendy ideas for small bathrooms, you must ensure the area is bone dry. Moisture trapped behind the tile will cause the new grout to discolor as it cures. This is known as efflorescence. It is a white salty crust that ruins the look of dark grout.
“Consistency in the water to powder ratio is the only path to a uniform cure and lasting pigment retention.” – Master Flooring Axiom
The chemistry of the modern bond
Modern grout additives like liquid latex polymers improve the flexibility and color consistency of the mix. When matching old grout, you must decide whether to use these additives or stick to a traditional water mix. Old grout was often just sand and cement. It was brittle. New high performance grouts are much tougher. However, the polymers can give the grout a slightly glossy finish that might not match the matte look of an old floor. You have to balance the need for durability with the need for a visual match. If the project involves showers that wow modern designs for 2025, you should almost always lean toward performance. A slight color mismatch is better than a leaking shower floor. For the most difficult matches, I use a grout stain or colorant. This is essentially a specialized epoxy paint that you brush over the cured grout. It seals the surface and provides a 100 percent uniform color across the entire room. This is the secret weapon for making a twenty year old floor look like it was installed yesterday. It also makes the grout waterproof, which is a huge plus for maintenance.
A checklist for the perfect grout match
- Deep clean the existing grout with a neutral pH cleaner to reveal the true color.
- Scrape out a small section of the old grout to check the depth and moisture levels.
- Perform a dry test by comparing dry powder samples to the cleaned joints.
- Mix a test batch with the exact water ratio and let it cure for 24 hours.
- Check the lighting in the room as LED versus incandescent bulbs change the color perception.
- Verify if the original grout was sanded or unsanded as this affects the texture.
- Assess the subfloor for any movement that might cause future cracking.
The final cure and long term protection
Protecting your new grout match involves a sealing process that must be timed correctly to avoid trapping moisture or changing the final shade. Wait at least forty eight hours before applying a penetrating sealer to ensure the hydration process is complete. If you seal too early, the moisture cannot escape. This leads to a cloudy finish. I always tell homeowners that the first week is the most critical. Do not use harsh chemicals. Do not scrub the new lines. Let the minerals stabilize. If you have done your job right, the patch will be invisible. You can learn more about maintaining this look at how to refresh grout without replacing it. It takes patience to do this. Most people want a quick fix. They want to be done in an hour. But a real floor professional knows that the clock is just another tool. You can’t rush chemistry. You can’t argue with physics. You just have to respect the process and the materials. If you have questions about a specific project, you can always reach out at contact us for expert advice. We have seen every type of failed grout imaginable. We know how to fix it the right way. It starts with the subfloor and it ends with the perfect pigment match. Anything else is just a temporary cover up. Real floors are built to last a lifetime, and that includes the lines between the tiles. Check out eco-friendly tile solutions for sustainable homes in 2025 for more ideas on durable materials. Your home deserves a foundation that is as strong as it is beautiful. Don’t settle for anything less than professional standards.