
The subfloor secret to successful grout removal
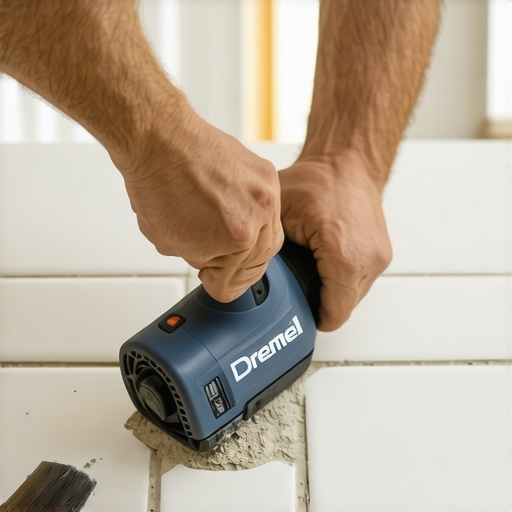
To remove grout with a Dremel safely, you must maintain a consistent depth of 1/8 inch while keeping the rotary tool at a 30-degree angle to avoid chipping tile edges. High RPM settings between 15,000 and 20,000 provide the necessary torque to pulverize cementitious grout without jumping. Most guys skip the leveling compound. They think the underlayment will hide the dip. It won’t. I spent three days grinding concrete on a job last month just so the floor wouldn’t click like a castanet, and that same level of precision is required when you take a high-speed bit to a finished floor. If the subfloor is bouncing, your hand will bounce, and that is exactly when a diamond bit bites into a piece of expensive porcelain. You cannot treat a rotary tool like a paintbrush. It is a miniature jackhammer. Every vibration travels through your wrist and into the tile assembly. If the tile was installed with poor coverage, leaving hollow spots underneath, the vibration of the Dremel will shatter the unsupported ceramic instantly. I have seen entire bathroom floors ruined because someone thought they could just zip through the joints without checking the structural integrity of the bond first.
The physics of rotary friction and ceramic failure
Grout removal physics involves the interaction between rotary bit speed, friction-induced heat, and the Mohs hardness scale of the tile glaze. Using a carbide bit at excessive speeds generates thermal expansion within the grout joint, which can lead to stress fractures in vitrified tiles. It is a matter of molecular agitation. When that bit spins at 20,000 revolutions per minute, it creates a localized heat zone. If you stay in one spot too long, that heat has nowhere to go but into the edge of the tile. Ceramic tiles are often harder than the grout, but they are also more brittle. The microscopic structure of a tile is designed to handle compressive loads from the top, not lateral vibration from the side. This is why a steady hand and constant movement are the only things standing between a clean joint and a jagged crack. You are essentially performing surgery on a floor. If you want to see how to maintain the surrounding area, you should look into tile cleaning tips for a sparkling bathroom in 2025 before you start the heavy demolition.
Tool selection for precision joint extraction
Selecting the correct Dremel bit requires matching the bit diameter to the grout line width, typically using a 1/16-inch carbide bit for narrow joints or a 1/8-inch diamond bit for wider spacing. The Dremel 568 grout removal attachment is a mandatory guide that maintains a fixed depth and prevents the bit from wandering across the tile face. I always tell my apprentices that the tool is only as good as the geometry of the bit. A worn-out bit does not cut, it rubs. Rubbing creates heat, and heat creates problems. You need a bit that evacuates the dust as it works. If the dust stays in the joint, it gets reground into a fine powder that acts as a lubricant, making your bit slide right out of the track and across your decorative border.
| Bit Type | Ideal Material | Lifespan | Risk Level |
|---|---|---|---|
| Carbide Grits | Sanded Grout | Medium | Moderate |
| Diamond Point | Epoxy Grout | High | Low |
| High Speed Steel | Non-Sanded Grout | Low | High |
The ghost in the expansion gap
Expansion gaps are the perimeter voids located at the junction of the floor and baseboards that allow for the natural movement of the subfloor assembly. Removing grout from these areas requires a low-torque setting to prevent damaging the bottom edge of baseboards or compromising the waterproof membrane in showers. When you get close to the walls, the physics change. The vibration has more places to reflect. If you hit a hidden spacer left behind by a lazy installer, the bit will kick back. This is why I always check the perimeter first. If you find the grout is hard-packed against the wall, you need to be even more careful. For those looking to upgrade the look after the grout is fixed, check out chic baseboard designs that transform rooms in 2025 for a better finish.
“A floor is only as good as the subfloor beneath it; deflection is the enemy of every joint.” – Master Flooring Axiom
Why your subfloor is lying to you
A unstable subfloor causes micro-deflection which manifests as cracked grout lines, necessitating a total grout replacement rather than a simple grout refresh. Before using a Dremel, you must perform a tap test with a plastic mallet to identify hollow-sounding tiles that are prone to shattering under rotary vibration. If you hear a hollow thud, that tile is a ticking time bomb. No amount of careful grinding will save it if the thin-set has delaminated from the back of the stone. You might think you are just fixing a cosmetic issue, but often you are uncovering a structural failure. While most people want the thickest underlayment, too much cushion actually causes the locking mechanisms on modern floors to snap under pressure, and the same logic applies to tile. Too much flex in the plywood below means the grout is the only thing holding the floor together. Once you remove it with your Dremel, the tile might just pop right off.
The 1/8 inch that ruins everything
Maintaining a consistent depth of 1/8 inch is the industry standard for grout re-application, ensuring enough surface area for the new cementitious bond to hold. Over-grinding can damage the tongue and groove of engineered cores or pierce the anti-fracture membrane, leading to moisture intrusion and mold growth. You have to be precise. If you go too shallow, the new grout will just flake out in a few weeks. If you go too deep, you are cutting into the structural integrity of the installation. It is a fine line. I have seen guys dive in like they are digging a trench and they end up cutting right through the Ditra or whatever waterproof layer is underneath. In a shower, that is a death sentence for the house. If you are working in a wet area, you should read about showers that wow modern designs for 2025 to understand how modern waterproofing works before you start cutting.
- Wear N95 respiratory protection to avoid inhaling silica dust.
- Tape off the edges of the tiles with painters tape to prevent scratches.
- Vacuum the joints every three linear feet to maintain visibility.
- Use a manual grout saw for the final corners where the Dremel cannot reach.
- Check the bit temperature every five minutes and allow it to cool.
The chemistry of the modern bond
Grout adhesion depends on a clean, dust-free channel and the chemical compatibility between the old thin-set and the new polymer-modified grout. Using a vacuum with a HEPA filter during the Dremel extraction process is mandatory to remove microscopic debris that prevents a mechanical bond. Once you have ground out the old stuff, you aren’t done. You have to wash those joints. Any leftover dust acts as a bond breaker. I have gone back to jobs where the homeowner tried to do it themselves and the new grout just pulled up in long strips like wet noodles. That is because they didn’t get the joint clean. They left a layer of pulverized cement at the bottom. You need to get in there with a stiff brush and some water after the Dremel is put away. For more on this, look at grout restoration secrets for long-lasting results to see the chemical side of the job.
“The installation of ceramic tile is a system, not a product; every component from the joists to the grout must act in unison.” – TCNA Handbook Principle
The sound of a failing joint
Auditory feedback from the rotary tool serves as an early warning system for tile stress, with a high-pitched whine indicating excessive friction and a dull chatter suggesting a loose subfloor. You have to listen to the machine. A Dremel will tell you when it is about to kick. If the pitch changes, you are either hitting the tile or the bit is loading up with melted plastic from some old sealer. Stop. Breathe. Adjust. If you are in a region like the humid Southeast, the grout might be slightly damp even if it looks dry, which turns the dust into a paste. That paste will overheat your bit in seconds. This is why professional installers don’t just rush through. We feel the vibration. We listen to the motor. If you want to avoid the mess entirely, sometimes you can find ways on how to refresh grout without replacing it, but if the grout is cracked, the Dremel is the only way out.
Navigating the vertical challenge
Removing grout from vertical shower walls requires a two-handed grip on the Dremel to counter the effects of gravity and prevent the cutting bit from sliding down the polished tile surface. The angle of attack must remain perpendicular to the joint, using the pinky finger as a stabilizing pivot point against the wall. Working on a wall is twice as hard as a floor. Your arms get tired. When your arms get tired, your hands shake. When your hands shake, you break tiles. I always set up a bracing point. I might even use a suction cup handle on the tile next to where I am working just to have something to hold onto. It is all about control. If you are doing a full renovation, you might want to look at showers with a style trendy ideas for small bathrooms to see if it is worth just retiling the whole thing. Sometimes the labor of removing grout is more than the cost of new tile.
The final sweep and inspection
The post-extraction phase involves a mechanical inspection of every inch of the tile grid to ensure no micro-cracks were formed during the Dremel operation. Any chipped edges must be smoothed with a diamond sanding pad before the new grout is applied to prevent stress concentrations. You aren’t finished until you have run your finger along every single line. If you feel a sharp edge, you missed a spot. If you see a tiny crack you didn’t notice before, that tile has to come out. It is better to replace one tile now than to have the whole floor fail in six months. This is the difference between a DIY job and a master installation. We don’t hide our mistakes. We fix them. If you have questions about specific materials, you can always contact us for a professional opinion. This process is grueling, but it is the only way to save a floor that was otherwise destined for the dumpster. Use the right tools, watch your heat, and never trust a subfloor you didn’t level yourself.