
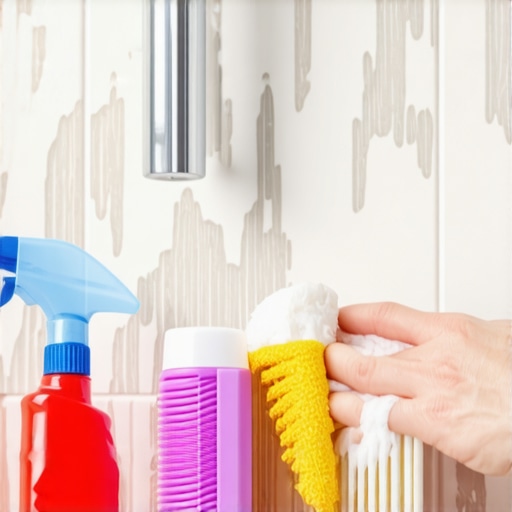
I spent three days grinding concrete on a job last month just so the floor wouldn’t click like a castanet, and that same level of precision is exactly what your shower deserves. Most guys skip the leveling compound on a subfloor because they think the underlayment will hide the dip. It won’t. The same logic applies to your shower fixtures. You think that chrome plate is keeping the water out. It isn’t. I have seen the same structural neglect in showers that I see in failing hardwood installations. When you ignore the small gap behind a handle, you are inviting a biological colony to set up shop in your wall cavity. My hands smell like WD-40 and oak dust most days, but the scent of black mold behind a shower valve is something you never forget. It is the smell of structural failure. Removing mold from this specific area requires more than a spray bottle and a prayer. You need to understand the physics of water surface tension and the chemistry of fungal growth. If you do not pull the handle, you are just cleaning the front door of a burning house.
The moisture trap behind your chrome
Removing mold from behind your shower handle requires the complete removal of the handle and escutcheon plate to access the hidden fungal colonies growing on the tile and grout surfaces. Water seeps behind the plate through capillary action, creating a dark, humid micro-environment where spores thrive on soap scum and skin cells. You must neutralize these spores with a 10 percent bleach solution or 6 percent acetic acid to ensure the structural integrity of the wall assembly remains intact. This is not just about looks. This is about preventing the rot of your backer board. If you want to keep the rest of your bathroom in peak condition, check out these tile cleaning tips for a sparkling bathroom in 2025. The physics of a shower handle are simple. The metal plate, called an escutcheon, sits against your tile. It usually has a thin foam gasket. Over time, that gasket compresses or degrades. When you spray the shower, water hits the top of the plate. Gravity pulls it down. Some of it slips behind the metal. It gets trapped there. It cannot evaporate because there is no airflow. This is a recipe for disaster.
“A shower is only as good as the waterproofing behind it, moisture is the enemy of every wall stud.” – Master Flooring Axiom
Why water finds the path of least resistance
Surface tension and capillary action are the primary forces that drive water behind your shower fixtures and into the porous grout lines. When water droplets cling to the edge of the shower handle, they are drawn into the microscopic space between the wall and the fixture. This is the same principle that causes subfloor joists to rot when a moisture barrier is missing. You need to understand that grout is essentially a hard sponge. Unless it has been treated with a high-grade sealer, it will suck that trapped water deep into the substrate. This is why learning grout restoration secrets for long lasting results is vital for any homeowner. The mold you see is just the fruiting body. The real problem is the hyphae, the root system, digging into your grout. It eats the minerals. It weakens the bond. Eventually, the tile will pop. I have seen it a thousand times. A homeowner thinks they have a small mold problem, but when I pull the tile, the thin-set is like wet sand.
The hidden chemistry of fungal colonies
Biofilms and organic matter accumulate behind the shower handle, providing the necessary carbon source for Aspergillus and Cladosporium to colonize the area. These fungi do not need much. They eat the sloughed-off skin cells and the fatty acids found in your expensive soaps. The chemistry of the removal is specific. You cannot just use any cleaner. Most people reach for a generic bathroom spray. Those often contain surfactants that do not actually kill the roots of the mold. You need an oxidizing agent. If you are interested in better materials for your home, consider eco friendly tile solutions for sustainable homes in 2025. I prefer a concentrated vinegar solution for porous surfaces because acetic acid penetrates deeper into the grout than chlorine bleach. Bleach has a high surface tension. It stays on top. The mold underneath laughs at it. You want something that will soak in and kill the colony at its base. That is how you stop the cycle.
Dissecting the shower valve assembly
A standard shower valve consists of a cartridge, a stem, and an escutcheon plate, all of which must be carefully disassembled to expose the mold-infested areas. You will need a set of hex keys, a Phillips head screwdriver, and perhaps a handle puller if the minerals have fused the metal together. Start by turning off the water. Do not skip this. I once saw a guy blow a cartridge out of a wall because he thought he could handle the pressure. It was a mess. Once the handle is off, look at the plate. If it is stuck, do not pry it with a screwdriver. You will chip the tile. Use a utility knife to cut the old caulk. Be surgical. This is about precision, not power. When the plate comes off, you will likely see a ring of black or green slime. That is your target. You are now looking at the raw intersection of plumbing and masonry.
| Material | Porosity | Mold Risk | Cleaning Method |
|---|---|---|---|
| Ceramic Tile | Low | Surface Only | Abrasive Scrub |
| Cement Grout | High | Deep Root | Acetic Acid Soak |
| Chrome Plate | None | Biofilm Only | Mild Detergent |
| Silicone Seal | Moderate | Internal | Complete Replacement |
The proper way to strip a handle
Removing the handle requires a systematic approach to avoid damaging the delicate ceramic cartridge inside the valve. First, locate the set screw. It is usually hidden under a small plastic cap or on the underside of the handle. Use the correct size hex key. If it is stripped, you are in for a long day. Once the screw is loose, pull the handle straight toward you. If it resists, it is likely calcified. Do not hammer it. Use a specialized descaler or a 50/50 mix of water and vinegar to dissolve the calcium deposits. Once the handle is removed, the escutcheon plate is usually held on by two long screws. Remove them. Now you can see the truth. The wall cavity around the valve is often open. If the mold has spread into the wall, you have a bigger problem. But usually, it is just on the surface of the tile and the grout. For those looking to upgrade the look while they are at it, check out showers that wow modern designs for 2025. Cleaning this area is about saturation. You need to let the cleaner sit for at least fifteen minutes. It needs time to work.
Chemical warfare against spores
Targeted antimicrobial treatments are the only way to ensure that microscopic spores do not immediately recolonize the shower valve area after cleaning. I don’t use the word “clean” when I talk about mold. I use the word “remediate.” You are changing the environment so the mold cannot live. After you have scrubbed the visible slime away with a stiff brush, you need to treat the grout. If the grout is severely stained, you might need to look into how to refresh grout without replacing it. Use a toothbrush to get into the crevices around the valve. Rinse with hot water. Dry the area completely. I use a heat gun or a hair dryer. You cannot seal a wet surface. If you put silicone over damp grout, you are just trapping the moisture in. It is like laying hardwood over a wet slab. It will fail. Every time. The area must be bone dry before you even think about the next step.
- Remove all visible debris with a plastic scraper.
- Saturate the area with 6 percent acetic acid.
- Scrub the grout lines with a stiff nylon brush.
- Rinse with distilled water to prevent mineral buildup.
- Dry the cavity with a heat gun or hair dryer.
- Apply a high-quality grout sealer.
- Replace the handle gasket with a new silicone bead.
The 1/8 inch gap that ruins everything
Precision sealing is the final and most important step in preventing future mold growth behind your shower handle assembly. Most people think more caulk is better. It isn’t. You want a clean, 1/8 inch bead of 100 percent silicone. Do not use latex caulk in a shower. It will peel in six months. Run the bead around the top and sides of the escutcheon plate. Leave the very bottom open. This is called a weep hole. If water does get behind the plate, it needs a way to get out. If you seal the bottom, you are creating a terrarium for mold. I see this mistake on high-end jobs all the time. Professionals should know better. While you are focusing on the details, consider how chic baseboard designs that transform rooms in 2025 can carry that same level of detail through the rest of the bathroom. A proper seal is about the bond between the silicone and the tile. It must be clean. It must be dry. If it is, that seal will last for years. If not, you will be doing this all over again in three months.
Reassembling for a watertight future
Proper reassembly of the shower handle components ensures that the mechanical integrity of the valve is not compromised during the cleaning process. Slide the escutcheon plate back over the valve stem. Tighten the screws evenly. Do not over-torque them or you will crack the tile. Once the plate is secure and the silicone is applied, slide the handle back on. Replace the set screw. Test the handle. It should move smoothly. If it feels gritty, you didn’t clean the minerals off the stem well enough. Take it back apart and do it right. A floor installer knows that the finish is only as good as the prep. The same is true here. If you want to see how this attention to detail looks in other parts of the house, look at baseboards makeover ideas to elevate your space. When the job is done, you should have a handle that looks new and a wall that is protected from the inside out. Don’t be the homeowner who ignores the small stuff. The small stuff is what rots your house. Keep your shower dry, keep your grout sealed, and keep your fixtures tight. If you have questions about more complex tile issues, you can always contact us for expert advice. This is a job that takes an hour but saves you thousands in water damage remediation down the road. Respect the process. Respect the physics. The mold won’t come back if you don’t give it a home. It is as simple as that.