How to Remove Old Silicone Caulk Without Scratching the Tub
I spent three days grinding concrete on a job last month just so the floor wouldn’t click like a castanet, and that experience reminded me why details matter. I walked into a bathroom where the previous installer had taken a metal putty knife to a brand new acrylic tub. The result was a series of jagged gouges that could never be buffed out. Removing silicone is not a race, it is a surgical procedure. Most homeowners and even some green contractors think a sharp blade and some elbow grease are enough. They are wrong. Silicone is a polymer that creates a chemical and mechanical bond with the surface of your tub, whether that is cast iron, porcelain, or acrylic. If you do not respect the physics of that bond, you will ruin the finish. I have spent 25 years on my knees in bathrooms across the country, and I have seen $10,000 bathroom remodels ruined by a single slip of a razor blade. You need to understand the molecular reality of the sealant. 100 percent silicone is an RTV sealant, which stands for Room Temperature Vulcanizing. It cures by reacting with moisture in the air to form a tough, flexible solid. This material is designed to withstand extreme temperatures and constant water exposure, which makes it a nightmare to remove once it has reached the end of its lifecycle. When the edges start to peel or black mold begins to colonize the microscopic pores in the sealant, it is time to act. But before you touch that tub, you need to know exactly what you are dealing with.
The phantom of the previous installer
Removing old silicone caulk requires a combination of chemical softening agents and non-marring mechanical tools to protect the finish of your tub. You must identify the material of your bathtub before selecting your removal method, as acrylic and fiberglass are significantly softer than cast iron or porcelain. Start by applying a specialized silicone remover to break the polymer bonds, then use a plastic scraper to lift the material without leaving permanent scratches on the substrate. This approach ensures that your showers and tubs remain in pristine condition for years to come. I once walked into a house where a $15,000 wide-plank walnut floor was cupping so bad it looked like a potato chip because the installer didn’t check the crawlspace humidity, and I see the same level of neglect in bathroom seals. People ignore the transition between the floor and the tub, but that is where the real damage starts. If you want to see how to integrate your floor and walls correctly, look at these chic baseboard designs that transform rooms in 2025 for inspiration. A poor seal at the tub base leads to subfloor rot, which is a much more expensive fix than a tube of caulk.
“A floor is only as good as the subfloor beneath it; deflection is the enemy of every joint.” – Master Flooring Axiom
Chemical warfare against polymer bonds
Silicone softeners are the most overlooked part of this process because people are impatient and want to start scraping immediately. These chemicals work by penetrating the silicone matrix and expanding the polymer chains, which effectively weakens the grip the sealant has on the tub surface. You should look for products containing aliphatic hydrocarbons or specialized esters designed specifically for RTV silicone. Apply the gel liberally and let it sit for at least four to eight hours. In colder, drier climates like Denver, the chemical reaction may take longer than in the humid air of New Orleans. If you try to scrape while the silicone is still hard, you are forced to use more pressure. More pressure equals more scratches. This is the same logic we use in grout restoration secrets for long-lasting results where preparation is 90 percent of the work. You cannot rush the chemistry. If you are working on a tile surround, be careful not to let the softener dwell too long on unsealed natural stone, as it can cause staining. Always test a small area near the baseboards to ensure the chemical won’t discolor your flooring or trim.
Tools that respect the finish
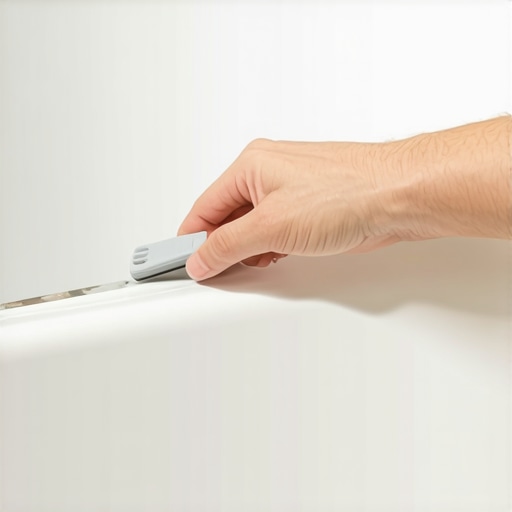
Plastic scrapers and nylon picks are the only tools that should ever touch an acrylic or fiberglass tub. While a stainless steel razor is tempting because of its sharpness, its Rockwell hardness is much higher than that of your tub, meaning it will win every time they collide. Plastic tools made of polyoxymethylene or high-impact polystyrene are hard enough to lift the silicone but soft enough to yield before they dig into the tub. Think of it like a sacrificial layer. I always keep a handful of these plastic chisels in my bag because they dull quickly. Once the edge is rounded, it is useless, and you should grab a new one. For the tight corners where the tub meets the showers walls, use a plastic caulk removal tool with a triangular head. This allows you to get into the 90 degree angle without putting undue stress on the tile edges. If you find the silicone is particularly stubborn, you can use a heat gun on its lowest setting, but you must be extremely cautious. Excessive heat can warp acrylic or cause fiberglass to de-laminate. It is a delicate balance of heat and patience.
| Tool Material | Surface Compatibility | Scratch Risk | Efficiency |
|---|---|---|---|
| Stainless Steel Razor | Cast Iron Only | Extreme | Very High |
| High-Impact Plastic | All Surfaces | Low | Moderate |
| Nylon Pick | Acrylic/Fiberglass | Zero | Low |
| Bamboo Skewer | Detail Work | Zero | Low |
The microscopic physics of the bathtub surface
Porcelain enamel is essentially a thin layer of glass melted onto a metal base, and while it is hard, it is also brittle. On a microscopic level, porcelain has small undulations and pores where silicone can anchor itself. If you pull the silicone too hard without softening it first, you can actually cause microscopic chips in the enamel, a process known as spalling. This is why we focus so much on the bond. In my 25 years, I have seen guys try to use wire brushes or abrasive pads to get the last bits of residue off. That is a death sentence for the shine of the tub. Once you scratch the surface, you increase the surface area for soap scum and mold to attach to. It is the same reason why tile cleaning tips for a sparkling bathroom in 2025 emphasize non-acidic cleaners. You want to maintain the integrity of the factory finish. If you are dealing with a textured slip-resistant bottom, the removal is even more difficult. In those cases, you must use a soft nylon brush and a lot of solvent to dissolve the residue rather than scraping.
A checklist for the surgical extraction
- Vacuum the area first to remove any grit or sand that could act as an abrasive.
- Apply a thick layer of silicone remover and cover with plastic wrap to prevent evaporation.
- Wait the full recommended duration, usually several hours or overnight.
- Use a plastic scraper at a 30 degree angle to lift the primary bead of caulk.
- Clean remaining residue with a microfiber cloth soaked in denatured alcohol.
- Inspect the gap for moisture or mold before applying new sealant.
- Wipe the surface with a lint-free rag to ensure no chemical film remains.
Why your baseboards are part of the moisture barrier
Moisture migration does not stop at the edge of the tub, as water often travels along the floor line to the nearest wall. When you are removing caulk, take a look at where the tub meets the floor. If the caulk there is failing, water is likely getting under your baseboards and soaking into the drywall or the subfloor. This is why I always recommend high-quality transitions. If you are looking to upgrade this area, check out baseboards makeover ideas to elevate your space to see how to properly finish these wet areas. In places with high humidity like Florida or the Gulf Coast, this seal is the only thing standing between you and a thousand dollar mold remediation bill. The gap between the tub and the floor should be filled with a 100 percent silicone sealant that matches your tile grout. This creates a flexible joint that can handle the weight of a full tub of water without cracking. If you use a rigid grout here, it will crack the first time someone takes a bath. Deflection is real, and the weight of 50 gallons of water plus a person is enough to move even a sturdy subfloor by a fraction of an inch.
“Water follows the path of least resistance; a microscopic gap in your caulk is a highway to your floor joists.” – TCNA Handbook Perspective
The math of the perfect bead
Calculating the volume of the joint is something most people skip, but it is why their caulk fails in six months. A joint needs to be deep enough to provide enough surface area for adhesion, but not so deep that the silicone cannot cure properly. For most tub surrounds, a 1/4 inch bead is the sweet spot. When you are applying the new silicone after your successful removal, you need to ensure the surface is bone dry. Even a single molecule of water trapped in a pore will prevent the silicone from bonding. This leads to what we call adhesive failure, where the caulk looks fine but can be pulled away like a piece of string. I always use a hairdryer to blast the gap for ten minutes before I even open the tube. If you are working in showers that are used daily, you might need to wait 24 hours with a fan running to ensure total evaporation. For those interested in the latest aesthetics, look at showers that wow modern designs for 2025 to see how clean lines and proper sealing go hand in hand.
Dealing with the residue ghost
Silicone residue is the thin, oily film that remains after the main bead is gone, and it is the primary cause of new caulk failure. This film is made of silicone oils that have migrated into the surface of the tub. If you do not remove this film, the new caulk will be trying to bond to the oil rather than the tub. Denatured alcohol is my go-to solvent for this. It evaporates quickly and doesn’t leave its own residue behind. Do not use mineral spirits or turpentine, as they are oily and will just create a new problem. Wipe the area until the cloth comes away clean and you hear a squeak when you rub your finger across the surface. That squeak is the sound of a clean substrate. If you are dealing with old tile, you might also need to look at how to refresh grout without replacing it if the previous installer smeared silicone all over the grout lines. Silicone on grout is a nightmare because it soaks into the cementitious matrix and makes it impossible for new grout or sealer to stick. You have to be meticulous. Use a small nylon brush to scrub the grout lines until every trace of the silicone is gone. It is tedious work, but it is the difference between a job that lasts ten years and one that lasts ten weeks.
Regional humidity and curing times
Atmospheric conditions change the way these materials behave on a structural level. In the swampy humidity of Houston, silicone might skin over in ten minutes, but take 48 hours to cure through to the center. In the bone-dry air of Phoenix, it might take much longer to skin over because there isn’t enough moisture in the air to trigger the vulcanization process. I have seen installers in the desert actually leave a damp towel in the tub to help the caulk cure. If you are doing a project in a coastal area, the salt in the air can also affect the longevity of the bond. Always choose a premium grade silicone with high anti-fungal properties for these environments. If you are considering an upgrade to your space, eco-friendly tile solutions for sustainable homes in 2025 offer great options that work well with modern high-performance sealants. Remember that the goal is a cohesive system where the tile, the showers pan, and the baseboards all work together to shed water. One weak link in the chain, and the whole system fails. Take your time, use the right chemicals, and keep the metal blades away from the acrylic. Your tub and your subfloor will thank you for the extra effort.”, “image”: {“imagePrompt”: “A close-up shot of a professional hand using a blue plastic scraper to gently lift a bead of old white silicone caulk from the edge of a pristine white acrylic bathtub, with a tile wall in the background and a bottle of denatured alcohol nearby. Soft natural bathroom lighting.”, “imageTitle”: “Safe removal of silicone caulk from acrylic tub”, “imageAlt”: “Plastic scraper removing old caulk from bathtub without scratching”}, “categoryId”: 0, “postTime”: “”}