
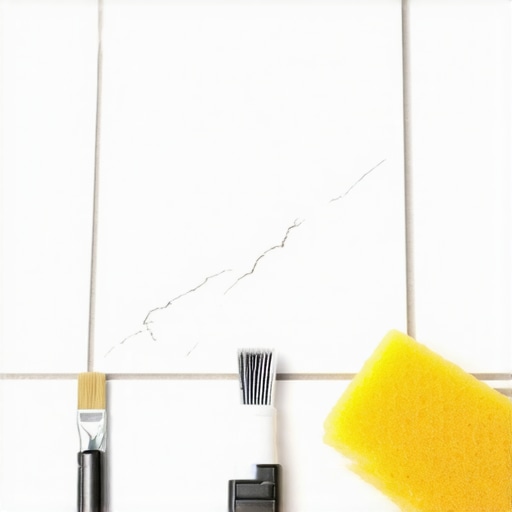
Mastering the Art of Ceramic Bathroom Tile Chip Repair
I spent three days grinding concrete on a job last month just so the floor wouldn’t click like a castanet. Most guys skip the leveling compound. They think the underlayment will hide the dip. It won’t. I have spent twenty five years on my knees with a moisture meter and a level. I smell like WD-40 and oak dust. When I see a chip in a bathroom tile, I do not see a small aesthetic flaw. I see a breach in the structural integrity of a performance surface. Ceramic tile is a sandwich of fired clay and glass glaze. When that glass shatters, the porous bisque underneath is exposed to the humid environment of the bathroom. If you ignore it, moisture will penetrate the clay, causing expansion and eventual delamination of the surrounding glaze. Repairing a chip is not just about looks. It is about sealing a structural envelope. To do this right, you need to understand the chemistry of the bond and the physics of the impact.
The microscopic truth about ceramic fractures
To repair a small chip in ceramic bathroom tile, you must use a color-matched epoxy resin or a ceramic repair kit. This process involves cleaning the porcelain or ceramic surface, mixing the two-part adhesive, filling the void in the glaze, and leveling the repair site with a razor blade. Ceramic is essentially a vitrified material. It is created when minerals like kaolin clay and feldspar are fired at temperatures exceeding 2,000 degrees Fahrenheit. This process creates a dense, brittle body. When a heavy object falls, the energy has nowhere to go. It shatters the surface glaze. The resulting chip often has jagged edges that catch dirt and bacteria. If you are working in showers with a style that features intricate patterns, a chip can ruin the entire visual flow. You must treat the repair like surgery. The first step is removing all microscopic debris from the crater. Use a vacuum, then scrub the area with 90 percent isopropyl alcohol. Do not use household cleaners. They leave behind a film of surfactants that will prevent your resin from bonding at a molecular level.
The subfloor secret that cracks your finish
Subfloor deflection is the primary cause of tile chips and cracks in residential bathrooms. If the plywood or concrete underneath the tile flexes more than 1/360th of the span, the rigid tile will eventually fail under point-load pressure. Most homeowners think their tile broke because they dropped a jar. Often, the tile broke because it was suspended over a microscopic void. When the jar hit, the tile had no support and snapped. This is why I obsess over the TCNA standards for subfloor preparation. If your floor has a dip, the tile is under constant tension. Repairing a chip on a floor with high deflection is a temporary fix. The movement will eventually pop the epoxy patch right out. You should check the surrounding grout lines for signs of movement. If you see fine powder or cracks, you have a bigger problem than a single chip. You might need grout restoration secrets to stabilize the installation before focusing on the cosmetic repair.
“A floor is only as good as the subfloor beneath it; deflection is the enemy of every joint.” – Master Flooring Axiom
Chemical properties of high performance resins
The choice of repair material dictates the longevity of the fix, with two-part epoxies offering the highest bond strength and durability. These resins create a chemical link with the ceramic bisque that resists moisture and heat better than one-part acrylic fillers. When you mix a resin and a hardener, an exothermic reaction occurs. This creates a polymer chain that is incredibly strong. One-part fillers, the kind you find in squeeze tubes at big-box stores, rely on evaporation to harden. This leads to shrinkage. As the water or solvent leaves the filler, the volume decreases, leaving a concave divot in your tile. A two-part epoxy does not shrink. It maintains its mass as it cures. This allows for a flush, flat finish that mimics the original glaze. You must also consider the refractive index of the material. Glassy glazes reflect light in a specific way. If your repair material is too matte, it will stand out like a sore thumb. I always recommend adding a drop of clear coat or high-gloss sealer once the epoxy is cured to match the sheen of the surrounding bathroom floor.
| Repair Material | Bond Strength | Drying Time | Flexibility | Best Use Case |
|---|---|---|---|---|
| Two-Part Epoxy | High | 24 Hours | Low | Structural floor chips |
| Acrylic Resin | Medium | 4 Hours | Medium | Wall tile aesthetics |
| Grout Pens | Low | 1 Hour | N/A | Superficial color fixes |
| Cyanoacrylate | High | 1 Minute | Brittle | Tiny hairline cracks |
Surgical steps for an invisible repair
An invisible tile repair requires a steady hand, precise color matching, and a multi-stage sanding process. You must build the repair in layers if the chip is deeper than one-eighth of an inch to ensure proper curing. Start by protecting the healthy tile. Apply blue painter’s tape exactly up to the edge of the chip. This prevents the epoxy from hazing the surrounding glaze. Mixing the color is the hardest part. Ceramic tiles are rarely a single flat color. They have depth and variegation. Use a kit that includes primary color pigments. Mix your base color first, usually a white or bone, then add tiny amounts of brown or black to match the undertone.
- Degrease the tile surface with 90 percent isopropyl alcohol.
- Tape off the surrounding glaze to prevent epoxy haze.
- Mix the pigment into the resin before adding the hardener.
- Overfill the chip slightly to account for resin shrinkage.
- Level the site with a fresh single-edge razor blade at a 45-degree angle.
Once the epoxy is applied, do not touch it. Let it sit for at least twelve hours. If you try to sand it too early, you will tear the polymer chains and leave a gummy mess. After it is fully hard, use 600-grit wet sandpaper to level it. Then move to 1200-grit for a polished finish. This is the difference between a handyman job and a master craftsman result.
The 1/8 inch that ruins everything
Precision in the expansion gaps and grout lines is what separates a professional bathroom from a DIY disaster. If your repair sits too close to a grout line, the structural movement of the house will cause the patch to fail. Every bathroom needs an expansion gap where the tile meets the wall. This is usually hidden by chic baseboard designs. If your tile was installed tight against the wall, the pressure from the house settling has nowhere to go but into the tile. This pressure can cause the glaze to