
Cutting Large Format Tiles Without a Heavy Wet Saw
Most guys skip the leveling compound. They think the underlayment will hide the dip. It won’t. I spent three days grinding concrete on a job last month just so the floor wouldn’t click like a castanet. When you are dealing with large format tiles, or LFT as we call it in the trade, the margin for error disappears. These tiles, often measuring 24 by 48 inches or larger, do not bend. They are rigid slabs of porcelain fired at temperatures exceeding 2,200 degrees Fahrenheit. This sintering process creates a material so dense it has a water absorption rate of less than 0.5 percent. If your subfloor has a hump or a valley, that tile will eventually crack or the lippage will be so bad you could trip over it in the dark.
The mechanics of the score and snap method
Manual tile cutters and angle grinders with diamond blades are the primary tools for cutting large format tiles without a wet saw. These tools utilize a score and snap technique or high-speed abrasive cutting to manage porcelain slabs that exceed 24 inches in length. This approach is often faster and cleaner than dragging a 150 pound wet saw onto a second story job site where water management is a nightmare.
When you use a manual snap cutter, you are engaging in a game of controlled tension. The tungsten carbide scoring wheel creates a microscopic fracture line across the vitreous surface of the tile. This is not about deep gouging. You are looking for a consistent, light scratch that looks like a hair. If you press too hard, you create jagged chips in the glaze. If you press too light, the tension will not follow the path. The breaker bar then applies localized pressure on either side of that fracture. Because porcelain is brittle, the fracture propagates through the entire body of the tile in a fraction of a second. It is pure physics. The lever arm of a 48 inch cutter provides massive mechanical advantage, allowing you to snap a half inch thick porcelain plank with minimal physical effort.
“A floor is only as good as the subfloor beneath it; deflection is the enemy of every joint.” – Master Flooring Axiom
I have seen guys try to use a $40 score and snap tool from a big box store on a $20 per square foot Italian porcelain. It never works. The rails flex, the wheel wobbles, and you end up with a $100 piece of trash. You need a professional grade cutter with a rigid I-beam or dual rail system. This ensures the score is perfectly straight from the top edge to the bottom. If that line deviates by even a millimeter, the snap will go wild. This is especially true in regions like Houston where the humidity can affect how some backer boards behave, though the tile itself remains a cold, hard constant. In dry climates like Phoenix, the dust from cutting becomes even more of a nuisance, making the manual snap cutter a superior choice for indoor work.
Why your subfloor is lying to you
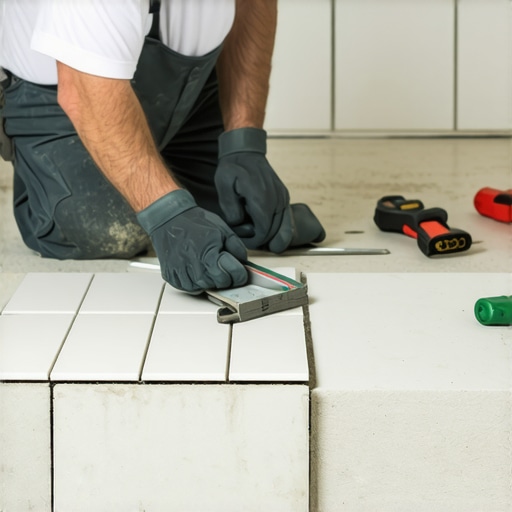
Subfloor flatness is the single most important factor when installing large format tiles without a wet saw. You must achieve a flatness of 1/8 inch within a 10 foot radius according to ANSI A108.19 standards. Failure to meet these specs leads to lippage, where one tile edge sits higher than its neighbor, creating a permanent trip hazard and an eyesore. [IMAGE_PLACEHOLDER]
If you find a dip, you don’t just throw more thin-set in there. Thin-set is an adhesive, not a leveler. As the water evaporates from a thick pile of mortar, it shrinks. This shrinkage pulls the tile down, creating a hollow spot or a lip. I use a 10 foot straightedge to find every low point. I circle them with a wax pencil. Then I use a high flow self-leveling underlayment. It is a pain, and it adds a day to the job, but it is the only way to ensure the tile doesn’t fail. When you are ready to finish the room, you will want to look at chic baseboard designs that transform rooms in 2025 to cover those expansion gaps properly. You need that gap at the perimeter because even though the tile is stable, the house moves.
Tooling for the professional installer
Angle grinders equipped with thin diamond blades allow for complex cuts such as L-shaped notches or U-cuts around plumbing stubs. While a manual snap cutter is limited to straight lines, the grinder provides the versatility needed for intricate bathroom layouts. Using a vacuum shroud is mandatory if you want to keep the job site breathable and avoid a massive cleanup.
I prefer a 4.5 inch grinder with a variable speed trigger. Cutting porcelain at 11,000 RPM creates a lot of heat. If the blade gets too hot, the diamond matrix glazes over and stops cutting. You end up burning the tile. I keep a damp sponge nearby and periodically touch the blade to it, or I slow the speed down. The blade choice is everything. You want a continuous rim blade specifically rated for porcelain. A segmented blade will chatter and chip the edge. If you are working on showers that wow modern designs for 2025, you cannot afford a single chipped edge on a visible corner.
| Tool Type | Best For | Max Tile Thickness | Dust Level |
|---|---|---|---|
| Manual Snap Cutter | Straight cuts | 15mm | Zero |
| Angle Grinder | L-cuts and U-cuts | Unlimited | High |
| Diamond Hand Pad | Edge smoothing | N/A | Low |
| Hole Saw | Plumbing stubs | 20mm | Medium |
The 1/8 inch that ruins everything
Expansion gaps at the perimeter of the room must be maintained at a minimum of 1/8 inch to 1/4 inch depending on the total span. This gap allows the structure of the home to expand and contract without putting lateral pressure on the tile grid. Without this space, the tiles will eventually tent or buckle, leading to a catastrophic floor failure that is not covered by any warranty.
People think tile is indestructible. It is not. It is strong under compression but weak under tension. If the walls of your house squeeze that tile floor, the floor has nowhere to go but up. I have walked into jobs where the tiles were literally popping off the floor like a deck of cards. It sounds like a gunshot when it happens. This is why I always leave a gap and hide it with a baseboard or a color matched 100 percent silicone sealant. Never use grout in a change of plane or at the perimeter. Grout is rigid. It will crack. If you have old grout issues elsewhere, you should check out how to refresh grout without replacing it before you start a new project.
- Check for subfloor flatness using a 10 foot straightedge.
- Vacuum the substrate to ensure a proper bond for the thin-set.
- Mark your cut lines with a grease pencil on the tile surface.
- Score the tile in one continuous motion from edge to edge.
- Apply steady pressure to the breaker bar until the tile snaps.
- Smooth the cut edge with a 200 grit diamond hand sanding pad.
“Large format tile requires a minimum of 95 percent mortar contact in wet areas to prevent water pooling in voids.” – TCNA Handbook Standards
Managing tension in porcelain slabs
Relieving internal stress in the tile is a requirement before making complex cuts with an angle grinder. You must drill a small hole at the corner of an L-cut to prevent the fracture from continuing into the main body of the tile. This technique, known as stress relief drilling, is the difference between a successful install and a pile of broken porcelain.
When you cut an L-shape into a large tile, you are creating a point of concentrated stress. If you just run the grinder into the corner, the vibration and the heat will eventually cause a crack to spider out from that 90 degree angle. I use a diamond core bit to drill a 1/4 inch hole at the junction of my two cut lines. Then I cut into that hole. This rounds the internal corner, distributing the stress. It is the same principle used in aircraft windows. After the cut is made, I use a diamond hand pad to take the sharpness off the edge. If the tile edge is going to be exposed, I spend twenty minutes polishing it through the grits until it looks like a factory edge. If you are doing a bathroom, remember to look at tile cleaning tips for a sparkling bathroom in 2025 so you can tell the homeowner how to maintain that finish.
The final word on large format installation
Large format tile is not for the faint of heart or the poorly equipped. It requires a level of precision that smaller 12 by 12 tiles simply do not demand. Every movement must be calculated. The way you mix your thin-set matters. The way you back-butter the tile matters. The way you handle the tile after it is cut matters. These slabs are heavy and awkward. I use suction cup handles to move them into place. It saves my back and prevents me from dropping a $150 slab. If you treat the floor like an engineering project instead of a weekend DIY task, it will last for fifty years. If you rush the prep or use the wrong tools, you will be ripping it out in five. Keep your tools clean, keep your subfloor flat, and never trust a house to be square. It never is.