
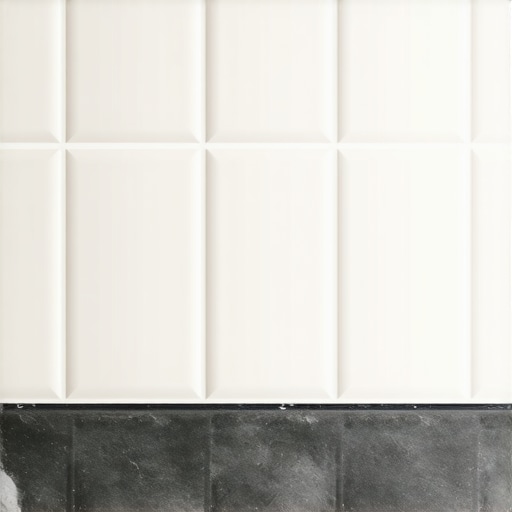
The raw truth about tile terminations
Finishing the edge of a subway tile backsplash requires using bullnose tiles, metal transition profiles, or hand-polished mitered cuts to hide the raw ceramic biscuit. You must ensure the termination point is mechanically sound and chemically bonded with high-grade modified thin-set to prevent moisture intrusion or edge delamination. Proper planning starts with substrate preparation and ends with high-performance silicone or grout color-matching to create a professional, durable finish.
Most guys skip the leveling compound. They think the underlayment will hide the dip. It won’t. I spent three days grinding concrete on a job last month just so the floor wouldn’t click like a castanet. Tile is exactly the same. People think the tile hides the wall, but it actually highlights every bow in the stud. If your wall is out of plumb by even an eighth of an inch, your subway tile edge will look like a staircase. I have seen fifteen thousand dollar kitchens ruined because the installer didn’t want to spend an hour with a straightedge and some shims. You have to treat the wall as a structural engineering challenge before you even open a box of tile. The edge is where all your sins come to light, and in my twenty-five years on my knees, I have learned that a bad edge is the first step toward a failing installation.
The physics of the ceramic bond
When you press a subway tile into a bed of mortar, you are engaging in a complex mechanical and chemical interaction. Most subway tiles are made of ceramic with a vitreous glaze. The back of the tile, known as the biscuit, is porous. When you apply an ANSI A118.4 modified thin-set, the water carries polymer chains into those pores. As the mortar hydrates, it forms microscopic crystals that lock into the tile. The edge is the most vulnerable point of this system. Without a proper termination, the edge of the mortar is exposed to air, which can cause it to dry too quickly and become brittle. This is why choosing the right finishing method is not just about looks. It is about protecting the integrity of the bond. If you leave a raw edge, you are inviting moisture to travel behind the tile via capillary action. This is especially dangerous in areas near sinks or modern showers that wow where water is a constant presence. You need a transition that seals the system.
“A floor is only as good as the subfloor beneath it; deflection is the enemy of every joint.” – Master Flooring Axiom
Metal profiles and the technical advantage
Modern installations often favor metal profiles, such as those made from anodized aluminum or stainless steel. These profiles, often referred to by brand names like Schluter, provide a mechanical shield for the tile edge. The profile has an anchoring leg that is embedded in the thin-set under the tile. This leg is perforated to allow the mortar to squeeze through and create a solid lock. The vertical flange of the profile protects the ceramic edge from impact. Ceramic is strong in compression but weak in tension and shear. If you hit the edge of a subway tile with a heavy cast-iron skillet, it will chip. A metal profile absorbs that energy and distributes it across the substrate. When selecting a profile, you must match the height of the tile plus the thickness of the mortar. If you are using a standard three-by-six subway tile, it is usually five-sixteenths of an inch thick. You should use an eight-millimeter or ten-millimeter profile to account for the thin-set bed. Metal also handles thermal expansion better than plastic. In a kitchen, where the wall behind the stove can reach high temperatures, the metal profile and the tile expand at different rates. You must leave a small gap for grout between the tile and the profile to act as a movemenet joint.
The bullnose traditionalist approach
For decades, the bullnose tile was the only way to finish an edge. A bullnose tile has one or two factory-rounded edges that are glazed. This allows the tile to curve back toward the wall, creating a soft transition. The challenge today is that many manufacturers have stopped making matching bullnose for every line of tile. If you find yourself in this position, you have to get creative. You can use a pencil liner, which is a thin, rounded strip of tile, or a quarter-round. The key to a successful bullnose transition is the layout. You never want to end with a tiny sliver of tile at the edge. I always calculate my layout from the most visible edge inward. This ensures the finished termination looks intentional rather than like an afterthought. If you are working around baseboards makeover ideas to elevate your space, you must ensure the tile edge meets the wood trim at a clean ninety-degree angle or is recessed slightly to allow for a bead of caulk.
| Method | Structural Strength | Moisture Resistance | Technical Difficulty |
|---|---|---|---|
| Metal Profile | Extreme | Very High | Low |
| Bullnose Tile | High | High | Medium |
| Mitered Edge | Medium | Medium | Extreme |
| Caulk Termination | Low | Medium | Low |
Why your subfloor is lying to you
You might think a backsplash has nothing to do with a subfloor, but you would be wrong. Every wall in your house sits on a plate that sits on the floor system. If your floor is sagging or bouncing, that movement is transferred directly into the wall studs. This causes the drywall to flex. If you have finished your subway tile edge with a rigid grout and no movement joint, the grout will crack. This is the ghost in the expansion gap. I have seen beautiful tile jobs develop hairline fractures along the entire perimeter because the installer didn’t account for structural deflection. This is why you must use a high-quality silicone caulk at the transition between the backsplash and the countertop, and where the tile meets vertical cabinetry or walls. Silicone is an elastomer, meaning it can stretch and return to its original shape. Grout cannot. If you want to keep your installation looking new, you should study grout restoration secrets for long lasting results to understand how to handle these failure points over time.
The precision of the mitered cut
For the true craftsman, the mitered edge is the gold standard. This involves cutting the back of the tile at a forty-five-degree angle so that two pieces meet at a perfect ninety-degree corner. This is common on outside corners of a backsplash or where the tile wraps into a window reveal. Doing this with subway tile requires a wet saw with a high-quality continuous rim diamond blade. You cannot use a snap cutter for this. The blade must be spinning at high revolutions with a constant stream of water to prevent the glaze from chipping. Once the cut is made, I use a two-hundred-grit diamond hand-polishing pad to smooth the sharp edge. This is called easing the edge. It makes the transition less sharp and more resistant to chipping. A mitered corner is a beautiful thing, but it is fragile. If the house settles, the miter is the first place to crack. I always back-butter these pieces with extra mortar to ensure there are no air pockets behind the joint. An air pocket is a weakness that will eventually lead to a break.
“Deflection is the enemy of every joint; a floor is only as good as the subfloor beneath it.” – Tile Council of North America Axiom
Tooling and chemistry for a perfect finish
The final step in finishing an edge is the grout and caulk. Most people think grout is just colored sand, but modern high-performance grouts are engineered with polymers and rapid-setting cements. When you apply grout to the edge of a metal profile or a bullnose tile, you must pack it tight. Use a hard rubber float at a forty-five-degree angle to the joint. This ensures the grout reaches the full depth of the tile. If you leave voids, water will get in. For the very edge where the tile meets the painted wall, I recommend a sanded caulk that matches the grout color. This provides a clean line that can be painted over if needed. If you are struggling with old installations, you might need to look into tile cleaning tips for a sparkling bathroom in 2025 to see how to maintain these transitions. A clean edge is a long-lasting edge. Remember that the chemistry of your cleaning products matters. Acidic cleaners will eat away at Portland cement-based grouts over time, eventually weakening the edge of your tile work.
Expert Edge Checklist
- Verify substrate is plumb within one-eighth inch over ten feet
- Select metal profiles based on tile thickness plus mortar bed height
- Acclimate tile to room temperature for forty-eight hours prior to install
- Use continuous rim diamond blades for all visible field cuts
- Apply silicone caulk at all change-of-plane transitions
- Maintain a consistent grout joint width of at least one-sixteenth inch
The regional moisture factor
Depending on where you live, the way you finish an edge might change. In high-humidity environments, the moisture in the air can actually slow the curing process of your mortar. In dry desert climates, the opposite happens. The wall can suck the moisture out of the thin-set so fast that the tile never develops a proper bond. This is why I always damp-wipe the back of my tiles and the surface of the wall before I start. It satisfies the thirst of the materials so they don’t steal the water from the chemical reaction of the cement. Whether you are working on a backsplash or showers with a style for small bathrooms, the physics remains the same. Control the moisture, control the bond, and you will control the life of the floor or wall. Finishing an edge is not just the end of the job, it is the seal that protects your investment for the next thirty years. [{“@context”:”https://schema.org”,”@type”:”HowTo”,”name”:”How to finish the edge of a subway tile backsplash”,”step”:[{“@type”:”HowToStep”,”text”:”Assess the wall for plumbness and flat surfaces using a six-foot level.”},{“@type”:”HowToStep”,”text”:”Select a finishing method such as bullnose tiles or metal profiles.”},{“@type”:”HowToStep”,”text”:”Measure tile thickness and add 2mm for the mortar bed to choose the correct trim size.”},{“@type”:”HowToStep”,”text”:”Install the trim or bullnose into a bed of modified thin-set, ensuring full coverage.”},{“@type”:”HowToStep”,”text”:”Grout the joints using a high-performance polymer-modified grout.”},{“@type”:”HowToStep”,”text”:”Seal transitions to other materials with 100% silicone caulk.”}]}]