
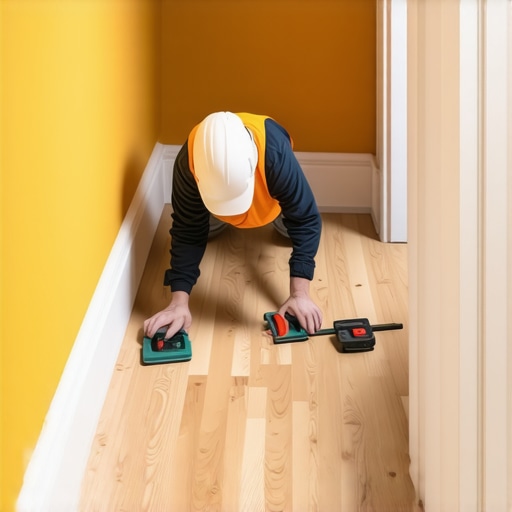
The phantom dip in the subfloor
Scribing baseboards to a sloping bathroom floor involves using a compass or scribing tool to transfer the uneven floor profile onto the trim material. This technique eliminates gaps caused by foundation settling or improper subfloor leveling, ensuring a waterproof seal and a professional finish for bathroom renovations.
Most guys skip the leveling compound. They think the underlayment will hide the dip. It won’t. I spent three days grinding concrete on a job last month just so the floor wouldn’t click like a castanet. When you are dealing with bathrooms, the stakes are higher. You have showers, tile, and constant moisture. If your baseboard is not sitting tight against that tile, you are inviting trouble. Water finds a way. It travels through the grout lines and sits under your trim. I have seen 25 year old oak rot in six months because someone thought a fat bead of caulk could fix a half inch slope. It can not. You have to cut the wood to fit the reality of the floor. That is what we call scribing. It is the difference between a floor that lasts and a floor that fails. I have spent my life with sawdust under my nails because I refuse to accept a gap. If you can fit a credit card under your baseboard, you have failed the installation. We are looking for a molecular level fit here. The subfloor is the foundation of everything. If that subfloor is not flat, your baseboards will tell the world. People think baseboards are just for show. They are not. They protect the expansion gap required for your flooring to breathe.
The physics of the bathroom slope
Bathroom floors often slope toward drains or settle near heavy plumbing stacks, creating irregularities in the subfloor elevation. Understanding deflection and subfloor physics is vital for a durable installation that withstands high humidity and heavy foot traffic. Gravity is a constant enemy. Over decades, the weight of a cast iron tub or the constant vibration of a washing machine nearby can cause the floor joists to bow. This creates a valley. If you try to force a straight piece of baseboard into a valley, one of two things happens. Either the board snaps, or the nails pull out of the studs within a week. Neither is acceptable. You must understand the material. Wood has a cellular structure that reacts to the environment. In a bathroom, the humidity fluctuates wildly. When you take a hot shower, the air saturates. The wood fibers absorb that moisture and expand. If the board is under tension because you tried to bend it into a dip, that expansion will cause it to buckle or warp. We use scribing to ensure the wood stays in a neutral state. It rests on the floor. It does not fight the floor. This is especially true when you have showers that wow but a baseboard that screams amateur hour. You need to match the quality of your finish work to the quality of your tile.
“A floor is only as good as the subfloor beneath it; deflection is the enemy of every joint.” – Master Flooring Axiom
The tool kit for a perfect scribe
Precision scribing requires a professional compass, a sharp pencil, and a jigsaw with a fine-tooth blade. These tools allow the installer to map micro-elevations on the baseboard surface, ensuring structural alignment with the grout lines and tile layout. I do not use those cheap plastic school compasses. You need something with a locking nut. If the legs of your compass move while you are drawing your line, your scribe is garbage. I prefer a dedicated scribing tool with a brass body. It has a weight to it that helps you maintain a steady hand. You also need a pencil with a high graphite content, something like a 2B. You need a dark, clear line that you can see through the dust of your saw. Speaking of saws, do not use a standard framing blade. You need a down-cut jigsaw blade. A standard blade pulls the wood fibers upward, which chips the finish on the face of your baseboard. A down-cut blade pushes the fibers down, leaving a crisp edge on the top where it matters. If you are working with chic baseboard designs, you cannot afford to have ragged edges. You are aiming for a cut that looks like it grew out of the tile.
| Material Type | Moisture Resistance | Scribing Difficulty | Best Use Case |
|---|---|---|---|
| Solid Pine | Low | Easy | Dry areas only |
| MDF | Very Low | Moderate | Never in bathrooms |
| PVC Trim | Highest | Easy | High moisture showers |
| Primed Poplar | Moderate | Moderate | General bathroom use |
The 1/8 inch that ruins everything
Expansion gaps and tolerances are the most misunderstood aspects of floor trim installation. A gap larger than 1/8 inch allows moisture infiltration behind the baseboard, leading to mold growth and structural rot within the wall cavity. When you are scribing, you are often dealing with very small measurements. A dip of 1/8 inch across a four foot span might not look like much to the naked eye. But once that baseboard is painted and the light hits it from the side, it looks like a canyon. I have walked onto jobs where the installer tried to fill a 1/4 inch gap with caulk. It looks like a white worm crawling along the floor. It is hideous. More importantly, caulk is not a structural material. It is a sealant. If the gap is too wide, the caulk will eventually shrink and pull away from the tile. Now you have a highway for water to get under your floor. If you have spent money on eco-friendly tile solutions, the last thing you want is mold growing in the subfloor. You have to get the wood close. I aim for a fit within 1/32 of an inch. That is the thickness of a thumbnail. When you get it that close, a tiny bead of silicone-based caulk is all you need. The silicone remains flexible, allowing for the natural movement of the house without breaking the seal.
A step by step guide to the scribe
Professional baseboard scribing involves a mechanical transfer of the floor profile to the trim board using calibrated instruments. Following a systematic protocol ensures that baseboard makeover ideas translate into functional architectural elements.
- Level the baseboard across the high points of the floor and tack it into place with a single nail.
- Set your compass to the width of the largest gap between the floor and the bottom of the board.
- Run the metal tip of the compass along the floor while the pencil side marks the board.
- Remove the board and cut along the pencil line using a jigsaw at a slight back-bevel angle.
- Test the fit and use a hand plane or sanding block for final microscopic adjustments.
- Apply a high-quality sealant to the bottom edge before final nailing to prevent moisture wicking.
I always use a back-bevel. This means I tilt the jigsaw blade about 5 degrees. By cutting more material away from the back of the board than the front, I ensure that the front edge is the only part making contact. This makes it much easier to get a tight fit. If the back of the board hits a high spot in the grout, the front will still look perfect. It is a trick I learned forty years ago and it has never failed me. It is also vital to keep your tools clean. If there is dried grout on the floor where you are scribing, your compass will jump. Use a scraper to clear the path first.
The chemistry of the baseboard bond
Adhesive selection for bathroom trim must account for hydrostatic pressure and thermal expansion. Using a modified polymer adhesive in conjunction with pneumatic fasteners creates a hermetic seal that protects the subfloor integrity. People think a few nails are enough. In a bathroom, it is not. You need a secondary bond. I use a polyurethane-based construction adhesive on the back of the board. Unlike standard wood glue, polyurethane does not break down when it gets wet. It actually cures faster in the presence of moisture. This creates a waterproof barrier behind the board. If a pipe leaks or a shower overflows, that adhesive keeps the water from reaching the drywall. We are talking about the molecular bond here. The adhesive fills the microscopic pores in the wood and the wall. It becomes one unit. This is especially important if you are using baseboards makeover ideas to hide old water damage. You cannot just cover it up. You have to seal it out. I also pay close attention to the nails. I use stainless steel finish nails in bathrooms. Regular steel nails will rust over time due to the steam from the shower. Those rust spots will eventually bleed through your paint, looking like little orange freckles on your trim. It is a sign of a lazy installer.
“Precision is not an accident; it is the result of high intention and sincere effort.” – Master Flooring Axiom
Why your subfloor is lying to you
Subfloor flatness is rarely architecturally perfect, and optical illusions caused by light and shadow can hide structural defects. A moisture meter and a six-foot level are the only ways to verify the true state of your bathroom floor. I have seen floors that looked flat as a pancake until I put a laser on them. The human eye is easily fooled. The way the light comes through a bathroom window can make a huge hump look like a flat plane. You have to trust your tools, not your eyes. If the floor is out of level by more than 3/16 of an inch over ten feet, you are outside the NWFA standards. At that point, you are not just scribing, you are performing surgery. You have to decide if you are going to level the floor or scribe the board. In a bathroom with existing tile, you do not have the luxury of leveling. You are stuck with the slope. That is why scribing is a mandatory skill for any real floor man. You also have to consider the humidity of the region. If you are in a swampy area, your wood is going to be expanded when you install it. If you are in the desert, it will be bone dry. You have to account for that movement. I like to let my trim acclimate in the bathroom for at least 72 hours. This lets the moisture content of the wood stabilize with the room. If you take wood from a cold truck and nail it straight to a warm bathroom wall, it will move. And when it moves, your beautiful scribe line will open up.
The final seal against the elements
Finishing a scribed baseboard requires a silicone-latex hybrid caulk that offers maximum elasticity and fungicidal properties. Maintaining grout restoration secrets and clean lines ensures the bathroom aesthetic remains uncompromised for years. Once the board is nailed and glued, you have to seal the deal. I do not use standard painter’s caulk. It is too brittle. I use a high-performance sealant that can handle 25 percent movement. You apply a very thin bead along the scribe line. You are not trying to fill a gap, you are just providing a skin. Then you tool it with a wet finger or a profiling tool. This forces the sealant into the joint. If you have done your job right and used grout restoration secrets to keep your floor looking new, this final seal will be invisible. It is the ghost in the expansion gap. It is there, doing its job, but nobody sees it. That is the hallmark of a master. We do not want people to notice our work. We want them to notice the beauty of the room. A perfectly scribed baseboard should look like it was carved into place by a master stonemason. It should be part of the architecture, not an afterthought. Do not let a sloping floor ruin your project. Take the time, use the compass, and cut the line. Your floor deserves that much respect.