
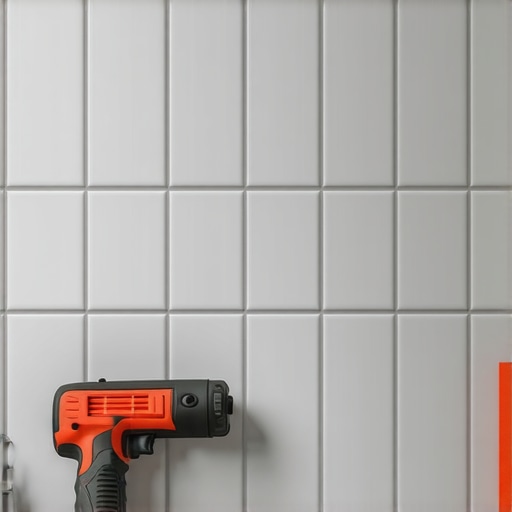
Precision Engineering for a Level First Row of Shower Tile
I spent three days grinding concrete on a job last month just so the floor wouldn’t click like a castanet. Most guys skip the leveling compound. They think the underlayment will hide the dip. It won’t. I walked into that bathroom with my laser level and saw a 3/8 inch dip over a four foot span. If I had set that first row of tile on that dip, the entire wall would have looked like a drunk man built it. I had to grind it down, then build it back up with self-leveler until it was dead flat. My hands smelled like WD-40 and the dust was so thick I could taste the silicate, but that is the price of a floor that lasts fifty years. Most people think tile is about the finish. They are wrong. Tile is about the physics of the substrate. If you do not respect the subfloor, the subfloor will eventually destroy your work. This is especially true in a shower, where water and gravity conspire against every joint and every bead of sealant.
The gravity of a crooked ledger board
A level first row of shower tile depends on the installation of a temporary ledger board that supports the weight of the tile while the thin-set cures. This board must be perfectly level to ensure that every subsequent row remains aligned and the grout joints stay consistent throughout the installation. If you try to start your tile directly on a sloped shower pan, you will fail. The pan is designed to move water to the drain, which means it is never level. You must find the lowest point, calculate your tile layout, and screw a straight piece of lumber or a metal track into the studs. This creates a rock-solid foundation. Most installers rush this. They use a bubble level that hasn’t been calibrated since the nineties. I use a rotary laser. It does not lie. If the laser says the left side is 1/16 of an inch low, I fix it. Precision at the start prevents a disaster at the ceiling.
[IMAGE_PLACEHOLDER]
Why your subfloor is lying to you
Subfloors often hide structural deflections and moisture issues that can cause tile to crack or grout to crumble over time. Identifying these imperfections through a moisture meter and a straightedge is the only way to guarantee a bond that survives the thermal expansion of a bathroom. You might look at a piece of 3/4 inch plywood and think it is solid. It is not. It is a living, breathing organic material that reacts to the humidity in your home. When you add the weight of a person and a tub of water, that plywood flexes. That flex is the ghost that haunts your grout lines. If you have too much deflection, you need to add another layer of underlayment or use a decoupling membrane. The National Tile Contractors Association has strict rules about this. Deflection should not exceed L/360 for ceramic tile or L/720 for natural stone. If you ignore these numbers, you are just waiting for a crack to appear. For those looking for a clean finish, you might want to look at chic baseboard designs that transform rooms in 2025 to see how the floor meets the wall.
“A floor is only as good as the subfloor beneath it; deflection is the enemy of every joint.” – Master Flooring Axiom
The chemistry of the bond coat
Modified thin-set mortars use liquid latex or powdered polymers to increase bond strength and provide a small amount of flexibility. This chemical bond is what allows tile to adhere to various substrates while resisting the shear forces caused by temperature changes in a steam-filled shower. Understanding the science of hydration is vital. When you mix that bag of mortar, you are starting a chemical reaction. You have to let it slake. That means letting it sit for ten minutes so the polymers can fully saturate. If you skip the slake, the mortar will be weak. I see guys mixing it with a high-speed drill, whipping air into the mix like they are making a cake. That air creates voids. Voids lead to tile failure. You want a dense, creamy consistency that grips the ridges of your trowel. While many installers believe a thick layer of thin-set can level a wall, the reality is that excessive mortar shrinkage during the curing process pulls the tile inward, creating lippage that no spacer can fix. Thin-set is an adhesive, not a filler.
| Substrate Type | Water Resistance | Deflection Rating | Ideal Use Case |
|---|---|---|---|
| Cement Backer Board | High | L/360 | Standard wet areas |
| Foam Waterproof Board | Extreme | L/360 | Modern high-end showers |
| Exterior Grade Plywood | Low | L/720 | Dry areas only |
| Uncoupling Membrane | High | L/480 | Large format tile |
The 1/8 inch that ruins everything
Expansion gaps are the most overlooked part of a tile installation, yet they are the most critical for preventing tile tenting and grout failure. A 1/8 inch gap at the perimeter and at all plane changes allows the materials to expand and contract without crushing each other. I have walked into million-dollar homes where the shower tile was buckling because the installer ran the tile tight into the corners. They filled those corners with hard grout instead of 100 percent silicone sealant. Grout does not move. Silicone does. When the house settles in the winter, that corner joint is under immense pressure. If there is no gap, the tile has nowhere to go but out. It pops. It cracks. It ruins the waterproof envelope. You need to maintain that gap everywhere the wall meets the floor and where two walls meet. It looks like a small detail, but it is the difference between a five-year floor and a fifty-year floor. If you find your grout is already failing, you should check out grout restoration secrets for long lasting results to fix the damage.
- Check subfloor for levelness using a 10 foot straightedge
- Install a vapor barrier or waterproof membrane according to manufacturer specs
- Snap a chalk line for the second row to establish a level guide
- Mix thin-set to a peanut butter consistency and allow it to slake
- Apply mortar with the flat side of the trowel first to collapse air pockets
- Use a T-square to ensure the first row is perfectly vertical
- Back-butter large format tiles to ensure 95 percent coverage
Laser precision in a world of bubbles
Using a rotary laser level allows an installer to project a perfectly horizontal line across all four walls of a shower simultaneously, ensuring that the tile patterns wrap around corners without any vertical drift. This technology eliminates the human error associated with traditional spirit levels and manual measurements. When you are working in a cramped bathroom, a laser is your best friend. You set it up in the center of the room and it gives you a red or green line that stays true. You can measure down from that line to your ledger board. This ensures that when you reach the top of the shower, the tile hits the ceiling at the exact same height on every wall. If you are off by even 1/4 of an inch, it will be painfully obvious when you try to install the top trim. This level of detail is what separates a professional from a handyman. For those interested in the latest aesthetic trends, showers that wow modern designs for 2025 often feature large format tiles that require even more precision than standard subway tile.
“The minimum requirements for substrate flatness in tile installations must not exceed 1/4 inch in 10 feet.” – Master Flooring Axiom
The relationship between tile weight and slip resistance
Heavy porcelain tiles require a high-bond strength mortar with non-sag properties to prevent the tile from sliding down the wall before the adhesive sets. The weight of the tile exerts a constant downward force that must be countered by the mechanical grip of the trowel ridges and the chemical tack of the thin-set. Porcelain is dense. It is nearly waterproof, which makes it hard for standard mortars to grab onto. You need a mortar with high polymer content. If you are using 12 by 24 inch tiles, you are putting a lot of weight on that first row. This is why the ledger board is not optional. If you rely on plastic spacers alone, the weight of the upper rows will compress the spacers on the bottom row. Your grout lines will shrink. Your level line will sag. By the time you get to the third row, your alignment is gone. You are fighting gravity and you will lose. If you need help with maintenance after the job is done, tile cleaning tips for a sparkling bathroom in 2025 will help preserve that finish.
The phantom movement of wood studs
Wood studs are prone to twisting and bowing as they dry out or absorb moisture from the environment, which can create waves in the finished tile surface if the walls are not flattened prior to installation. Sistering new studs or using shims on the existing framing is a necessary step for a professional finish. In regions with high seasonal humidity, the wood in your walls is constantly moving. If you screw your backer board to a bowed stud, your tile will follow that bow. When the light hits the wall from the side, every hump and dip will show. I spend hours with a power planer and a straightedge before a single sheet of board goes up. I want those walls flat within 1/8 of an inch. If the wall is flat, the tile goes on easy. If the wall is a roller coaster, you will spend the whole day fighting lippage. It is a miserable way to work. You can find more ideas for wall transitions at baseboards makeover ideas to elevate your space. Precision in the framing is the silent partner of the master tiler. Without it, you are just masking flaws that will eventually reveal themselves.