The physics of a waterproof pan
A properly sealed poured concrete shower pan requires a liquid-applied waterproofing membrane or a bonded sheet membrane to prevent moisture migration into the subfloor. This structural barrier must meet ANSI A118.10 standards to ensure the shower assembly remains watertight and prevents mold growth. Most guys skip the leveling compound. They think the underlayment will hide the dip. It won’t. I spent three days grinding concrete on a job last month just so the floor wouldn’t click like a castanet. That experience stays with you. You learn quickly that concrete is a sponge. It looks solid, it feels like a rock, but at a molecular level, it is a network of capillaries waiting to suck up every drop of water that hits it. If you do not treat the slab like a living, breathing structural element, your tile job will fail. It is not a matter of if, but when. Concrete is inherently porous. The hydration process that turns cement, aggregate, and water into a slab leaves behind tiny voids. These voids are the enemies of longevity. When I walk onto a job site and see a raw concrete pan without a proper topical barrier, I see a ticking time bomb. The water will find the weep holes in the drain, but it will also find every microscopic crack in that slab. Without a chemical seal, the moisture saturates the concrete, eventually rotting the wood framing or saturating the slab below.
Why your subfloor is lying to you
A subfloor may appear level and dry, but moisture vapor emission rates and deflection often hide beneath the surface. Using a calcium chloride test or a moisture meter is the only way to verify the structural integrity of the concrete slab before applying a sealer. You cannot trust your eyes in this trade. I have seen slabs that looked bone dry but were actually pumping out moisture from a high water table. If you seal that pan too early, you trap that moisture. The hydrostatic pressure builds up and eventually blows the bond of your thin-set right off the concrete. This is why I obsess over the curing time. You need twenty-eight days for a standard slab to hydrate before you even think about putting a membrane on it. If you rush it, you are asking for a callback. And callbacks are where profits go to die. I remember a job in the humid heat of Florida where the installer didn’t check the moisture content. Two months later, the grout was leaching white powder, a classic case of efflorescence caused by moisture moving through the slab. We had to rip the whole thing out. It was a mess that could have been avoided with a simple moisture test.
The chemistry of hydrophobic barriers
A hydrophobic barrier works by creating a surface tension that prevents water molecules from penetrating the concrete pores. High-performance elastomeric membranes bridge hairline cracks and create a monolithic layer that is impervious to standing water and vapor drive. These chemicals are fascinating. You have liquid-applied products that go on like thick paint. As they dry, the polymers cross-link, forming a rubberized skin that can stretch. This elasticity is vital because houses move. The ground shifts, the wood framing expands and contracts with the seasons, and your shower pan has to handle that stress without cracking. If the seal is rigid, it snaps. If it is elastomeric, it lives. This is why I avoid the old-school methods of just using a heavy plastic liner under the mud bed. Those liners are prone to punctures and they don’t protect the concrete itself. I want a topical seal. I want the water to stop at the tile and grout layer, not soak into three inches of sand and cement. This approach ensures that the showers with a style trendy ideas for small bathrooms stay functional and dry for decades.
“A floor is only as good as the subfloor beneath it; deflection is the enemy of every joint.” – Master Flooring Axiom
The 1/8 inch that ruins everything
The slope to the drain must maintain a minimum of one-quarter inch per foot to ensure gravity-fed drainage. Any birdbaths or low spots in the concrete pan will cause standing water, which leads to grout degradation and the failure of the sealing bond. I have spent hours with a level and a grinder fixing pans that were poured by someone who didn’t understand the physics of water. Water is lazy. It wants to sit in the low spots. If your pan has a dip of even an eighth of an inch, you will have a puddle under your tile. That puddle will eventually dissolve the polymers in your thin-set. It will cause your grout to soften and turn to mush. When I talk about grout restoration secrets for long lasting results, the first secret is always a perfect slope. You can buy the most expensive sealer in the world, but if the water doesn’t move toward the drain, the sealer will eventually fail under the constant saturation. I always check my slope at three stages. I check the pre-slope, I check the mud bed, and I check the tile. It is the only way to be sure.
Technical Comparison of Sealing Methods
| Feature | Liquid Membrane | Sheet Membrane | Silane/Siloxane Sealer |
|---|---|---|---|
| Application Ease | High (Roll-on) | Medium (Thin-set) | Very High (Spray) |
| Crack Isolation | Yes (up to 1/8 inch) | Yes (superior) | No |
| Waterproof Level | Full Submergence | Full Submergence | Water Repellent Only |
| Permeability (Perms) | Less than 0.5 | Less than 0.1 | Varies (High) |
The microscopic bond of modified thin-set
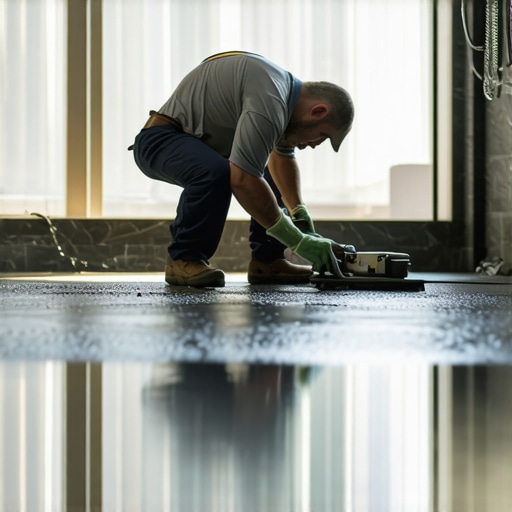
A polymer-modified thin-set creates a mechanical and chemical bond between the waterproofing membrane and the tile. The micro-polymers penetrate the surface of the sealed concrete to create an interlocking matrix that resists shear forces and thermal expansion. When you apply your thin-set over a sealed pan, you are relying on chemistry. The old days of just using sand and cement are gone. We now use high-tech powders that contain dried resins. When you add water, those resins rehydrate and create a glue that is incredibly strong. But this bond only works if the surface is clean. If there is dust from your grinder on that concrete, the thin-set will bond to the dust, not the floor. I have seen entire floors peel up like a giant scab because someone didn’t use a damp sponge to wipe the slab down. It is a simple step, but it is the difference between a floor that lasts fifty years and one that fails in five. This attention to detail is why showers that wow modern designs for 2025 require more than just a good eye for color. They require an understanding of the bond.
Installation Checklist for Sealing Success
- Verify concrete curing time of 28 days for new pours.
- Perform a moisture test to ensure MVER is within manufacturer specs.
- Grind down any high spots and fill low spots with a cementitious leveler.
- Clean the surface thoroughly to remove all dust, oils, and bond breakers.
- Apply the first coat of liquid membrane and allow to dry to a tacky finish.
- Apply the second coat in a perpendicular direction to ensure 100% coverage.
- Perform a 24-hour flood test before installing any tile.
- Inspect the drain assembly for a tight seal against the membrane.
The ghost in the expansion gap
Every shower pan must include an expansion gap at the perimeter where the floor meets the wall. Filling this gap with 100% silicone sealant instead of grout allows for structural movement without cracking the waterproofing seal. I see this mistake on almost every DIY job. They run the tile right into the wall and jam it full of grout. Then, when the house settles in the winter, the grout cracks, and the water starts seeping behind the tile. It is a rookie move. You need that gap. Think of it like a bridge. It needs room to breathe. I always leave a quarter-inch gap and then fill it with a high-quality silicone that matches the grout color. This creates a flexible gasket that keeps the water in the pan and out of the wall cavity. This also applies to where your tile meets the baseboards outside the shower. If you are looking for baseboards makeover ideas to elevate your space, remember that the transition from a wet zone to a dry zone is the most vulnerable point in your flooring architecture.
The final pressure test
Before I even think about laying a single piece of tile, I do a flood test. I plug the drain and fill the pan with two inches of water. Then I mark the water line and walk away for twenty-four hours. If that water level drops even a fraction of an inch, I have a leak. This is the moment of truth. It is the only way to verify that your poured concrete shower pan is actually sealed. Most guys are too lazy to do this. They are in a rush to get the tile down and get paid. But if that pan leaks, you are coming back for free to tear it all out. I would rather spend an extra day waiting on a flood test than a week doing a demolition. It is about professional pride and structural integrity. Whether you are using eco-friendly tile solutions for sustainable homes in 2025 or a standard ceramic, the prep work remains the same. The seal is everything. Without it, you just have a very expensive way to rot your house from the inside out. Don’t be the guy who skipped the seal. Be the architect of a floor that stands the test of time. For more information on maintaining your installations, check out tile cleaning tips for a sparkling bathroom in 2025 to keep that surface looking as good as the structure beneath it.