
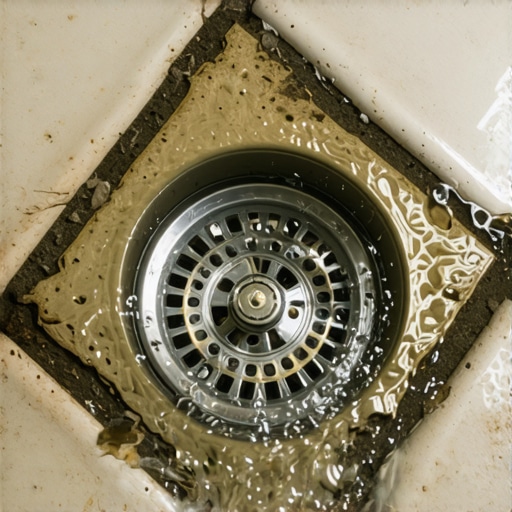
I spent three days grinding concrete on a job last month just so the floor would not click like a castanet. Most guys skip the leveling compound because they think the underlayment will hide the dip. It will not. When I walked onto that site, the homeowner was complaining about a floor that felt like a trampoline. I had to pull up two hundred square feet of fresh material just to show them the birdbath in the slab. That same lack of precision is exactly why your shower floor is currently holding a puddle of stagnant water right next to the drain. You think it is a minor cosmetic issue, but it is actually a failure of structural engineering and fundamental physics. I have seen the same story a thousand times in twenty-five years. A contractor gets lazy with the mud bed, forgets the pre-slope, or thinks they can eyeball a quarter-inch drop. Now you are left with a pool of soapy residue that will eventually rot your subfloor and grow a science experiment in your grout lines.
The physics of the invisible slope
Standing water near a shower drain indicates a violation of the standard quarter-inch per foot slope required for gravity-fed drainage. This failure occurs when the installer creates a flat spot or a birdbath in the mortar bed or when the tile layout creates a dam that prevents water from reaching the waste pipe. Gravity does not negotiate. If the geometry is wrong, the water stays put. This is not just about the surface you see. It starts way down at the subfloor level. When I am standing in a bathroom that smells like wet dog and mildew, I already know the installer skipped the pre-slope. They probably threw the liner flat on the plywood and built the mud bed on top of it. That is a recipe for disaster. The water that moves through the grout and the mortar hits that flat liner and just sits there, becoming a stagnant swamp. You need that pitch to exist at every layer of the assembly, not just on the tile surface.
“A floor is only as good as the subfloor beneath it; deflection is the enemy of every joint.” – Master Flooring Axiom
The chemistry of the installation also plays a role. If the installer used a cheap, modified thin-set in a submerged application where it cannot properly cure, or if they mixed the mortar too dry, the structural integrity of the slope can collapse over time. I have seen mud beds that were so crumbly they felt like beach sand because the water-to-cement ratio was off. When that happens, the weight of the person showering actually compresses the floor, creating new low spots. This is why you might notice the puddling getting worse after a year or two. It is a slow-motion mechanical failure. You might want to look into showers that wow modern designs for 2025 to see how professional systems handle these transitions. A modern integrated foam tray system often avoids these human errors, but even then, if the tray is not supported by a dead-level subfloor, the same pooling will happen.
The ghost in the expansion gap
Expansion gaps and perimeter joints are the most common places where water migration begins to interfere with drainage. If your tile is tight against the wall with no room for movement, the floor can slightly peak or crown in the center. This subtle lift is enough to create a rim around the drain, trapping water in a circular pool that never quite disappears. Most people do not realize that tile and stone are dynamic materials. They expand and contract with temperature changes and moisture absorption. When you lock a floor in place without a perimeter break, it has nowhere to go but up. I have seen floors pop like popcorn because an installer did not leave a gap under the baseboards. Speaking of which, you should check out baseboards makeover ideas to elevate your space to see how to properly finish these edges without compromising the floor’s ability to move.
| Method | Required Slope | Common Failure Point |
|---|---|---|
| Traditional Mud Bed | 1/4 inch per foot | Missing pre-slope under liner |
| Foam Tray System | Pre-pitched | Unlevel subfloor causing tray flex |
| Liquid Membrane | Surface slope | Thin-set buildup at the drain flange |
Why your subfloor is lying to you
Your subfloor might look flat to the naked eye, but a ten-foot straightedge usually reveals a different reality. A dip of just an eighth of an inch is enough to kill the velocity of water heading toward a drain, leading to the surface tension taking over and holding the water in place. I have spent thousands of hours with a grinder and self-leveling underlayment because I know that a subfloor is never your friend. It is a wild animal that needs to be tamed. If you are dealing with a wooden subfloor, the deflection or bounce in the joists can also cause the mortar bed to crack. Once that bed cracks, water seeps into the fractures, the wood swells, and the slope is ruined. It is a chain reaction. You need to be thinking about tile cleaning tips for a sparkling bathroom in 2025 because if that water stays standing, no amount of scrubbing will save your grout from the inevitable black mold.
- Check for weep hole blockages in the drain assembly.
- Use a digital level to verify the 2 percent minimum grade.
- Ensure the grout is not over-washed, creating deep channels.
- Verify that the drain flange is set below the tile surface.
- Inspect for any loose tiles that might indicate subfloor movement.
The silent clog in the weep holes
Weep holes are the small openings in a three-piece clamping drain that allow moisture to escape from the mortar bed into the waste pipe. When these holes become clogged with thin-set or sand, the mortar bed becomes saturated, and the water has nowhere to go but back up toward the surface. This creates a saturated state where the surface water cannot drain because the floor is already holding its maximum capacity of liquid. It is like trying to pour water into a sponge that is already soaking wet. You see the puddle on top, but the real problem is the two inches of wet mud underneath. I always tell my guys to put a handful of pea gravel around the drain base before they pack the mud. It keeps the weep holes clear. If your installer forgot this step, your shower is essentially a slow-leaking bucket. If your grout is looking dingy because of this constant moisture, you can learn how to refresh grout without replacing it, but remember that cleaning is just a bandage for a structural wound.
“Water follows the path of least resistance; if your installer makes that path uphill, the water will simply refuse to move.” – TCNA Handbook Standards
Surface tension and the geometry of the envelope cut
Large format tiles are the enemies of a properly sloped shower floor unless they are handled with expert envelope cuts. When you try to use a twelve by twenty-four inch tile on a floor that needs to slope toward a center point, the tile cannot physically bend to follow the pitch. This results in lippage, which is when one tile edge is higher than its neighbor. These tiny ridges act as dams. Water hits the ridge and stops. To fix this, a pro has to do envelope cuts, which are diagonal slices from the corners of the drain to the corners of the room. It allows the large tile to follow the slope. If your floor was done with large tiles and no cuts, you are going to have puddles. It is a mathematical certainty. There is no way around it. If you are tired of the maintenance that comes with poor drainage, looking into grout restoration secrets for long-lasting results might help you manage the damage, but the real fix is a hammer and a chisel. The 1/8 inch that ruins everything is usually found right at the junction of the tile and the drain grate. If that grate is even a hair higher than the tile, you will never have a dry floor.