
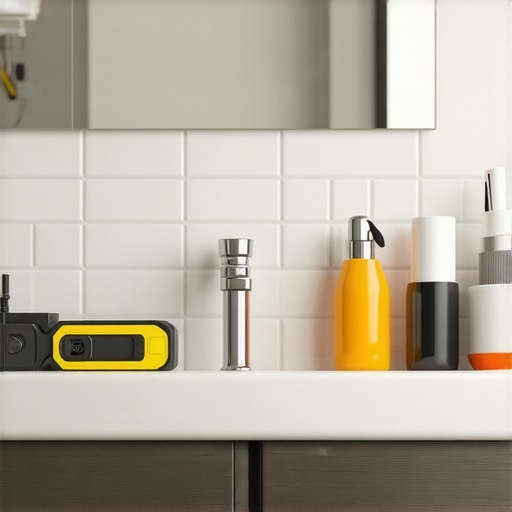
Mastering the Backsplash Behind Your Bathroom Vanity with Professional Precision
Most guys skip the leveling compound. They think the underlayment will hide the dip. It won’t. I spent three days grinding concrete on a job last month just so the floor wouldn’t click like a castanet. That same philosophy applies to your walls. If your drywall is out of plumb by even a sixteenth of an inch, your vanity backsplash will show it. You will see that gap between the stone and the wall, and no amount of caulk can hide a structural failure. I have spent 25 years on my knees or leaning over vanities, and if there is one thing I have learned, it is that the physics of the installation matter more than the color of the tile. A backsplash is not just a pretty addition. It is a functional barrier designed to protect your wall from the constant assault of moisture and cleaning chemicals.
The structural reality of your bathroom wall
A vanity backsplash requires a flat and stable substrate to ensure the adhesive creates a permanent bond without voids. You must inspect the drywall for any signs of moisture damage or loose paper before you even open a bag of thin-set. If the wall is wavy, your tile will lippage, creating shadows that look like amateur hour. I always check the wall with a six foot straight edge. If I see a gap, I am either floating that wall out with a setting-type compound or I am sanding down the high spots. You can not expect a thin layer of mortar to fix a wall that was framed poorly in 1994. The bond depends on the surface tension and the chemical hydration of the mortar. If the substrate is dusty or oily, that bond fails. I have seen entire rows of tile pop off a wall because the installer did not wipe down the drywall with a damp sponge first. It is about the molecular connection between the gypsum and the cement. When you apply the tile, you are creating a laminated structure that must withstand the vibrations of the house and the thermal expansion of the vanity itself.
Why your subfloor determines your backsplash success
The stability of your bathroom floor directly impacts the longevity of the backsplash joints by preventing vertical movement. If your subfloor has too much deflection, the vanity will shift every time someone leans on it. This movement transfers directly to the tile line above the sink. I always tell homeowners that if their floor is bouncy, their grout will crack. It is a simple law of engineering. Deflection is the enemy of every rigid surface in a home. You need to ensure that the floor joists and the subfloor meet the L/360 standard for ceramic tile or the L/720 standard for natural stone. This means the floor should not bend more than a fraction of an inch under a full load. When the floor is solid, the vanity stays still, and the backsplash remains intact. If you are worried about the look of the transition from the floor to the wall, you might consider baseboards makeover ideas to elevate your space which can help integrate the two planes. A stable floor is the foundation of a beautiful wall.
“A floor is only as good as the subfloor beneath it; deflection is the enemy of every joint.” – Master Flooring Axiom
The chemistry of the mortar bond
Choosing the correct thin-set mortar is vital for ensuring the tile stays adhered to the vertical surface without sagging. For a bathroom vanity, I always recommend a polymer-modified thin-set. The polymers add flexibility and increased grab, which is essential when you are working against gravity. You want a mortar that has a high ‘tack’ so the tile does not slide down the wall while you are trying to set the next row. The mixing process is where most people fail. You have to let the mortar slake. That means you mix it, let it sit for ten minutes to let the chemicals fully hydrate, and then mix it again. If you skip the slake, the mortar will be brittle and weak. It is a chemical reaction, not just a physical mixture. I have seen guys try to use mastic in wet areas. Don’t do it. Mastic is an organic adhesive that can re-emulsify if it gets wet. In a bathroom, you want a cementitious bond that is waterproof once it cures. While you are thinking about the longevity of your surfaces, remember that grout restoration secrets for long-lasting results can save an older installation if the structural bond is still good. Below is a comparison of common materials you might use for this project.
| Material Type | Water Resistance | Recommended Adhesive | Skill Level Required |
|---|---|---|---|
| Ceramic Tile | High | Modified Thin-set | Beginner |
| Natural Stone | Medium | White Thin-set | Advanced |
| Glass Tile | High | Glass-Specific Mortar | Expert |
| Porcelain | Superior | Modified Thin-set | Intermediate |
The physics of the expansion gap
Leaving a small gap between the bottom of the tile and the vanity surface allows for the natural expansion and contraction of materials. Wood vanities and stone tops move at different rates than the wall and the tile. If you butt the tile tight against the vanity, the pressure will eventually cause the tile to pop or the grout to crumble. You need a 1/8 inch gap. This gap should never be filled with grout. It must be filled with 100 percent silicone caulk. Silicone is flexible and waterproof, making it the only acceptable choice for this transition. Grout is rigid. When things move, grout breaks. Silicone stretches. I have walked into too many bathrooms where the grout at the sink line is moldy and cracked because someone forgot this rule. If you are working on a larger bathroom project, you might also be looking at showers with a style trendy ideas for small bathrooms to match your new backsplash. Consistency in your expansion joints throughout the room is what separates a pro job from a weekend DIY project.
Precision cuts and the vanity lip
Measuring your tiles to fit around the vanity and any wall outlets requires a diamond blade and a steady hand. You can not just eyeball these cuts. I use a cardboard template for difficult areas around the plumbing or the edge of the vanity. The goal is to have the tile look like it grew out of the wall, not like it was forced there. When you are cutting porcelain or stone, heat is your enemy. A wet saw is the only way to go for clean, chip-free edges. If you are using a manual snapper, you will likely end up with jagged edges that you have to hide with more caulk. That is a sign of laziness. I take pride in my cuts. I want them so tight that the gap is uniform across the entire installation. This is especially important in small spaces where every detail is magnified. Using the right tools is the first step on any professional checklist.
- Laser level for a perfect horizontal baseline
- 1/4 inch by 1/4 inch square notched trowel
- High-speed mixing paddle for mortar
- Diamond blade wet saw for precision cutting
- Rubber grout float for even distribution
- Microfiber sponges for cleaning tile faces
- 100 percent color-matched silicone sealant
The chemistry of grout selection
Selecting the right grout involves understanding the width of your joints and the porosity of your tile. For joints smaller than 1/8 inch, you typically use unsanded grout. For anything larger, sanded grout is necessary because the sand acts as a structural bridge to prevent the grout from shrinking and cracking. However, if you are using polished stone or glass, sanded grout will scratch the surface. This is why I prefer high-performance polymer grouts. They offer the strength of sanded grout without the grit that ruins delicate finishes. The water-to-powder ratio must be exact. If you add too much water, you wash out the pigment and end up with splotchy, weak joints. I use a digital scale to weigh my grout and water. It sounds obsessive, but it is the only way to get a consistent color across the whole wall. For maintenance down the road, you should check out tile cleaning tips for a sparkling bathroom in 2025 to keep those joints looking fresh.
“In wet areas, the bond strength between the substrate and the tile must exceed 50 psi to ensure long-term performance.” – TCNA Installation Manual
The 1/8 inch that ruins everything
A single mistake in the layout of your first row can lead to a disastrously crooked finish at the top of the backsplash. Gravity is a constant force. If your vanity is not perfectly level, do not follow its line for your tile layout. You must use a laser level to establish a perfectly horizontal line. If there is a gap at the bottom because the vanity is tilted, you cut the bottom row of tiles to fit that slope while keeping the top of the tiles perfectly level. Most people just set the tile on the vanity and go. By the time they reach the top, the whole thing is slanted. It looks terrible. I spend more time on my layout than I do on the actual setting. I dry-lay the tiles on a table first to see how the patterns fall. You do not want a tiny sliver of tile in the corner. You want balanced cuts on both ends. This level of planning is what makes a backsplash look intentional and architecturally sound.
Waterproofing the splash zone
Applying a high-quality sealer to your grout and natural stone tiles is the final defense against staining and water penetration. Even the best grout is porous. It will absorb water, oils, and soap scum if it is not sealed. I prefer a penetrating sealer that bonds with the minerals inside the grout rather than a topical sealer that just sits on top. Topical sealers can peel and turn yellow over time. A penetrating sealer is invisible and lasts much longer. I tell my clients that they need to re-seal their backsplash every year or two depending on how much they use the sink. It is a five minute job that saves the installation. If the grout does get stained, knowing how to refresh grout without replacing it is a valuable skill. But prevention is always better than a cure. You should also consider the height of your backsplash. A standard four inch splash is often not enough. I like to go all the way up to the mirror or even to the ceiling for a more dramatic and protective effect.
Protecting the baseboards and transitions
Ensuring a clean transition between your new tile and the existing baseboards prevents moisture from reaching the wall studs. When the backsplash meets the floor or the side walls, you need to be careful about how the materials intersect. I often see people run the tile right over the edge of the baseboard. It looks bulky and cheap. The correct way is to notch the baseboard or to end the tile with a clean, finished edge like a Schluter strip. This creates a architectural break that looks professional. If your baseboards are old and beaten up, this is the perfect time to look into chic baseboard designs that transform rooms in 2025. A backsplash is part of a larger system. Every piece of trim, every line of grout, and every bead of caulk must work together to create a water-tight and visually appealing space. The final step is always a thorough cleanup. Use a vinegar and water solution to remove any remaining grout haze from the tile surface. If you leave that haze, it will cure into a cloudy film that is nearly impossible to remove later. Take the time to do it right the first time, and your vanity backsplash will last as long as the house itself. {“@context”: “https://schema.org”, “@type”: “HowTo”, “name”: “How to Tile a Backsplash Behind a Bathroom Vanity”, “step”: [{“@type”: “HowStep”, “text”: “Inspect and prepare the wall substrate, ensuring it is flat, dry, and free of debris.”}, {“@type”: “HowStep”, “text”: “Establish a level baseline using a laser level, accounting for any vanity slope.”}, {“@type”: “HowStep”, “text”: “Mix polymer-modified thin-set mortar and allow it to slake for ten minutes.”}, {“@type”: “HowStep”, “text”: “Apply mortar to the wall with a notched trowel and set the tiles with even spacing.”}, {“@type”: “HowStep”, “text”: “Cut edge tiles and outlet openings using a wet saw with a diamond blade.”}, {“@type”: “HowStep”, “text”: “Apply grout to the joints and clean the tile surface with a damp sponge.”}, {“@type”: “HowStep”, “text”: “Seal the transition gap between the vanity and the tile with 100 percent silicone caulk.”}]}