The subfloor secret that ruins most DIY projects
Most guys skip the leveling compound. They think the underlayment will hide the dip. It won’t. I spent three days grinding concrete on a job last month just so the floor wouldn’t click like a castanet. That is the fundamental problem with modern shower installs. If you ignore the structural integrity of your substrate, you are building a house on sand. A shower is a high-stress environment. It deals with thermal expansion, hydrostatic pressure, and the constant vibration of the home. When you decide to tile a shower yourself, you are stepping into the role of a structural engineer. You are managing water drainage and chemical bonds. If you get it wrong, you get mold. You get rot. You get a lawsuit from the people living in the unit below you. This guide is for those who want to do it right. We are going to focus on the physics of the install. We will discuss the chemical reactions of modified mortars and the mechanical reality of moisture barriers. This is not about choosing a pretty color. This is about making sure your floor survives the next thirty years.
The skeletal structure of a waterproof shower
Shower waterproofing systems rely on a rigid substrate and a continuous moisture barrier to prevent structural rot and mold growth. You must ensure your studs are plumb and your subfloor deflection meets TCNA L/360 standards before any tile is laid or thinset is mixed. If your wall studs are bowed even a quarter of an inch, your tile will show a lip. This is where the physics of the room comes into play. You are not just hanging board. You are creating a foundation. If you use a traditional mud bed, you need a pre-slope. The water does not just disappear when it hits the drain. It travels through the grout and the thinset. It hits the liner. If that liner is flat, the water sits there. It becomes a stagnant pool of bacteria. This is why many pros have moved toward foam systems like Schluter or Wedi. These systems provide a surface-level waterproof membrane. The water never gets to the substrate. It is more expensive but it eliminates the moisture-wicking potential of cement backer board. For those looking for inspiration on the final look, showers that wow modern designs for 2025 offers a glimpse into what is possible when the engineering is sound.
“A floor is only as good as the subfloor beneath it; deflection is the enemy of every joint.” – Master Flooring Axiom
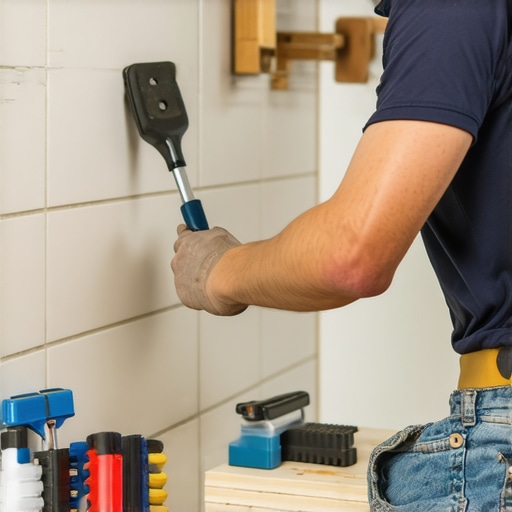
The chemistry of the bond and thinset selection
Thin-set mortar is a portland cement based adhesive that requires polymer additives to achieve the shear strength necessary for vertical tile applications. You must match your mortar type to your tile porosity and the substrate material to ensure a permanent mechanical and chemical bond. There are two main types: unmodified and modified. Unmodified thinset is just portland cement, sand, and water retention agents. It is great for certain membranes but it lacks the stickiness needed for large-format porcelain. Modified thinset contains liquid latex or dry polymers. These polymers create a bridge between the tile and the wall. As the water evaporates, the cement forms silicate hydrate crystals. These crystals grow into the microscopic pores of your tile. If you are using glass tile, you need a specific high-polymer mortar. Glass is non-porous. It does not have holes for the crystals to grow into. It needs the chemical grab of the polymer. This is why reading the bag is the most important part of the job. If you mix it too thin, you lose the strength. If you mix it too thick, it skins over before the tile can bed. For a sustainable approach, consider eco-friendly tile solutions for sustainable homes in 2025 when selecting your materials.
The science of the slope and drainage
Shower drainage physics requires a minimum slope of 1/4 inch per foot toward the drain flange to ensure capillary action and gravity move water effectively. Failure to maintain this pitch leads to standing water, grout erosion, and the eventual failure of the waterproofing bond. You have to understand that water is a solvent. It is slowly trying to dissolve your house. In a traditional shower pan, you have a primary liner and a secondary drain. The weep holes in the drain are there for a reason. They let the water that has soaked through the grout escape into the plumbing. If you clog those holes with thinset, you are creating a dam. Your shower pan will always be wet. It will never dry out. This leads to the sour smell many homeowners complain about. When you are screeding your sand mix for the base, you need to be precise. Use a level. Check your math twice. If you have a five-foot span, that drain needs to be an inch and a quarter lower than the perimeter. No exceptions. No shortcuts.
Grout chemistry and water resistance
Grout selection determines the maintenance requirements and moisture resistance of the tile assembly, with epoxy grout offering the highest stain resistance and compressive strength. Standard cementitious grout is porous and acts like a hard sponge, requiring penetrating sealers to protect the underlying installation from mineral deposits. Many DIYers choose sanded grout because it is easier to work with. But if your joints are smaller than an eighth of an inch, you need unsanded grout. If the joint is too tight, the sand particles will not fit. You will get a weak, crumbly joint. If your old grout is already failing, you might look into grout restoration secrets for long lasting results before you decide to rip everything out. Grout is not just a filler. It is a structural component that keeps the tile from shifting. It must be mixed to the consistency of peanut butter. If you use too much water during the cleanup phase, you wash out the pigments and the binders. You end up with soft, chalky grout that will fail in six months. For those who want to avoid the mess, how to refresh grout without replacing it is a viable path for minor repairs.
| Material Type | Janka / Hardness Factor | Moisture Absorption | Recommended Use |
|---|---|---|---|
| Porcelain | High | < 0.5% | Shower floors and walls |
| Ceramic | Medium | 3% – 7% | Shower walls only |
| Natural Stone | Varies | High | Requires high maintenance |
| Glass | High (Brittle) | 0% | Accent walls and niches |
The 1/8 inch that ruins everything
Expansion gaps at the perimeters and corners are necessary to accommodate structural movement and thermal expansion in the tile field. You must use 100 percent silicone sealant in all change of plane joints rather than rigid grout to prevent stress cracking and water intrusion. Houses move. They breathe. The wood studs swell in the summer and shrink in the winter. If you grout the corners of your shower, that grout will crack. It is a physical certainty. Silicone is flexible. It acts as a gasket. It takes the stress so the tile doesn’t have to. I see this mistake on every single DIY repair job. People think grout is waterproof. It is not. It is just a filter. The silicone is what actually keeps the water from getting behind the tile at the corners. The same applies to where the tile meets the ceiling or the floor. These are movement joints. Treat them with respect. If you are finishing the room, chic baseboard designs that transform rooms in 2025 can help you integrate the shower into the rest of the bathroom aesthetic. You can also see more at baseboards makeover ideas to elevate your space.
Critical installation checklist for DIY success
- Verify subfloor deflection is less than L/360 for ceramic or L/720 for stone.
- Ensure all wall studs are within 1/8 inch of plumb over an 8-foot span.
- Apply a liquid or sheet membrane waterproofing system over all cement boards.
- Perform a 24-hour flood test before laying any tile to check for leaks.
- Use the directional troweling method to ensure 95 percent mortar coverage.
- Maintain a 1/4 inch expansion gap at the base where walls meet the floor.
Maintenance and the lifecycle of your shower
Tile longevity is a result of consistent cleaning protocols and the periodic reapplication of hydrophobic sealers on porous surfaces. You should avoid acidic cleaners that dissolve the calcium carbonate in cement grout, opting instead for pH-neutral solutions that preserve the integrity of the sealer. If you spend five thousand dollars on a custom tile shower, don’t ruin it by using bleach every day. Bleach is an oxidizer. It eats grout. It makes it more porous over time. Use a squeegee after every shower. It takes ten seconds. It prevents mineral buildup and soap scum. If you want to keep things looking new, follow these tile cleaning tips for a sparkling bathroom in 2025. If you have a small space, you might find specific advice in showers with a style trendy ideas for small bathrooms. Proper care is the difference between a shower that lasts ten years and one that lasts fifty. If you have questions about specific materials, you can always contact us for expert guidance. A shower is a machine for cleaning. It should be treated with the same respect as your car or your HVAC system.
“The movement joint is not a suggestion; it is a structural necessity for ceramic installations.” – TCNA Guide
Comments
One response to “How to Tile a Shower Without a Professional Contractor”
Reading the section about subfloor deflection really hit home for me. I once attempted a DIY shower installation without verifying the subfloor’s integrity, and over time I noticed some tiles cracking unexpectedly. It’s a prime example of how small overlooked details can lead to major issues down the line. The advice on ensuring the subfloor meets the L/360 standards is crucial, especially for those tackling large-format tiles that demand a sturdier base. I also appreciate the emphasis on movement joints and silicone sealing—something many beginners overlook, but which is vital to prevent cracking and water intrusion. Has anyone found good ways to easily check and correct subfloor deflection in older homes, or is it usually a matter of professional assessment? It seems like investing in that initial check can save a lot of headaches and money later on.