A wobbly baseboard is rarely a failure of the wood itself. It is a symptom of a structural disconnect between a vertical plane and a horizontal surface that was never truly flat. Most homeowners see a gap and reach for a tube of cheap caulk. That is a mistake. I have spent twenty five years with my knees on a concrete slab and a moisture meter in my pocket. I know the truth. A floor is a performance stage. If the stage is uneven, the actors will stumble. In this case, your trim is the actor, and the tile is a stage full of ridges and valleys. Fixing this requires more than just a hammer. It requires an understanding of how physics and chemistry interact at the point where your walls meet your floor.
The subfloor secret that ruins every installation
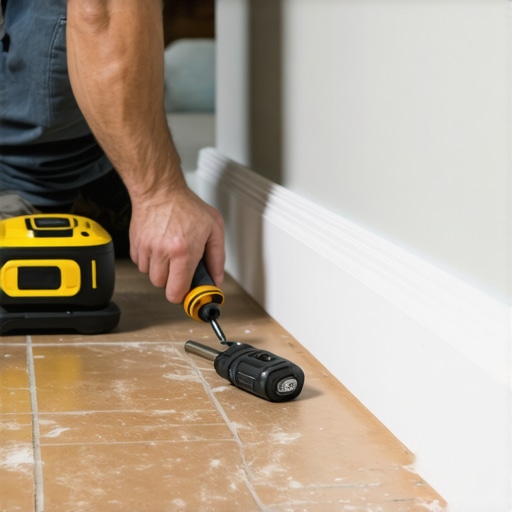
To fix a wobbly baseboard on tile, you must identify if the movement stems from a loose fastener, an uneven subfloor, or wood shrinkage. The most effective repair involves securing the trim to wall studs using 18 gauge finish nails and filling the floor gap with a flexible, color matched caulk.
I spent three days grinding concrete on a job last month just so the floor wouldn’t click like a castanet. The homeowner thought I was crazy. They wanted the tile down immediately. But I saw the slab. It had a two inch dip over a ten foot span. If I had ignored that, every single piece of baseboard in that room would have wobbled by the second month. You cannot nail a straight piece of wood to a curved floor and expect it to stay still. When you force a baseboard down into a dip, you are creating a spring. That wood wants to return to its straight state. It will pull against the nails. It will win. Eventually, the nails will back out, the caulk will crack, and you will have a gap that looks like a hungry mouth. This is why we talk about the L over 360 deflection standard. It is not just a suggestion from the TCNA. It is the law of the job site. If your tile is wobbly, your foundation is the culprit. You must bridge the gap with structural intent rather than just cosmetic filler.
The ghost in the expansion gap
Baseboards must never be pinned directly to the tile surface because both materials expand and contract at different rates. The wobble occurs when the wood shrinks during winter months or when the subfloor shifts slightly. Using a logic based approach to shimming and nailing ensures a permanent fix.
When we talk about expansion gaps, we are talking about the life of the house. A house is a breathing organism. The wood studs behind your drywall swell when the humidity hits eighty percent. The pine or MDF baseboard does the same. Tile, however, is relatively stable but the grout is not. If you are interested in keeping things stable, you should look into grout restoration secrets for long lasting results to ensure your base floor is solid. The wobble happens because the installer didn’t account for the microscopic movement of the materials. When the baseboard moves and the tile stays still, the bond breaks. I see this often in showers that wow modern designs for 2025 where moisture levels are extreme. People forget that the baseboard in a bathroom is fighting a war against steam every morning. If that board isn’t secured with the right gauge of steel, it will dance. You need to use a moisture barrier behind the board and a bead of high quality polyurethane adhesive. Do not use PVA glue here. It is too brittle. You need something that stays flexible enough to handle the house breathing without letting go of the wall.
“A floor is only as good as the subfloor beneath it; deflection is the enemy of every joint.” – Master Flooring Axiom
The physics of the shim and the nail
Fixing a wobbly baseboard requires locating the wall studs using a high density sensor and driving fasteners at a downward angle to create a mechanical lock. If the gap is wider than one eighth of an inch, you must use composite shims to provide a solid backing before nailing.
Most guys skip the leveling compound and try to hide the dip with the baseboard. It does not work. When you find a wobble, the first thing you do is check the studs. I don’t care what your electronic stud finder says. I want you to take a small trim nail and probe the area. If you hit air, you are just pinning the wood to the drywall. Drywall has no structural integrity. It is just gypsum and paper. If you nail into drywall, that baseboard will be loose by next Tuesday. You must find the wood or the metal studs. Once you find them, you use an 18 gauge brad nailer. 16 gauge is too thick and might split the wood. 23 gauge is too thin and won’t hold the tension of a warped board. You drive the nail at a 45 degree angle. This creates a dovetail effect. If you drive it straight in, it can pull straight out. If you drive it at an angle, the wood has to fight the shear strength of the steel to move. This is basic engineering applied to trim. If the gap at the bottom is large, don’t just pull the board down. Put a shim behind it. This stops the board from rotating backward when you hit it with the nailer.
Fastener and Substrate Compatibility Matrix
| Material Type | Recommended Fastener | Adhesive Type | Movement Allowance |
|---|---|---|---|
| Solid Oak Trim | 16 Gauge Stainless | Polyurethane | Low |
| MDF Baseboard | 18 Gauge Brad | Construction Grade | Moderate |
| PVC Waterproof Trim | Stainless Steel Screw | Silicone Based | High |
| Primed Pine | 18 Gauge Brad | Wood Glue and Caulk | Moderate |
Why your subfloor is lying to you
The underlying concrete slab or plywood subfloor often contains waves known as birdbaths that prevent tile from being perfectly level. These micro deviations are the primary cause of baseboard wobble because the trim cannot sit flush against a non linear surface.
You look at a tile floor and it looks flat. It is not. Every tile has a slight crown. Every grout line is a valley. If you are struggling with the look of your floors, you might want to consider baseboards makeover ideas to elevate your space. When you set a baseboard on top of tile, it is only touching the high points. It is effectively floating over the grout lines. This is why it wobbles. To fix this, you need to use the scribing method. Scribing is an old school carpenter trick. You hold the baseboard against the wall, take a compass, and trace the contour of the floor onto the wood. Then you cut that line with a jigsaw. Now the wood fits the floor like a glove. Most modern installers are too lazy for this. They want to fly through the job. They leave the gap and fill it with caulk. But if the floor is really bad, even caulk won’t save you. You will see the shadows in the gaps. This is especially true if you are looking for chic baseboard designs that transform rooms in 2025. High profile trim shows every flaw. If the floor is wavy, the trim will look wavy unless you scribe it.
The 1/8 inch that ruins everything
A gap of only one eighth of an inch is enough to allow moisture to penetrate behind the baseboard, leading to mold growth and stud rot. Sealing the wobble is not just about aesthetics; it is about protecting the structural envelope of the room.
I have seen houses where the bottom plate of the wall was completely rotted because the homeowner kept mopping their tile floor and the water was disappearing into the gap under the wobbly baseboard. They thought they were cleaning. They were actually drowning their house. When you fix the wobble, you must seal the bottom. But you don’t use regular grout. Grout is rigid. It will crack the moment someone steps near the wall. You need a 100 percent silicone sealant or a high quality siliconized acrylic. This allows the floor to move without breaking the seal. If you are cleaning your floors often, check out tile cleaning tips for a sparkling bathroom in 2025 to make sure you aren’t using chemicals that degrade your sealant. A stable baseboard is a dry baseboard. If you can move the board with your toe, it is not sealed. It is a portal for water.
“Adhesion failure at the perimeter is the most common cause of secondary structural damage in residential flooring.” – Structural Flooring Journal
The chemistry of the bond
The interaction between wood tannins and alkaline thin set can cause discoloration and bond failure if not properly managed. Using a primer on the back of your baseboards before installation prevents the wood from reacting with the tile mortar.
People forget that concrete and mortar are alkaline. Wood is acidic. When you put them together, a chemical reaction happens. This is why you sometimes see dark stains at the bottom of white baseboards. It is not dirt. It is a chemical burn. If you have a wobbly board, it might be because the back of the wood has started to disintegrate from contact with the subfloor. When you pull the board to fix it, sand the back and hit it with a quick coat of oil based primer. This creates a molecular barrier. Then, use a bead of construction adhesive. This adhesive needs to be rated for both porous and non porous surfaces. You are bonding organic wood to inorganic ceramic or stone. That is a tough bridge to build. Use a product with a high grab strength so you don’t have to stand there holding it for twenty minutes. I like the stuff that smells like a chemical factory. If it doesn’t have a strong scent, it probably doesn’t have the polymers needed to hold a warped board against a wavy floor.
Checklist for a Permanent Baseboard Repair
- Locate studs using a deep scan sensor.
- Remove old brittle caulk using a sharp carbide scraper.
- Check moisture levels in the wall and floor using a pinless meter.
- Scribe the bottom edge of the board if the floor dip exceeds 1/4 inch.
- Back prime the wood to prevent alkaline reaction with tile mortar.
- Apply a continuous bead of polyurethane construction adhesive.
- Drive 18 gauge fasteners at opposing 45 degree angles.
- Seal the floor transition with a flexible color matched sealant.
Regional climate impacts on trim stability
In regions with high seasonal humidity variation, wood baseboards will expand and contract significantly more than the tile floor. This differential movement is the primary driver of hardware loosening and the eventual appearance of a wobble.
If you live in a place like Houston or Miami, your house is a sponge. The humidity gets into the wood and it grows. In the winter, the heater kicks on, dries the air out, and the wood shrinks. The tile doesn’t care. It stays the same size. This creates a massive amount of stress on the nails. Over five or ten years, the nails simply give up. They lose their grip on the pine studs. If you are in a dry climate like Phoenix, the wood is constantly shrinking. You might find that your baseboards have pulled away from the corners. This is why I always tell people to acclimate their trim. Do not take the wood from the back of a humid truck and nail it to the wall immediately. Let it sit in the room for at least seventy two hours. Let it reach equilibrium. If you don’t, you are installing a ticking time bomb. It will wobble. It will gap. And you will be back on your knees fixing it in six months. Always think about the long term chemistry of the room. A floor is for twenty years, not twenty minutes.
Comments
One response to “How to Fix a Wobbly Baseboard on a Tile Floor”
This article hits the mark on why a wobbly baseboard isn’t just an aesthetic issue but often a sign of underlying structural problems. I learned firsthand how crucial it is to address uneven subfloors before installing trim during my renovation projects. Grinding concrete beneath the slab truly made a difference in stabilizing the floors and preventing future wobbling. It’s fascinating how much physics and chemistry influence what seems like simple carpentry tasks! I especially appreciated the detailed advice on using composite shims and staple locking techniques; these are game-changers in ensuring a permanent fix. Has anyone tried scribing their own baseboards to match floor contours? I’ve found that taking the extra step to custom-fit trim saves significant headaches down the line.