
I have spent twenty five years on my knees with a wet saw and a level and I can tell you that glass tile is the most unforgiving material on the planet. It does not care about your schedule or your budget. If you treat it like ceramic or stone it will shatter into a thousand jagged pieces before you even get it to the wall. I once walked into a job where a homeowner tried to cut three hundred dollars worth of linear glass mosaic with a standard tile nipper. The edges looked like they had been chewed by a shark. I spent three days grinding concrete and rebuilding the substrate because the previous guy thought the underlayment would hide the dips. It never does. Glass tile requires a level of precision that borderlines on structural engineering. You are not just laying a floor or a wall. You are managing thermal expansion and molecular vibration. My hands are stained with thin-set and my apron smells like the metallic mist of a high speed wet saw. This is the reality of the trade. Success happens in the fractions of an inch and the grit of the diamond blade. If you want a result that belongs in showers that wow modern designs for 2025 then you have to respect the physics of the material. Glass is an amorphous solid. It is technically a slow moving liquid with high internal tension. When you introduce a blade you are disrupting that tension. If your technique is off the glass will relieve that stress through chipping. This guide is the accumulated grit of a career spent perfecting the cut.
The mechanical physics of glass fracture
Glass subway tile chipping occurs when the mechanical vibration of the cutting tool exceeds the elastic limit of the glass edges. To prevent this you must use a high density diamond blade with a continuous rim specifically designed for glass. The abrasion process must be accompanied by a high volume water cooling system to prevent localized thermal shock. Glass tiles have a different molecular structure than ceramic. While ceramic is porous and allows the blade to bite into the material glass is dense and brittle. Most guys skip the prep. They think they can just slap the tile on the saw and push. That is how you end up with a pile of waste. I have spent years listening to the hum of the motor. You can hear when a cut is going south. The pitch changes. The vibration moves from the table into your fingertips. You need to control every variable from the water temperature to the pressure of your hands. If the substrate is not perfectly flat the glass will crack under the weight of the grout later. This is why I always emphasize proper subfloor and wall preparation. I spent three days grinding concrete on a job last month just so the floor would not click like a castanet. The same logic applies to walls in showers with a style trendy ideas for small bathrooms. If the wall bows the glass will chip during the installation or shortly after.
“A floor is only as good as the subfloor beneath it; deflection is the enemy of every joint.” – Master Flooring Axiom
The diamond blade truth for glass edges
Diamond blades for glass tile must have a much finer grit than standard masonry blades to ensure a smooth finish without micro-fracturing the edges. A 200 grit blade is standard for ceramic but for glass you should be looking at 400 to 600 grit for the cleanest possible kerf. The kerf is the width of the cut and in glass you want it as narrow as possible. When the diamonds on the blade become dull they do not cut the glass. They beat it. This impact is what causes the paint or the foil on the back of the tile to flake away. Once that backing is gone the tile is ruined. You can see the damage through the translucent face of the tile. I always keep a dressing stone nearby. A dressing stone is a soft abrasive block that you cut into to expose new sharp diamonds on your blade. If you see sparks while cutting you are burning the glass. Stop immediately. You need more water or a sharper blade. I have seen guys try to use a dry blade on glass. It is a disaster. The heat builds up in milliseconds and the glass expands faster than it can handle. It will literally explode on the saw table. You need a steady stream of cold water hitting the exact point where the blade meets the glass. This is not just for cooling. It is for lubrication. It washes away the glass dust which is highly abrasive and can scratch the surface of the tile as you push it through.
| Blade Type | Grit Level | Best Use Case | Chipping Risk |
|---|---|---|---|
| Continuous Rim Glass | 400 to 1000 | Linear glass and mosaics | Very Low |
| Fine Ceramic Blade | 200 to 300 | Standard subway tiles | Medium |
| Turbo Masonry Blade | 60 to 100 | Concrete and stone only | High |
| Manual Score and Snap | N/A | Straight cuts on thin glass | Moderate |
The substrate secret for glass installations
Flatness requirements for glass tile are significantly more stringent than for traditional ceramic because glass does not hide any imperfections in the wall or floor. According to the Tile Council of North America the maximum allowable variation for large format tile is one eighth of an inch over ten feet. For glass I prefer to see half of that. If your wall is wavy the glass will bridge the gaps. This creates a hollow space behind the tile. When you apply pressure to the tile during grouting or cleaning it can snap. This is why I spend so much time with a straightedge and a bucket of thin-set before I ever open a box of tile. You are building a structural system. The glass is just the finish. If you want your bathroom to stay clean you should check out tile cleaning tips for a sparkling bathroom in 2025 but no amount of cleaning will fix a cracked tile. The subfloor or wall must be rigid. Deflection is the technical term for the bounce in a floor. Glass has zero tolerance for deflection. If the joists under your floor are weak the glass will crack along the grout lines. I always use a polymer modified thin-set specifically formulated for glass. These adhesives have a slight amount of flexibility which allows the glass to expand and contract with temperature changes without shearing off the wall.
“Glass tile requires a minimum of ninety five percent mortar coverage to ensure structural integrity and aesthetic clarity.” – TCNA Handbook
The blue tape trick and marking methods
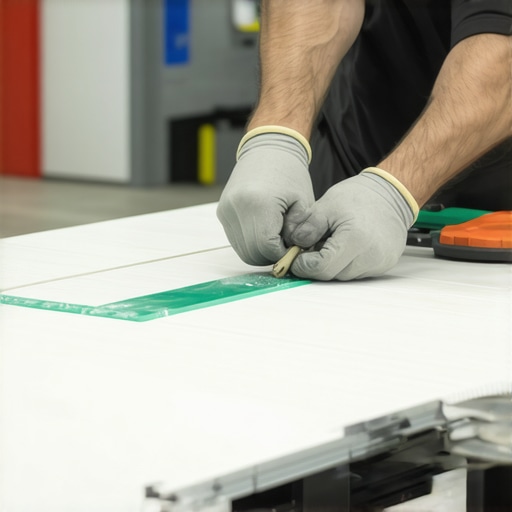
Preventing glass tile chipping during the cut can be achieved by applying a high quality painters tape along the cut line to stabilize the surface tension. This is a trick I learned early on. The tape holds the glass fibers in place at the exit point of the blade. Most chips happen on the back side of the tile as the blade leaves the material. By taping both the front and the back you provide a mechanical buffer. Use a fine tipped permanent marker on the tape. Do not use a wax pencil. Wax pencils leave a residue that can interfere with the bond of the thin-set. Also the water from the wet saw will wash away most pencil marks. I prefer blue tape because it is easy to see and it does not leave a gummy mess on the glass. When you make your cut do not force the tile. Let the blade do the work. If you feel resistance it means your blade is loading up with debris. Back the tile out slightly and let the water clear the kerf. This is a slow process. If you are in a rush you should not be working with glass. I tell my apprentices that cutting glass is like performing surgery. One wrong move and the patient is dead. You need a steady hand and a calm mind. If you are frustrated walk away from the saw for five minutes. The glass will wait for you.
- Inspect every tile for factory defects before cutting.
- Check the squareness of your wet saw fence every morning.
- Use a sacrificial board under thin glass to prevent it from falling into the saw throat.
- Always back butter glass tile to ensure one hundred percent coverage.
- Change the water in your wet saw reservoir every few hours to remove glass silt.
- Wear eye protection because glass shards are sharp and travel at high speeds.
Grout selection and the expansion gap
Grout for glass tile must be non-sanded to prevent scratching the delicate surface of the glass during the application process. Sanded grout contains silica sand which is harder than glass. If you rub sanded grout across the face of a glass subway tile you will leave permanent swirl marks. I always recommend high performance unsanded grout or an epoxy grout for wet areas. Epoxy is harder to work with but it is waterproof and stain resistant. This is essential for grout restoration secrets for long lasting results. You want a grout that will not degrade over time. Another critical factor is the expansion gap. Glass has a high coefficient of thermal expansion. This means it grows and shrinks significantly with temperature changes. If you butt the glass tight against a corner or a ceiling it will eventually buckle and chip. You must leave a minimum of one eighth of an inch gap at all perimeters. This gap should be filled with a color matched 100 percent silicone caulk. Never use grout in the corners. Grout is rigid and will crack. Silicone is flexible and allows the glass to breathe. If you are looking for eco friendly tile solutions for sustainable homes in 2025 many glass tiles are made from recycled materials but they still require these technical installation steps to last a lifetime.
Baseboards and the finishing touch
Finishing glass tile edges requires a transition piece or a polished edge to ensure the installation looks professional and remains safe from impact. Glass edges are razor sharp. You cannot leave a raw cut edge exposed. I often use a metal Schluter strip or a matching glass bullnose to finish the run. If you are transition from a tiled wall to a floor you need to consider how the baseboards will sit. I have seen many people ruin a great tile job with poor baseboard choice. You should look at chic baseboard designs that transform rooms in 2025 for inspiration on how to marry the two surfaces. If you are installing glass in a bathroom the baseboard must be moisture resistant. I prefer using the same tile as a baseboard or a high quality PVC trim. If you must use wood ensure it is back primed and sealed. To get the best results you should also know how to refresh grout without replacing it if you are working on a renovation. For new builds the goal is to never have to fix it. If you cut the glass correctly and leave the proper expansion gaps the floor will remain beautiful for decades. If you have questions about specific materials you can always contact us for professional advice. The final word on glass tile is patience. Respect the material and it will respect you. Rush the job and you will be buying more tile next week.