
The Science of Staying Put for Stone Tile Accents
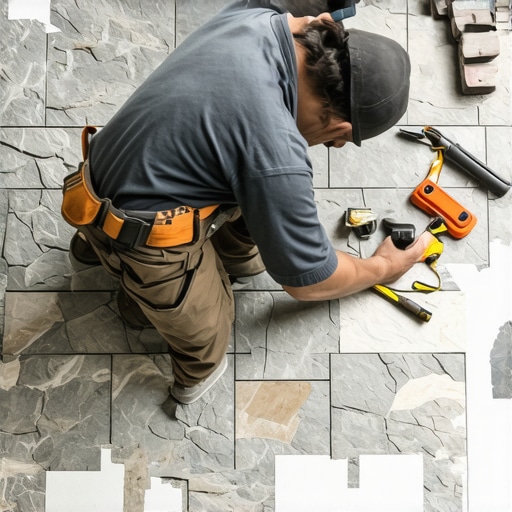
I spent twenty five years with my knees on a subfloor and my hands in a bucket of mortar. I have seen every failure in the book. Most guys skip the leveling compound. They think the underlayment will hide the dip. It won’t. I spent three days grinding concrete on a job last month just so the floor wouldn’t click like a castanet. That job is a reminder that flooring is not a cosmetic upgrade, it is a structural engineering feat. Stone tile accents are heavy, porous, and unforgiving. If you treat them like a sticker you are peeling and pressing, your work will fail within a season. The bond between the substrate and the stone requires more than just sticky stuff, it requires a chemical marriage that accounts for moisture, deflection, and the microscopic physics of the stone itself. My boots smell like wet cement and my truck smells like floor wax because I respect the chemistry of the bond. If you want a floor that lasts longer than the mortgage, you stop looking at the pretty colors and start looking at the mil thickness of your adhesive ridges.
The microscopic reality of stone adhesion
Stone tile accents require specialized adhesives like polymer-modified thin-set or epoxy mortars because of their unique porosity and weight. Standard mastics often fail due to moisture trapped in the stone. Selecting an adhesive with high shear strength and C2TE S1 classifications ensures a permanent chemical bond to the subfloor. When you look at a piece of travertine or slate under a magnifying glass, you see a world of canyons and peaks. This is the porosity of the material. A standard organic mastic, the kind you buy in a pre-mixed bucket at the big-box store, dries by evaporation. Stone is often too dense or too wet for that evaporation to happen evenly. This leads to a skin-over effect where the outside is dry but the center is a gooey mess. You need a cementitious bond that cures through a chemical reaction, not just drying. Polymer-modified thin-sets contain powdered resins that, when mixed with water, create bridges between the molecules of the stone and the cement board. These bridges are what hold that heavy marble accent on a vertical wall in one of those showers that wow modern homeowners. Without those polymers, the weight of the stone will eventually win the battle against gravity.
The ghost in the deflection limit
Deflection is the amount a floor bends under a load and it is the primary reason stone tiles crack. For stone, you need a deflection rating of L/720, which is twice as stiff as what is required for ceramic tile. Adhesives cannot fix a bouncy floor, they can only bridge the gap. If your plywood subfloor moves more than a fraction of an inch when you walk on it, no adhesive on earth will keep your stone accents from popping. I have seen guys try to use double the amount of thin-set to stiffen a floor. It is a fool’s errand. Thin-set is brittle when cured. It has high compressive strength but zero tensile strength. If the wood under it bows, the thin-set snaps. This is where the physics of the subfloor meets the chemistry of the mortar. You must ensure the joist spacing and subfloor thickness meet the TCNA standards before the first trowel hits the ground.
“A floor is only as good as the subfloor beneath it; deflection is the enemy of every joint.” – Master Flooring Axiom
One contrarian truth that many homeowners hate to hear is that the thickest underlayment is often the worst choice. Too much cushion under a stone accent or a luxury plank causes the locking mechanisms and the mortar bond to snap under pressure. You want stability, not a trampoline.
Chemical warfare in the thin-set bag
Modified thin-set mortars use Portland cement, graded sand, and water-retention agents mixed with liquid or powdered polymers. These additives improve the bond strength and allow the mortar to flex slightly without losing its grip on the stone. Choosing the right ANSI rating is the difference between success and failure. ANSI A118.4 is the standard for modified thin-set. If you are installing stone accents in a wet area, you need to look for this rating. The polymers allow the adhesive to grip the stone in a way that standard mortar cannot. Think of it like this, standard mortar is like a handful of dry sand, while modified mortar is like a handful of sand mixed with microscopic rubber bands. When the house settles or the temperature changes, those rubber bands allow for tiny movements. If you are working with moisture-sensitive stones like green marble, you cannot use water-based adhesives at all. You have to jump to an epoxy-based adhesive, ANSI A118.3, which contains no water. If you use a water-based mortar on green marble, the stone will actually warp and curl like a piece of wet cardboard. This is why you must know the chemistry of your specific stone before you pick your bucket.
| Adhesive Type | ANSI Rating | Best Use Case | Cure Time |
|---|---|---|---|
| Standard Thin-set | A118.1 | Basic ceramic on concrete | 24 Hours |
| Modified Thin-set | A118.4 | Natural stone and glass accents | 24-48 Hours |
| Epoxy Mortar | A118.3 | Moisture-sensitive stone (Green Marble) | 12 Hours |
| Organic Mastic | A136.1 | Dry wall applications only | 72 Hours |
The 1/8 inch that ruins everything
Flatness is not the same as levelness and stone tile requires a surface that varies by no more than 1/8 inch over ten feet. Adhesives are designed to bond, not to level the floor. Using thin-set to fill deep holes creates uneven drying and shrinkage. When a installer tries to “build up” the mortar to level a low spot, the thicker areas of the adhesive shrink more than the thin areas as the water leaves the mix. This creates tension. That tension pulls on the bottom of the stone, often causing it to crack or “de-bond” before the furniture is even moved in. You must use a self-leveling underlayment or a dedicated floor patch before you start the adhesive process. Once the surface is flat, you use a notched trowel to create ridges. These ridges allow air to escape so the tile can be fully embedded. If you don’t collapse those ridges by back-buttering the stone, you leave air pockets. Air pockets are where moisture collects and where mold begins to grow, eventually ruining your grout restoration efforts years later. I always tell my apprentices that if they can see the subfloor through the mortar after they set the stone, they’ve already failed the client.
The moisture trap behind the accent
Waterproof does not mean vapor-proof and adhesives must be able to withstand constant hydrostatic pressure in bathroom settings. Stone is naturally porous and will suck moisture out of the adhesive if not properly managed. In a shower, the stone accent acts like a sponge. It pulls water in, and that water eventually hits the adhesive layer. If you used a cheap mastic, it will re-emulsify, turning back into a liquid paste, and your tiles will slide right off the wall. This is a common disaster in small bathrooms where ventilation is poor. You need a mortar that is rated for submerged or wet environments. Additionally, you need to consider the finish at the floor-to-wall transition. Using chic baseboard designs can hide expansion gaps, but those gaps must exist. Stone expands and contracts. If you glue the stone tight against the floor and the wall, the internal pressure will eventually shear the adhesive bond. You need that 1/4 inch gap at the perimeter, hidden by your baseboards, to allow the entire floor system to breathe.
“Movement joints are not optional; they are the pressure release valves of a stone installation.” – TCNA Handbook
Adhesive application essentials checklist
Follow this checklist to ensure your stone accents stay bonded for decades. Skipping even one of these steps is an invitation for a callback.
- Verify subfloor deflection meets L/720 for stone.
- Clean the back of every stone tile to remove cutting dust.
- Mix thin-set with a low-speed drill to avoid whipping air into the bucket.
- Use a notched trowel appropriate for the stone size (typically 1/4 or 3/8 inch).
- Back-butter every piece of stone to ensure 95 percent coverage.
- Maintain a consistent temperature between 50 and 90 degrees Fahrenheit during curing.
- Allow at least 24 hours before walking on or grouting the accents.
The final word on the job site is that shortcuts are expensive. You might save twenty dollars on a bag of cheap mortar, but you will spend five thousand dollars replacing a failed floor. Stone is a premium product. It deserves a premium bond. Respect the chemistry, check your levels, and never trust a subfloor that hasn’t been tested with a straightedge. When the job is done right, the adhesive is the invisible hero that keeps the architecture together. If you need help choosing materials or want to discuss a specific project, you can always contact us for expert guidance on your next installation.