
The subfloor secret to a perfect finish
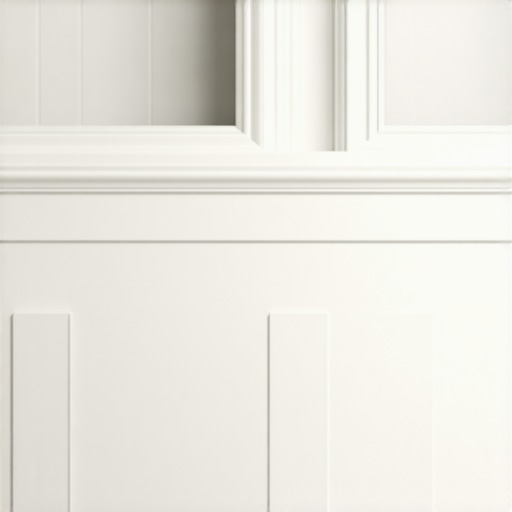
Most guys skip the leveling compound. They think the underlayment will hide the dip. It won’t. I spent three days grinding concrete on a job last month just so the floor wouldn’t click like a castanet. That level of obsession is what separates a professional installation from a weekend hack. When you ask whether bathroom baseboards should match the floor or the wall, you are asking a question of structural alignment and visual weight. The baseboard exists to hide the expansion gap, a physical necessity for every floor system. If you match the floor, you extend the horizontal plane, making the room feel wider. If you match the wall, you emphasize the vertical rise, making the ceiling feel higher. My hands are stained with the residue of a thousand grout jobs, and I can tell you that the choice dictates more than just color. It dictates the material you use and how it handles the inevitable moisture of a wet environment. I smell the oak dust and the damp concrete every morning. I know that a baseboard is the final defense for your subfloor. If you choose a wood baseboard to match a wood floor in a high-moisture bathroom, you are inviting capillary action to rot your plates. It is a technical decision disguised as a design choice.
The visual weight of a baseboard anchor
Bathroom baseboards often serve as the visual anchor that transitions between tile flooring and painted walls or showers. When the baseboard matches the floor, it creates a grounded look that expands the footprint of the bathroom. This is particularly effective in small spaces where a break in color can make the floor look chopped up. Many homeowners opt for a chic baseboard design that bridges the gap between these two planes. However, if the baseboard matches the wall, it tends to disappear. This is the goal of the minimalist who wants the focus on a high-end vanity or a custom shower. I have seen beautiful showers that wow become secondary because a dark baseboard created a heavy line at the bottom of the room. The decision depends on where you want the eye to land. If your floor is a busy mosaic, matching the baseboard to the wall provides a clean frame. If your floor is a large-format porcelain, matching the baseboard using the same tile material creates a high-end, integrated look.
“A floor is only as good as the subfloor beneath it; deflection is the enemy of every joint.” – Master Flooring Axiom
The physics of the wet zone
Moisture resistance is the primary engineering requirement for any bathroom baseboard regardless of whether it matches the grout or the wall paint. In a bathroom, the floor is a splash zone. Water sits at the perimeter. If you install an MDF baseboard because it matches your white walls perfectly, you are installing a sponge. MDF consists of compressed wood fibers and resin. Once moisture penetrates the factory primer, the fibers swell. This expansion is irreversible. You end up with a baseboard that looks like it has been through a flood. For bathrooms, I always recommend PVC, solid wood with a high-quality oil-based finish, or tile. Tile baseboards are the king of the wet zone. You take the same tile used on the floor, cut it into four or six-inch strips, and finish the top with a Schluter strip or a bullnose edge. This ensures that the water never reaches the drywall behind the baseboard. It creates a waterproof tub at the bottom of your room. When we look at eco-friendly tile solutions, we see more recycled ceramic being used for this very purpose because it is inert and won’t off-gas when exposed to cleaning chemicals.
Why your subfloor is lying to you
Subfloor levelness dictates the success of your baseboard installation and its alignment with tile. If your concrete slab has a 1/4 inch dip over six feet, your rigid baseboard will not follow that curve. It will leave a gap. This is where the chemistry of adhesives and the skill of scribing come into play. Most installers try to fill that gap with a massive bead of caulk. It looks terrible within six months because caulk shrinks and attracts hair and dust. I prefer to scribe the baseboard to the floor. I use a compass to track the profile of the floor onto the bottom of the board, then I plane it down. This creates a tight fit that requires almost no filler. If you are matching the floor and using tile as your baseboard, you have to be even more precise. You cannot scribe tile. You must ensure the floor is perfectly flat using self-leveling underlayment before the first tile is set. If the subfloor is off, the grout lines in your baseboard will never line up with the grout lines in the floor. This leads to a visual mess that ruins the entire aesthetic of the room.
| Material | Moisture Resistance | Stability | Best Match Recommendation |
|---|---|---|---|
| PVC Trim | 100% Waterproof | High | Matches White Painted Walls |
| Ceramic Tile | 100% Waterproof | Highest | Matches Tile Floor |
| Solid Pine | Low | Medium | Matches Stained Wood Floors |
| MDF | Zero | Lowest | Never use in bathrooms |
The 1/8 inch that ruins everything
Expansion gaps are the hidden technical requirement that many homeowners and DIYers ignore when installing baseboards. Every floor moves. Hardwood moves because of the cellular structure of the wood fibers reacting to humidity. Tile moves because of thermal expansion and structural deflection. If you jam your baseboard tight against the floor and then nail it into the wall studs, you have created a fixed point. When the floor tries to expand, it hits the baseboard. This pressure can cause tile to tent or wood to buckle. In the humid climate of the South, like in Houston, this is a recipe for disaster. The air is so thick with moisture that materials are constantly at their maximum expansion. You must leave a 1/8 inch gap between the bottom of the baseboard and the top of the floor. This gap is then filled with a flexible 100% silicone sealant, not a rigid grout. If you use grout at the change of plane, it will crack. I have seen thousands of bathrooms where the grout restoration secrets involve removing old, cracked grout from the baseboard line and replacing it with color-matched silicone. This allows the house to breathe without compromising the waterproof seal.
The chemistry of the silicone bead
Flexible sealants are the only correct way to bridge the gap between baseboards and floors. While most people want the thickest underlayment, too much cushion actually causes the locking mechanisms on LVP to snap under pressure. This same logic applies to the seal at the baseboard. If the floor is flexing underfoot because of a soft underlayment, the seal at the baseboard is being stressed. A rigid caulk will fail. You need a high-modulus silicone that can handle 25% movement. When matching the baseboard to the floor, you should use a sealant that matches the floor color. When matching the wall, use a sealant that matches the baseboard color. This makes the transition invisible. If you are struggling with old, moldy lines, you might need to know how to refresh grout and silicone without a full tear-out. It involves a mechanical removal of the top layer and a chemical cleaning of the substrate to ensure the new bead bonds at a molecular level. Use denatured alcohol to prep the surface. If you don’t, the oils from your skin or soap residue will prevent the silicone from sticking, and you will be back to square one in a month.
Contrarian views on underlayment thickness
Underlayment density is often more important than thickness when protecting your baseboard transition. People think a thick 6mm foam underlayment makes a floor feel soft and expensive. In reality, it creates a trampoline effect. Every time you walk near the wall, the floor sinks, pulling away from the baseboard. This vertical movement ruins the seal. I advocate for high-density rubber or felt underlayments that are no more than 2mm to 3mm thick. These provide superior sound dampening without the structural instability of cheap foam. This stability is vital if you have opted for a modern look with baseboard makeover ideas that involve flush-mount or shadow-gap profiles. These high-end designs leave no room for error. If the floor moves, the shadow gap looks uneven. This is the difference between a floor that lasts 30 years and one that needs a repair in five. I always check the Compression Strength (psi) of the underlayment before I let it on my job site. Anything less than 20 psi is garbage for a bathroom floor with heavy fixtures.
- Check subfloor moisture levels with a pinless meter.
- Acclimate wood or LVP for at least 48 hours in the bathroom.
- Ensure the subfloor is flat within 3/16 inch over 10 feet.
- Leave a perimeter expansion gap equal to the thickness of the flooring.
- Use stainless steel finish nails to prevent rust spots in high humidity.
- Seal the back of wood baseboards before installation.
“Expansion gaps at the perimeter must be maintained to prevent bucking even in ceramic tile installations where the wall meets the floor.” – TCNA Standard Analysis
The final verdict on color matching
Design decisions regarding color matching should follow the structural logic of the bathroom layout. If your bathroom has high ceilings and you want to keep it airy, match the baseboard to the wall color using a semi-gloss finish. This provides a subtle texture change without a color break. If you have a sprawling master bath with beautiful stone floors, use the stone for the baseboard. This creates a high-end spa feel that is also functionally superior. For those maintaining their current setup, tile cleaning tips can help keep those transitions looking sharp. Dirt tends to settle in the corner where the baseboard meets the floor, so a clean transition is easier to maintain. Never use a color that is almost but not quite the same as the floor. It looks like a mistake. Either match it exactly or create a deliberate contrast. In my 25 years, I have seen that a deliberate choice, backed by proper subfloor preparation and moisture-proof materials, always wins. The floor is a performance surface. Treat it like one. If you have questions about specific materials for your project, you can always contact us for expert guidance on your next renovation.