
The Science of Drilling Through Ceramic and Porcelain
I spent three days grinding concrete on a job last month just so the floor wouldn’t click like a castanet. Most guys skip the leveling compound. They think the underlayment will hide the dip. It won’t. I have spent decades with my knees on the subfloor, and I can tell you that if your subfloor is off by an eighth of an inch, your tile will crack when you try to drill into it. When you are installing hardware in showers that wow modern designs for 2025, you are not just making a hole. You are managing thermal expansion and structural integrity. Most homeowners buy a cheap masonry bit and wonder why their hundred-dollar porcelain plank just shattered. It is because they do not understand the molecular difference between clay bodies.
The microscopic reality of clay and heat
The primary difference between ceramic and porcelain tiles lies in their density and water absorption rates, which dictates the type of drill bit required. Porcelain is fired at higher temperatures, resulting in a vitrified material that demands diamond-tipped bits for successful penetration without cracking. Ceramic tile is basically baked mud with a glass skin. It is porous and relatively soft once you get past the glaze. Porcelain is a whole different beast. It is dense, packed with feldspar, and fired until it is basically a man-made stone. If you try to use a standard carbide bit on a high-end porcelain tile, you will just sit there generating heat until the bit glows red and the tile snaps from thermal shock. You need to understand the Mohs scale of mineral hardness. Ceramic usually sits around a five or six. Porcelain pushes up into the seven or eight range. You cannot cut something hard with something softer. It is basic physics. If you are doing a baseboards makeover ideas to elevate your space and need to drill through tile to reach the wall studs, knowing your material is the first step to not ruining the room.
The diamond advantage in porcelain drilling
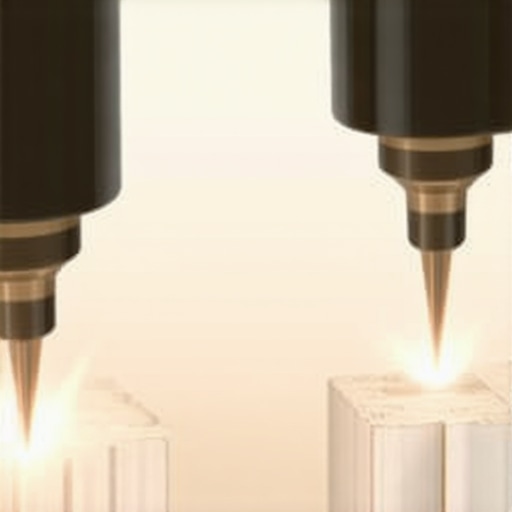
Diamond-tipped hole saws and bits are the gold standard for porcelain because they use industrial-grade diamond grit to grind away the material rather than cutting it. This grinding action generates less concentrated stress on the vitrified tile body, preventing the spider-web cracks common with impact-based drilling. I have seen guys try to use hammer drills on porcelain. That is a recipe for disaster. A hammer drill is designed to pulverize concrete through percussion. Porcelain is brittle. When you hit it with a hammer action, the vibration resonates through the tile until it finds a microscopic flaw and turns it into a giant crack. When you are setting up showers with a style trendy ideas for small bathrooms, every hole for a towel bar or a glass door hinge needs to be precise. You want a diamond bit with a hollow core. This allows the water to reach the cutting surface and flush out the slurry. Without flushing, the dust acts as an abrasive that wears down your bit in seconds.
“A floor is only as good as the subfloor beneath it; deflection is the enemy of every joint.” – Master Flooring Axiom
Why your carbide bit keeps failing
Carbide-tipped spear bits are effective for ceramic tile because they can bite into the softer clay body, but they fail on porcelain because the material hardness exceeds the bit’s abrasive resistance. Carbide loses its edge rapidly when subjected to the high-friction environment of a porcelain surface. If you are working on tile cleaning tips for a sparkling bathroom in 2025 and notice a loose grab bar, you might be tempted to just grab whatever bit is in your bag. Do not do it. A dull carbide bit will skip across the surface and gouge the glaze. This creates a permanent scar that even the best grout restoration cannot hide. If you must use carbide on ceramic, keep the RPMs low. High speed equals high heat. Heat is the killer of all drill bits. I have seen bits lose their tempering in under ten seconds because someone thought they could power through the hole at 2,000 RPM. You want a slow, steady pressure. Let the tool do the work. If you find yourself leaning your entire body weight onto the drill, you are doing it wrong. That pressure creates lateral stress that will pop the tile right off the thin-set.
The metallurgy of drill bit selection
Understanding the chemistry of your tools is as important as the tile itself. Most cheap bits are made of high-carbon steel with a tiny flake of carbide brazed onto the tip. That braze is a weak point. Once the tip gets hot, the braze softens, and the carbide tip just falls off into the hole. Professional-grade diamond bits use a vacuum-brazed process or an electroplated bond. Vacuum-brazing is superior because it fuses the diamond particles to the steel core in a way that allows for better heat dissipation. When you are looking for eco-friendly tile solutions for sustainable homes in 2025, you want tools that last. Buying five cheap bits that you throw in the trash is not sustainable. One high-quality vacuum-brazed diamond bit will outlast a dozen cheap ones if you treat it right.
“The integrity of a tile installation is fundamentally linked to the thermal management during penetrative drilling; excessive heat leads to micro-fracturing.” – Technical Tile Manual
Wet vs dry drilling techniques
Wet drilling is mandatory for porcelain to manage heat and extend bit life, whereas dry drilling is only acceptable for ceramic when using specialized vacuum-brazed bits at very low speeds. Water acts as both a lubricant and a coolant, preventing the thermal expansion that leads to tile failure. I always keep a spray bottle or a wet sponge next to me. If I am drilling a hole for a shower head, I have someone else hold the sponge just above the bit. The water captures the dust and turns it into a slurry. This keeps the air clean and the bit cool. If you see smoke, you have already failed. That smoke is the resin or the metal itself burning. Some modern bits come with a wax core. As the bit heats up, the wax melts and lubricates the diamonds. These are great for quick jobs where you do not want to make a mess, but they still do not beat a constant flow of cold water. If you are worried about the mess, you can use a suction-cup guide that holds a small reservoir of water around the hole. This keeps everything contained and ensures your hole is perfectly vertical. After the job is done, you might need how to refresh grout without replacing it advice if you spilled slurry everywhere, so keep a rag handy.
The 1/8 inch that ruins everything
Precision in hole placement is governed by the structural support behind the tile, as a hole drilled into a hollow void will cause the tile to collapse inward under the pressure of the drill. You must ensure the tile is fully back-buttered and bonded to the substrate before attempting to drill hardware holes. I have walked into so many bathrooms where the tile is cracked right at the toilet bolt or the towel rack. It is almost always because there was a void in the thin-set behind that spot. When you push on the drill, the tile has no support and it snaps. This is why I am a stickler for 95 percent coverage. You should not be able to hear a hollow sound when you tap the tile. If you are installing chic baseboard designs that transform rooms in 2025 over a tiled wall, make sure your anchors are long enough to bite into the framing, not just the backer board. The tile is a facade. It has no structural strength in tension. It only has strength in compression. If you tighten a screw too hard against the tile without a plastic sleeve or anchor, the metal screw head will act like a wedge and split the tile in two. It will buckle. I have seen it happen a thousand times.
Technical Comparison Table
| Tile Type | Hardness (Mohs) | Recommended Bit | Cooling Method | RPM Range |
|---|---|---|---|---|
| Ceramic Wall | 4-5 | Carbide Spear | Air or Water | 400-600 |
| Ceramic Floor | 5-6 | Carbide or Diamond | Water Recommended | 300-500 |
| Porcelain | 7-9 | Diamond Hole Saw | Constant Water | 200-400 |
| Natural Stone | Varies | Diamond Core | Wet Slurry | 300-500 |
Pre-Drilling Checklist
- Verify tile material (Porcelain vs Ceramic) to select the correct bit.
- Check for hollow spots behind the tile by tapping with a plastic mallet.
- Tape the drill site with masking tape to prevent the bit from walking.
- Ensure you have a water source for cooling (spray bottle or wet sponge).
- Set drill to non-hammer mode.
- Clear the work area of debris that could scratch the tile surface.
- Mark the exact center point with a fine-tip permanent marker.
The bottom line is that you cannot rush a hole in tile. If you try to save five minutes by using a dull bit or skipping the water, you will spend five hours replacing a broken tile. I have spent too many years fixing other people’s mistakes to tell you anything else. Use the right tool, keep it cool, and respect the material. If you need more help with your project, you can contact us for expert advice on your specific flooring needs. For more information on our data handling, see our privacy policy.