
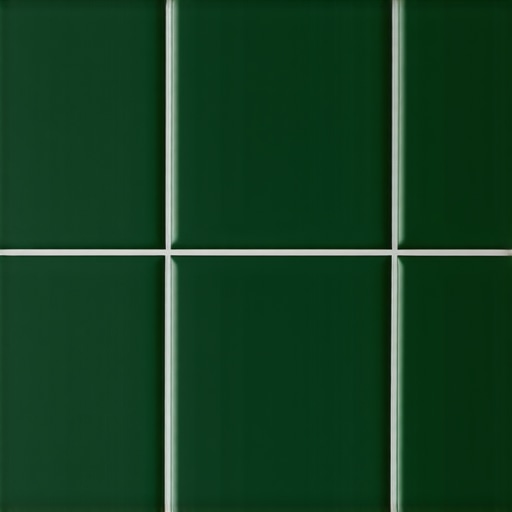
Selecting the best grout color for dark green tiles requires an understanding of visual contrast and material science. Black or charcoal grout provides a sophisticated shadow line for emerald tiles, while light grey offers a modern industrial contrast for forest green. Matching the grout to the tile creates a monolithic and expansive appearance. Most guys skip the leveling compound. They think the underlayment will hide the dip. It won’t. I spent three days grinding concrete on a job last month just so the floor wouldn’t click like a castanet. When you are dealing with dark green tiles, if your subfloor is off, your grout lines will look like a mountain range instead of a flat plane. I have spent 25 years on my knees with a moisture meter and a level. I view a floor as a performance surface. You cannot just slap some green ceramic on a wavy slab and expect the grout to stay put. The chemistry of the bond matters more than the color of the pigment.
The physics of pigment in dark green tile installations
The chemical composition of grout determines how well it holds its color against the deep saturated tones of dark green ceramic or porcelain. High-performance grout uses mineral oxides to achieve its hue. When you pair a dark green tile with a light grout, you are inviting every microscopic inconsistency in your spacer layout to show up. Dark green tiles often have a high gloss finish that reflects light into the grout joint. If the joint is too shallow or if the water-to-powder ratio was off during the mix, you will see mottling. Mottling is the uneven distribution of pigment. In my shop, we never eyeball the water. We use a graduated cylinder. A single extra ounce of water can turn a charcoal grout into a dusty grey, ruining the deep forest aesthetic you were aiming for.
“A floor is only as good as the subfloor beneath it; deflection is the enemy of every joint.” – Master Flooring Axiom
Why charcoal grout creates the perfect shadow line
Charcoal grout is the industry standard for dark green tiles because it mimics the natural shadow found between deep-toned materials. This color choice hides the inevitable dirt that accumulates in showers that wow. When you use charcoal, you are not trying to compete with the green. You are framing it. It creates a grid that feels structural rather than decorative. In the world of high-end installs, we call this the depth-perception effect. If you use a pitch-black grout, it can sometimes look like a void. Charcoal has just enough grey to show the texture of the joint. This is especially important for handmade tiles where the edges are not perfectly straight. The charcoal hides the variations while the green takes center stage.
The danger of white grout with dark green ceramics
White grout creates an aggressive high-contrast look that highlights every single installation flaw and requires constant maintenance. Unless you are going for a specific retro-diner look, white grout with dark green tiles is usually a mistake. The contrast is so sharp that it causes eye fatigue. Furthermore, white cementitious grout is incredibly porous. In a bathroom environment, it will absorb body oils and soaps. Within six months, your crisp white lines will be a muddy yellow. If you must have a light look, go with a cool-toned light grey. It provides the same bright feel without the maintenance nightmare. For those who already have stained lines, learning how to refresh grout without replacing it is the only way out of that hole.
The chemistry of epoxy versus cementitious grout
Epoxy grout is the superior choice for dark green tiles because it is non-porous and chemically resistant to fading. Standard cement grout is just Portland cement and sand. It is basically a sponge. Epoxy grout is a two-part resin system. It does not need a sealer. For dark green tiles in a wet area, epoxy is the only way to ensure the color stays vibrant. The pigment is locked in a plastic-like matrix. It will not react to the minerals in your water. If you live in a region with hard water, a cement-based dark grout will eventually develop efflorescence. That is the white crusty salt that makes your beautiful green floor look like it was dusted with flour. Epoxy eliminates this. It is harder to install because it is sticky and has a short pot life, but it is the professional choice every time.
| Grout Color | Visual Impact | Maintenance Level | Best Tile Match |
|---|---|---|---|
| Charcoal | High Depth | Low | Emerald / Forest |
| Light Grey | Modern Contrast | Medium | Sage / Olive |
| Warm Beige | Earthy Softness | Medium | Hunter Green |
| Matched Green | Monolithic | Low | Matte Ceramics |
The ghost in the expansion gap
Expansion gaps at the perimeter of a dark green tile floor are the most overlooked part of the structural system. Tile expands and contracts with temperature changes. If you grout the tile tight against the wall, the floor will eventually tent or crack. You need a 1/4 inch gap. This gap is hidden by chic baseboard designs. I have seen entire kitchen floors pop like popcorn because the installer forgot that buildings move. Dark green tiles, especially those in sunlit rooms, absorb more thermal energy than lighter tiles. This means they expand more. You must use a color-matched 100 percent silicone caulk in the corners and at the baseboards instead of hard grout. Hard grout in a change of plane will crack within the first season.
Grout selection checklist for dark green tiles
- Check the tile edge for rectified versus pressed status.
- Measure the moisture content of the subfloor with a pin-meter.
- Verify that the grout pigment is UV-stable for sunlit rooms.
- Select a grout width of at least 1/16 inch for rectified tiles.
- Ensure the thin-set has fully cured for 24 hours before grouting.
- Use a micro-fiber sponge for the final wash to avoid pulling pigment.
The 1/8 inch that ruins everything
The width of your grout line changes how the color is perceived by the human eye. A wide grout line with a contrasting color will make the room look smaller. For dark green tiles, I always recommend the narrowest joint the tile allows. For a rectified porcelain, that is 1/16 of an inch. For a hand-molded tile, you might need 1/8 or even 3/16 to account for the size variation. If your lines are too wide and the color is too light, the floor looks like a graph paper notebook. You want the tile to be the hero. Keep the lines tight and the color deep. If you are struggling with old, wide joints, check out grout restoration secrets to fix the visual balance. Precision in the layout phase is what separates a master from a handyman.
“Grout is not a structural component, but its failure is often the first sign of structural movement.” – Master Flooring Axiom
Why your subfloor is lying to you
Subfloors often appear flat to the naked eye but possess dips that will cause grout to crack and tiles to lippage. I don’t care if the house is brand new. The framing dries out and the plywood bows. If you are laying large format dark green tiles, you have to be within 1/8 inch over 10 feet. If you are not, your grout lines will vary in width and depth. This ruins the color consistency. A deep pocket of grout will dry slower and often appear darker than a thin layer. This creates a splotchy look. I use a 10-foot straightedge on every single job. If there is a gap, the self-leveling compound comes out. It is the only way to ensure those dark green tiles look like a million bucks. Your floor is a system. The grout color is just the final signature on a long engineering process.