
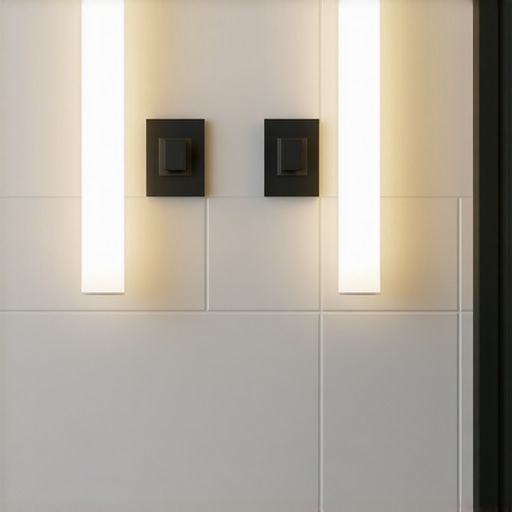
I spent three days grinding concrete on a job last month just so the floor wouldn’t click like a castanet. Most guys skip the leveling compound because they think the underlayment will hide the dip. It won’t. That experience taught me that the surface you see is only as good as the structural integrity and the lighting that reveals it. When you are dealing with a tile-heavy bathroom, the light fixtures aren’t just decorative elements. They are tools that either highlight the precision of your grout lines or expose every microscopic flaw in the subfloor preparation. A master installer knows that high-gloss porcelain behaves like a mirror, and if your light placement is off, you will see every ripple in the thin-set. We are looking at the intersection of electrical engineering and masonry. If you don’t account for the refractive index of your floor, you are essentially installing a beautiful surface and then blinding yourself to its quality.
The physics of reflection on polished porcelain
Polished porcelain and glazed ceramic tiles possess high specular reflection coefficients that require diffused light sources to prevent harsh glare. Using high-lumen bulbs with focused beams on shiny surfaces creates hot spots that obscure the texture of the tile and make the floor feel slippery even when dry. When light hits a polished surface, the angle of incidence equals the angle of reflection. This is why a chandelier placed directly over a glossy floor often results in a blinding spot that hides the natural beauty of the stone. To mitigate this, we look at the Kelvin scale. A 3000K bulb provides a warm, inviting glow that softens the harshness of white glaze. If you go too high into the 5000K range, your bathroom starts to look like a surgical suite, and every microscopic speck of dust on the tile cleaning routine becomes a glaring distraction. The goal is to use frosted globes or recessed cans with deep baffles. This keeps the light source hidden and allows the illumination to wash over the surface rather than bounce off it like a laser.
Shadows and the depth of grout channels
Grout lines create a rhythmic grid that defines the geometry of a bathroom while providing necessary expansion joints for the ceramic assembly. Lighting must be positioned to minimize deep shadows within these channels, as excessive shadowing can make even the cleanest grout appear dirty or unevenly applied. I have seen gorgeous grout restoration projects look terrible because the vanity light was too low, casting long, horizontal shadows across every vertical joint. The chemistry of grout involves a porous structure of Portland cement and sand. This texture absorbs light differently than the surrounding tile. If you want to showcase the precision of your spacing, use side-lit sconces. This fills the grout lines with light from multiple directions, neutralizing the depth of the shadow and making the floor look like a single, cohesive plane. This is especially true for eco-friendly tile solutions that often feature matte finishes or recycled glass inclusions which react uniquely to different wavelengths of light.
“A floor is only as good as the subfloor beneath it; deflection is the enemy of every joint.” – Master Flooring Axiom
Waterproofing the light in modern showers
Wet rated light fixtures are a non-negotiable requirement for shower enclosures to ensure safety and prevent electrical failure in high-moisture zones. These fixtures must feature a sealed gasket and an IP65 or higher rating to withstand direct water contact and the inevitable steam buildup. When you are designing showers that wow, the lighting must be integrated into the waterproofing plan. Most installers overlook the fact that steam rises and condenses on the lens of the fixture. This condensation can lead to mineral deposits that dim the light over time. In showers with a style suited for smaller spaces, a single recessed light with a trim that matches the hardware is often the best choice. This creates a clean look that doesn’t compete with the tile pattern. The interaction between the water droplets on the tile and the light creates a prismatic effect that can be stunning if the CRI of the bulb is above 90. High CRI ensures that the colors of your stone or ceramic are rendered accurately, showing the true richness of the material rather than a washed-out gray.
| Tile Finish | Recommended Kelvin | Ideal CRI | Fixture Type |
|---|---|---|---|
| Polished Marble | 2700K – 3000K | 92+ | Frosted Recessed |
| Matte Slate | 3000K – 3500K | 85+ | Directional Track |
| Glazed Ceramic | 3000K | 90+ | Wall Sconces |
| Glass Mosaic | 4000K | 95+ | Indirect LED Strips |
Baseboards as a boundary for light pools
Baseboards serve as the critical transition between the vertical wall and the horizontal floor while protecting the bottom of the drywall from moisture during cleaning. Incorporating low-level lighting near these trim pieces can accentuate the perimeter and provide a safe path for nighttime bathroom use. We often see chic baseboard designs that are built to withstand the humidity of a tile-heavy environment. If you are doing a baseboards makeover, consider the use of LED tape light tucked under a small lip in the molding. This grazes the floor with light, emphasizing the texture of the tile without causing the glare issues found with overhead lighting. This low-level illumination is particularly effective for highlighting the junction where the tile meets the wall. It shows off the quality of the cut and the consistency of the perimeter caulk. A poor cut will be hidden in shadow, but a master-grade installation deserves to be framed in light.
The technical nightmare of steam and electricity
Humidity levels in a bathroom can reach ninety percent during a shower, creating an atmospheric condition that is hostile to standard residential light fixtures. All bathroom lighting must be UL listed for damp or wet locations to prevent corrosion of the internal components and potential short circuits. The air in a bathroom is a suspension of water vapor and cleaning chemicals. Over time, these particles settle on the fixture housing. If the fixture is not properly rated, the salt and minerals in the water will eat through the finish, leading to unsightly pitting or rust. This is why I advocate for stainless steel or high-quality brass housings rather than painted steel. You also need to think about the heat dissipation of the fixture. LEDs generate heat at the base, and if they are enclosed in a tight, unventilated space behind a shower soffit, their lifespan will be cut in half. Proper ventilation and fixture choice are the twin pillars of a lasting bathroom renovation. If you need assistance with planning your layout, you should contact us for a consultation on technical specifications.
“Consistency in illumination reveals the true craft of the mason; shadows are the refuge of the amateur.” – Master Flooring Axiom
A checklist for bathroom lighting success
- Verify that all fixtures located within three feet of the shower or tub are wet-rated.
- Ensure that vanity lights are placed at eye level to eliminate facial shadows during grooming.
- Check the CRI of all bulbs to ensure they are 90 or above for accurate tile color representation.
- Install a dimmer switch to adjust light levels based on the time of day and mood.
- Confirm that the grout has been properly sealed before adding high-intensity lighting.
- Inspect the baseboards for any gaps where light could leak and expose subfloor issues.
- Review the how to refresh grout guide if your old grout looks dull under new lights.
Maintaining the brilliance of your surfaces
Tile and grout require regular maintenance to maintain their reflective properties and ensure that the lighting continues to enhance the room’s aesthetics. Accumulated soap scum and hard water stains will diffuse light in an unattractive way, making the surfaces look muddy and neglected. I tell my clients that if they are going to invest in high-end lighting, they must invest in a squeegee. Every time water dries on a tile, it leaves a microscopic layer of calcium. After a month, that layer is thick enough to kill the luster of even the most expensive Italian porcelain. Using the right cleaners is also vital. Avoid acidic cleaners that can etch the surface of the tile or degrade the grout sealer. A neutral pH cleaner is the only thing that should touch a professional installation. When the surface is clean, the light can do its job. It bounces off the peaks of the texture and defines the edges of the room, creating the depth and dimension that we strive for as builders. For more information on how we handle your data, please see our privacy policy.