
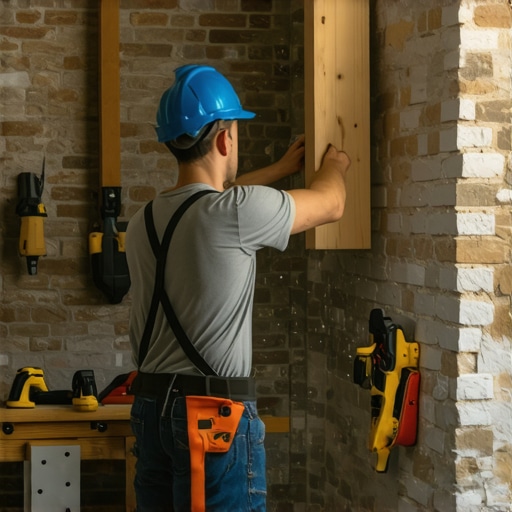
The subfloor secret and the hard truth about concrete
Most guys skip the leveling compound and think the underlayment will hide the dip. It won’t. I spent three days grinding concrete on a job last month just so the floor wouldn’t click like a castanet. That same job had a massive brick fireplace and three concrete block walls that needed trim. If you think you can just fire a finish nail into masonry and have it stay, you are in for a world of hurt. I have seen miles of baseboards peeling away from walls like old wallpaper because the installer ignored the physics of the substrate. Masonry is not wood. It does not give. It does not forgive. When you try to force a standard 18-gauge brad into a cured concrete block, the nail usually does one of two things. It either curls into a metal pretzel or it blows a crater out of the mortar joint. Neither of those results will hold your trim. You need a strategy that respects the density of the material and the chemical reality of the bond. I have spent twenty-five years with sawdust under my nails and the smell of WD-40 in my lungs. I have learned that the only way to beat masonry is to outthink it. You have to understand the porosity of the brick, the alkalinity of the concrete, and the shear strength of your fasteners. We are not just decorating a room. We are performing a structural engineering feat on a micro-scale. Every piece of trim must be anchored so it can withstand the seasonal movement of the house without popping loose. If you want a floor that looks like it belongs in a high-end gallery, you have to start with the things nobody sees. You have to start with the mechanical connection between the wood and the stone.
The physics of the masonry substrate
Masonry walls require specialized mechanical fasteners or high-performance chemical adhesives because standard nails cannot penetrate the dense crystalline structure of concrete or brick. To get a baseboard to stick, you must account for the compressive strength of the material, which often exceeds 3,000 PSI in residential slabs. Masonry is a thirsty material. It is full of microscopic pores that can suck the moisture out of standard wood glue before it has a chance to cure. This leads to a brittle bond that fails the moment someone bumps the wall with a vacuum cleaner. When we talk about attaching baseboards, we are talking about fighting the inherent rigidity of the wall. Unlike a stud wall where you have some flex, a masonry wall is an absolute. If the wall is not perfectly flat, and most are not, the baseboard will want to pull away and return to its straight shape. This tension is constant. If your fastening method is weak, that tension will eventually win. I have walked into jobs where the grout in the floor was perfect, the tile was straight, but the baseboards were gapping half an inch because the installer thought some hot glue would do the trick. It is embarrassing. You need to understand that the wall is a living thing in terms of temperature and moisture. Concrete slabs and brick walls breathe. They hold thermal mass. This means the adhesive you choose must be able to handle the thermal expansion and contraction of two very different materials. Wood moves a lot. Masonry moves very little. That difference is where the failure happens. You need a fastener that can bridge that gap.
“A floor is only as good as the subfloor beneath it; deflection is the enemy of every joint.” – Master Flooring Axiom
Chemical bonds and the molecular reality of adhesives
When you cannot use nails, you turn to chemistry. Not all construction adhesives are created equal. You have your water-based options which are fine for drywall, but they are a waste of time on masonry. You need a polyurethane-based adhesive. These products cure through a chemical reaction with atmospheric moisture. They do not just dry; they transform into a tough, flexible rubber that can withstand incredible shear forces. When I apply a bead of high-quality polyurethane to the back of a baseboard, I am looking for a specific pattern. You do not just glob it on. You want a zig-zag pattern that allows air to reach the center of the bead so the entire thing cures evenly. The bond strength of a premium polyurethane adhesive can exceed 300 PSI. This is more than enough to hold a piece of stubborn oak against a concrete block. However, the surface must be clean. If there is dust on the masonry, you are not bonding to the wall. You are bonding to the dust. The dust will act as a release agent and the whole board will fall off in six months. I always carry a stiff nylon brush and a vacuum. Every inch of that masonry gets scrubbed before the glue touches it. This is the difference between a pro and a hack. The hack is already at the bar while I am still vacuuming the wall. But my baseboards stay put for thirty years. I also look at the moisture content of the wood. If the baseboards are too wet, the adhesive might not grab properly. You want that wood acclimated to the space. If you are working in a damp basement, the challenges double. You need to check for efflorescence, that white powdery salt that grows on concrete. If that is present, no glue in the world will save you. You have to treat the moisture issue first.
Mechanical fastening strategies for permanent stability
Sometimes glue is not enough. If the wall is severely bowed, you need mechanical force to pull the board tight while the adhesive sets. This is where the hammer drill comes out. I prefer using a 5/32-inch carbide-tipped bit to drill a pilot hole through the baseboard and into the masonry. Then, I drive a trim-head masonry screw into the hole. These screws have a high-low thread design that cuts into the concrete and provides a massive amount of grip. The head is small enough that it can be sunk below the surface and filled with a bit of putty. It becomes invisible. Another trick of the trade is the “X-nailing” technique into the mortar joints. If you are working with old brick, the mortar is often softer than the brick itself. You can drive two finish nails at opposing 45-degree angles into the mortar. This creates a mechanical wedge that is surprisingly strong. But you have to be careful. If the mortar is sandy and crumbling, it will not hold. You might need to look at grout restoration secrets for long lasting results if the masonry itself is failing. You cannot anchor a heavy baseboard to a wall that is falling apart. For heavy-duty commercial applications, I have used powder-actuated tools. These use a literal blank cartridge to fire a hardened steel pin through the wood and into the concrete. It is fast and it is loud. It smells like a gun range on the job site. But it is overkill for most homes. Most of the time, the combination of a high-quality adhesive and a few strategic masonry screws is the gold standard. It gives you the best of both worlds. The glue provides the long-term surface area bond, and the screws provide the immediate mechanical clamp.
The 1/8 inch that ruins everything
Precision is not just about how the corners look. It is about how the material sits against the floor. If your subfloor is uneven, your baseboard will have gaps at the bottom. I have seen guys try to fill those gaps with caulk. It looks terrible. If you have a 1/8 inch gap over a four-foot span, it will catch every bit of dust and pet hair in the house. This is why I spend so much time on the subfloor. I want that floor flat to within 1/8 inch over ten feet. If the floor is flat, the baseboard sits flush. If it sits flush, you do not have to fight it to get it to stay against the masonry. When you are dealing with tile, you also have to worry about the grout lines. If your baseboard is thin, it might dip into the grout joints. This creates a wavy appearance. You need a thicker baseboard or a shoe mold to bridge those gaps. Think about the baseboards makeover ideas to elevate your space that actually work in the real world. A taller, beefier baseboard is often easier to install on masonry because it has more surface area for the adhesive. It also has more weight, which can help it settle into the floor. But you have to be careful about the expansion gap. You cannot jam the baseboard tight against the floor. You need a tiny bit of breathing room so the floor can expand and contract. This is especially true with hardwood or LVP. If you lock the floor down with the baseboard, you will get buckling. I have seen a floor lift six inches off the ground because the installer nailed the trim too tight. It sounded like a gunshot when the wood finally gave way.
Comparison of masonry attachment methods
| Method | Pros | Cons | Best For |
|---|---|---|---|
| Polyurethane Adhesive | Strong bond, no visible holes, flexible | Requires bracing, slow cure time | Finished basements, clean brick |
| Masonry Screws (Tapcons) | Absolute grip, immediate results | Visible holes to fill, requires drilling | Bowed walls, heavy hardwood trim |
| Steel Trim Nails | Fast, traditional look | Prone to bending, poor grip in concrete | Soft mortar joints, light pine trim |
| Construction Adhesive (Water-based) | Easy cleanup, low odor | Weak bond, fails on porous masonry | Lightweight MDF in dry areas |
Checklist for masonry baseboard installation
- Vacuum and scrub the masonry surface to remove all dust and loose particles.
- Acclimate the wood baseboards in the room for at least 72 hours.
- Check the wall for flatness using a six-foot level.
- Apply a continuous zig-zag bead of polyurethane adhesive to the back of the board.
- Pre-drill pilot holes if using mechanical fasteners to prevent splitting the wood.
- Use a hammer drill with a carbide bit for any holes into the brick or concrete.
- Brace the boards with heavy weights or temporary props while the glue cures.
- Seal the top edge with a high-quality acrylic caulk to prevent moisture entry.
The ghost in the expansion gap
There is a hidden danger in masonry installations that most people forget. It is the moisture that lives inside the wall. Concrete is like a sponge. It can hold gallons of water without looking wet. This moisture can travel from the ground, through the wall, and into your wood baseboard. If you seal the board too tightly against the wall without a moisture barrier, the wood will rot from the back side. You will not see it until the mushrooms start growing out of the top of the trim. This is why I often use a primer on the back of my wood baseboards before I install them on masonry. It acts as a shield. It keeps the moisture in the wall and the wood in the wood. You also have to consider the transition from the wall to the floor. In areas like showers that wow modern designs for 2025, the moisture levels are off the charts. You would never put a wood baseboard against a masonry wall in a wet area. You would use tile or a composite material. The principles of chic baseboard designs that transform rooms in 2025 are all about the look, but the reality is always about the water. If you are working in a basement, consider using a PVC-based trim that looks like wood but handles moisture like a champion. It bonds well with polyurethane adhesives and it will never rot. I have seen guys spend thousands on exotic mahogany trim only to have it turn black with mold in two years because they ignored the vapor transmission through the concrete block. Do not be that guy. Understand the environment before you open your tool box.
“Proper substrate preparation is the non-negotiable foundation of any architectural assembly.” – Structural Integrity Code
Why your subfloor is lying to you
You can have the best adhesive and the most expensive screws, but if the floor is a roller coaster, the baseboard will look like garbage. I spent years thinking I could fix floor dips with the trim. I was wrong. The floor dictates the trim. If you have a dip, the baseboard will either follow the dip and look crooked, or it will stay straight and leave a giant hole. This is why the prep work is the most important part of the job. You have to be a master of the self-leveling compound. You have to know how to prime the concrete so the leveler sticks. You have to know the flow rate of the product. If you get the floor flat, the baseboard installation becomes a breeze. You just lay the board down, apply your glue, and pop a few screws in. It fits like a glove. This is the secret that the big-box stores do not tell you. They want you to think it is all about the click-together planks. It is not. It is about the slab. It is about the grit. It is about the sweat you put into the preparation. When I am done with a floor, you could play billiards on it. That makes the baseboard guy’s life easy. And since I am usually the baseboard guy too, I am doing myself a favor. If you are struggling with a masonry wall, take a step back and look at the floor. Often the problem with the wall is actually a problem with the floor. Fix the foundation and the rest follows. This applies to everything from tile cleaning tips for a sparkling bathroom in 2025 to full-scale kitchen remodels. The base is everything.
The final bead of caulk and the artisan touch
Once the boards are up and the adhesive has cured, you are not done. The finish work is where the amateur is separated from the craftsman. On a masonry wall, the gap between the top of the baseboard and the wall can be uneven. You cannot just leave it. You need a clean bead of caulk. But you cannot use cheap painter’s caulk. You need something with high elasticity. The wall and the wood are going to move. If the caulk is brittle, it will crack within the first season. I use a high-grade elastomeric sealant. I cut the tip of the tube at a sharp angle and I run a single, continuous bead. Then I tool it with a wet finger to create a perfect cove. This seals the system. It keeps dust and moisture out of the back of the board. It also provides a visual bridge that hides any minor imperfections in the masonry. If you have done your job right, the baseboard looks like it grew out of the wall. It should be rock solid. You should be able to kick it and not feel any movement. That is the standard. I do not care about the trends or the fancy magazines. I care about the bond. I care about the mechanical integrity of the assembly. When I pack up my tools and the smell of oak and adhesive starts to fade, I know that floor is solid. I know those baseboards are not going anywhere. That is the pride of the mechanic. That is the reward for doing it the hard way. There are no shortcuts on masonry. There is only the right way and the way that fails. Choose the right way every time.