
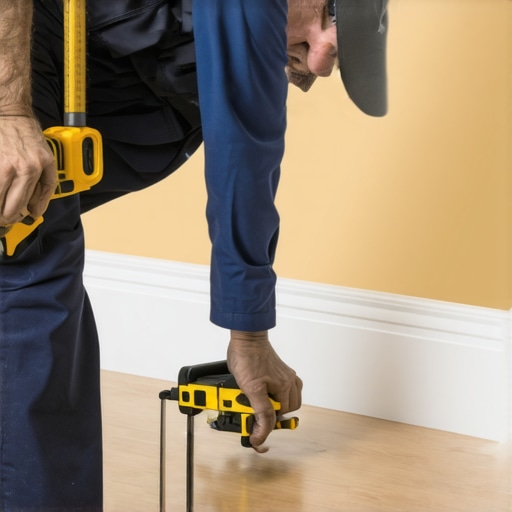
The 1/8 inch that ruins everything
Mastering baseboard installation on uneven walls requires understanding that no house is perfectly square and every drywall surface possesses a slight wave. Most guys skip the leveling compound. They think the underlayment will hide the dip. It won’t. I spent three days grinding concrete on a job last month just so the floor wouldn’t click like a castanet and the baseboards wouldn’t leave a canyon-sized gap at the bottom. When you are dealing with walls that look like a mountain range, a standard 45-degree cut is your enemy. The subfloor is the foundation of the aesthetic, and if the slab or the joists have a 1/8 inch deflection over ten feet, your baseboard will scream about it the moment you nail it in. You have to look at the physics of the wood. Wood is a cellular structure that reacts to the humidity in your home. If you force a miter joint together on a wall that is 92 degrees instead of 90, you are creating internal tension in the wood fibers. Eventually, that tension wins, the wood shrinks, and your beautiful joint looks like a cracked tooth. Most installers want to rush through the trim to get to the next paycheck, but trim is where the reputation is built. You can check out chic baseboard designs that transform rooms in 2025 to see what the goal should be, but remember that even the best design fails if the execution ignores the wall profile.
“A floor is only as good as the subfloor beneath it; deflection is the enemy of every joint.” – Master Flooring Axiom
The lie of the square corner
Outside and inside corners in modern residential construction are almost never a true 90 degrees due to drywall mud buildup and framing inconsistencies. When the drywall hangers finish a corner, they apply layers of joint compound that round out the transition. If you slap a square miter against a rounded corner, the back of the board hits the mud while the front stays open. This is where the coping technique becomes the superior choice for inside corners, while outside corners require an angle finder. You cannot guess. I have seen homeowners waste thousands on high-end oak trim only to have it look like a DIY disaster because they didn’t account for the wall’s belly. The wall belly is the slight protrusion in the middle of a stud bay where the drywall flexes. If you try to pull the baseboard tight to that belly with an 18-gauge nail, you might succeed for a week. Then the nail pulls through the soft pine or MDF, and the board snaps back to its original shape. For those looking to upgrade their home, exploring baseboards makeover ideas to elevate your space provides a good starting point, but the installation remains a structural engineering challenge. You are essentially trying to marry a straight piece of lumber to a curved surface. The only way to win is to use a combination of back-shimming and strategic adhesive application. You need a high-viscosity construction adhesive that fills the voids where the wall retreats. This creates a mechanical bond that resists the natural movement of the wood.
Why your saw is lying to you
The 45 degree detent on your miter saw is a suggestion, not a law, and must be calibrated against the reality of your specific room. Every time I start a new floor, I check my saw’s fence. If the fence is off by even a tenth of a degree, a six-inch baseboard will show a visible gap at the top or bottom. This is basic geometry. On a tall baseboard, the error is magnified. If you are installing baseboards after a floor renovation, perhaps after using eco-friendly tile solutions for sustainable homes in 2025, you have to be even more careful. Tile creates a rigid, unyielding surface. Unlike carpet, which hides a multitude of sins, tile will show every gap where the wood meets the floor. You have to scribe the bottom of the baseboard to the floor. This involves using a compass to trace the floor’s profile onto the wood and then using a jigsaw or a plane to remove the excess material. It is a slow process. It is tedious. It is the only way to get a professional result. I have seen guys try to fill a 1/4 inch gap with caulk. Caulk is for waterproofing and minor aesthetics, it is not a structural filler for bad carpentry. Over time, that caulk will shrink, pull away from the wall, and trap dust, turning into an ugly black line that ruins the room’s flow.
| Material Type | Moisture Sensitivity | Best Installation Method | Expansion Gap Required |
|---|---|---|---|
| Solid Oak | High | Nail + Glue | 1/2 Inch |
| MDF | Medium | 18ga Brads | 1/4 Inch |
| Pine | High | Coped Joints | 3/8 Inch |
| PVC/Vinyl | Low | Adhesive Only | 1/8 Inch |
The chemistry of the perfect joint
A miter joint is essentially an end-grain connection which is the weakest possible bond in woodworking without the proper adhesive strategy. When you cut a 45-degree angle, you are exposing the vertical tubes of the wood’s vascular system. If you just put a nail in it, those tubes will suck the moisture out of any standard wood glue, leaving a brittle, useless bond. You have to prime the end grain with a thin layer of glue first, let it get tacky, and then apply the final bead. This is molecular zooming at its finest. You are managing the surface tension of the adhesive. For outside miters, I always use a 2-part cyanoacrylate glue. You spray the activator on one side and the glue on the other. You hold them together for ten seconds, and the joint is locked forever. It is stronger than the wood itself. This is especially fundamental when the baseboard meets other architectural elements. If you are doing a bathroom, you might have to deal with showers that wow modern designs for 2025 where the baseboard meets the tile curb. That is a high-moisture zone. You cannot use standard MDF there. It will swell like a sponge. You need a solid wood or a composite material that can handle the humidity. The chemical bond of the grout also matters if you are transitioning from trim to tile. You might need grout restoration secrets for long-lasting results if your old transitions are failing. The goal is a permanent, waterproof seal that doesn’t rely on luck.
“Baseboard installation requires a stable substrate to maintain miter integrity over time.” – NWFA Standards Committee
The ghost in the expansion gap
Floating floors require a specific expansion gap at the perimeter that must be completely covered by the baseboard without pinning the floor down. This is where most DIYers fail. They nail the baseboard through the flooring into the wall plate. This locks the floor in place. When the seasons change and the humidity rises, the floor tries to expand, but it has nowhere to go because you nailed it down. The result is buckling in the center of the room. You have to nail the baseboard high enough that it only hits the wall studs and never touches the flooring material. The baseboard should hover just a fraction of a millimeter above the floor. If the floor is tile, you have to be careful with the grout. I recommend a color-matched 100 percent silicone caulk at the base of the board instead of grout. Grout is rigid and will crack when the house shifts. Silicone is flexible. If you are looking for how to refresh grout without replacing it, you will find that many experts suggest replacing the perimeter grout with caulk for this exact reason. It prevents the unsightly cracking that happens every winter. The expansion gap is the secret life of the floor. It is the breath of the room. If you choke it, the floor will eventually fight back and win. Always use a 1/4 inch spacer during the flooring install to ensure that gap is consistent before the baseboards even come out of the truck.
- Check the wall for high spots using a 6-foot level before cutting any wood.
- Use an electronic angle finder for every outside corner to determine the exact miter.
- Apply wood glue to every joint, even those that are being nailed.
- Acclimate your baseboard material in the room for at least 72 hours.
- Scribe the bottom of the board if the floor has a dip larger than 1/16th of an inch.
- Use 2-inch nails to ensure you are hitting the framing through the drywall.
- Pre-paint or pre-stain the boards to avoid getting finish on your new floors.
- Always cope inside corners instead of mitering them for a tighter fit.
- Keep a damp rag handy to wipe away excess glue immediately.
- Double-check the moisture content of the wood using a pin-less meter.
Baseboards meeting the tile floor
Installing trim against a tile surface requires a different set of rules because the tile is an unforgiving, non-porous substrate. If you are finishing a bathroom after looking at showers with a style trendy ideas for small bathrooms, you know that space is tight. Every cut must be precise. When baseboard meets a tile floor, the grout lines can create a shadow gap that looks terrible. The best approach is to ensure your tile is level to within 1/8 inch over 10 feet. If the tile was laid poorly, the baseboard will highlight every single lip in the floor. You might need some tile cleaning tips for a sparkling bathroom in 2025 to get the surface ready for the adhesive. I often use a small bead of translucent silicone at the very bottom of the baseboard where it meets the tile. This prevents water from wicking up into the wood during mopping. Water damage at the base of a miter joint is the number one cause of trim failure in bathrooms. The wood absorbs the water, the fibers expand, and the paint starts to peel. By the time you notice it, the wood is rotten. It is much cheaper to do it right the first time than to rip out moldy trim three years later. If you have questions about specific installations, you can always contact us for professional guidance. The final verdict is that patience and technical precision outperform speed every time. A floor is a performance surface. Treat it with the respect the engineering demands.