
I spent thirty years with sawdust under my nails and a level in my back pocket. Most guys skip the leveling compound. They think the underlayment will hide the dip. It won’t. I spent three days grinding concrete on a job last month just so the floor wouldn’t click like a castanet. That same logic applies to your surface finishes. When you decide to paint your showers or tile floors, you are entering a world of chemical engineering, not just home decor. If you treat it like a simple craft project, the paint will peel faster than a cheap sunburn. You have to understand the molecular bond between the coating and the ceramic glaze to get a result that lasts more than a week. Most people look at a bathroom and see ugly colors. I see a non-porous surface that is designed to repel everything, including paint. To change it, you have to fight the physics of the tile itself.
The myth of the weekend project
Painting tile effectively requires a minimum of 72 hours of preparation and curing to ensure a chemical bond that withstands daily foot traffic and moisture. This process involves stripping the surface of all contaminants, creating a mechanical tooth through abrasion, and applying specialized resin-based primers. Unlike painting a wall, tile painting is a structural modification of the surface finish. If you rush the drying times or skip the sanding, you are essentially laying a thin sheet of plastic over a glass-smooth surface. It will fail. You need to respect the chemistry of the materials. This isn’t about making it look pretty for a photo. It is about making it functional for the next five years of heavy use.
“A floor is only as good as the subfloor beneath it; deflection is the enemy of every joint.” – Master Flooring Axiom
Why ceramic glazes hate paint
The glaze on your tile is essentially a layer of liquid glass that has been fired at temperatures exceeding 2,000 degrees Fahrenheit. This process creates a surface with extremely low surface energy. In the world of coatings, high surface energy is what allows a liquid to wet out and stick. Low surface energy, like what you find on a Teflon pan or a glazed ceramic tile, causes liquids to bead up and roll off. When you apply standard latex paint to this, there is no physical or chemical hook for the paint to grab onto. This is why you see people on the internet complaining that their painted tile is chipping. They didn’t change the surface energy. To get paint to stick, you must either chemically etch the surface or mechanically profile it using 60-grit to 100-grit sandpaper. You are essentially creating microscopic valleys in the glass for the primer to settle into.
The invisible enemy of soap scum
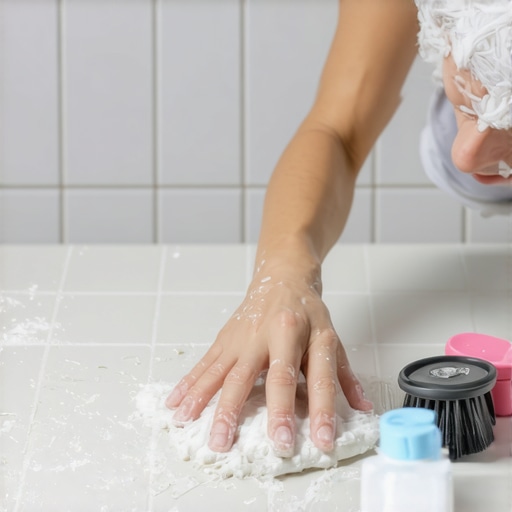
Every bathroom is covered in a layer of paraffin wax, body oils, and calcium deposits that are invisible to the naked eye. Even if the showers look clean, they are not. If you paint over these oils, the paint will never touch the tile. It will just sit on top of the grease. I always use a heavy-duty solution of Trisodium Phosphate (TSP) and a stiff scrub brush. You have to scrub until your arms ache. After the TSP, you need to rinse the surface three times with clean water. Any residue left behind will act as a bond-breaker. This is where most DIYers fail. They spray a bit of glass cleaner and think they are ready. You aren’t. You need to strip that tile down to its original, naked state. For those looking for more depth on maintenance, tile cleaning tips for a sparkling bathroom in 2025 provides a foundation for surface prep.
The mechanical tooth requirement
Once the tile is clean, you have to ruin it. You take a random orbital sander and you go over every square inch with 100-grit sandpaper. You are looking for the shine to disappear. If the tile still reflects light like a mirror, the paint will not stick. This dust is dangerous. It is silica dust. You wear a P100 respirator or you don’t do the job. I have seen guys ruin their lungs because they thought a little dust wouldn’t hurt. You sand until the surface feels slightly gritty. This is the mechanical tooth. It provides the surface area needed for the primer to bite. Without this, you are relying entirely on the chemical bond of the primer, which is a gamble I never take on my job sites. The grout lines need special attention too. They are porous and will soak up the paint differently than the tile face.
Primers that bridge the gap
You cannot use a standard primer for this. You need a high-adhesion, bonding primer. I prefer an epoxy-based primer or a high-solids urethane-alkyd. These primers are designed to stick to non-porous surfaces like glass and metal. They contain silane coupling agents. These molecules have two ends. One end is designed to bond to inorganic materials like ceramic. The other end is designed to bond to organic materials like the resins in your paint. It is a molecular bridge. If you use a cheap water-based primer, it will just sit on the surface like a film. When the humidity in the bathroom rises, that film will lose its grip and bubble. You need a primer that becomes part of the tile. This is especially true near chic baseboard designs that transform rooms in 2025 where moisture tends to pool at the floor transition.
The physics of epoxy resins
When it comes to the topcoat, I only recommend two-part epoxy or specialized tile enamels. Two-part epoxies involve a resin and a hardener. When you mix them, a chemical reaction occurs called cross-linking. The molecules form a dense, three-dimensional lattice. This makes the finish incredibly hard and waterproof. It is much more durable than the air-dried film of standard paint. Standard paint dries as the solvent evaporates. Epoxy cures as the molecules lock together. This is why epoxy is used on garage floors. It can handle the weight and the friction. If you use regular wall paint on a bathroom floor, the first time you slide a chair or drop a blow-dryer, the finish will shatter. You need that cross-linked strength to survive the environment of a modern home.
| Coating Type | Adhesion Strength | Moisture Resistance | Cure Time |
|---|---|---|---|
| Latex Enamel | Low | Moderate | 4 Hours |
| Urethane-Alkyd | Medium | High | 24 Hours |
| Two-Part Epoxy | High | Extreme | 72 Hours |
| Tile Tub Kit | Extreme | Extreme | 48 Hours |
How to handle grout lines
Grout is a different animal. It is cementitious and porous. While the tile glazes repel moisture, the grout absorbs it. When you paint, the grout will drink up the first coat. You have to be careful not to let the paint pool in the grout lines. This can lead to cracking as the paint dries. I suggest using a small brush to work the primer into the grout first, then rolling the tile faces. If your grout is crumbling or moldy, paint won’t fix it. You need to handle that first. You can check out grout restoration secrets for long-lasting results to see how to stabilize the lines before you seal them under a layer of epoxy. If the grout is failing structurally, the paint will crack along the joint lines within weeks. This is a common failure point that people blame on the paint when it was actually a subfloor deflection issue or a grout failure.
Curing is not drying
This is the hardest part for homeowners. Just because the paint is dry to the touch doesn’t mean it is ready. Drying is the evaporation of water. Curing is the completion of the chemical reaction. For a bathroom floor or showers, you should wait at least 72 hours before even walking on it in socks. You should wait a full week before getting it wet. If you turn on the shower too soon, the moisture will penetrate the microscopic pores of the curing paint and cause it to blush or delaminate. I have seen $500 paint jobs ruined because someone wanted to take a hot shower 24 hours later. The steam is the worst enemy of a fresh coating. It forces its way into the bond before the cross-linking is finished. Patience is the only tool that costs nothing but provides the most value here.
Managing expectations in high moisture areas
Let’s be honest. Painted tile is a temporary solution. Even with the best prep and the most expensive epoxy, it is not a 30-year floor. It is a 5-year refresh. In high-traffic areas or inside the shower pan where water stands, the paint will eventually wear down. If you want a permanent fix, you have to tear it out and start over. But if you are on a budget and need to hide that 1970s avocado green, painting is a viable option. Just keep in mind that you are adding a layer of maintenance. You cannot use abrasive cleaners on painted tile. You have to use mild soaps. You are basically cleaning a painted car, not a stone floor. If you want to see what a full replacement could look like for a more permanent upgrade, look into showers that wow modern designs for 2025. Sometimes the cost of the chemicals and the labor of prep makes a new installation look more attractive.
The Essential Painting Kit Checklist
- Trisodium Phosphate (TSP) for deep degreasing
- Random orbital sander with 100-grit sandpaper
- P100 respirator and nitrile gloves
- High-adhesion bonding primer (Stix or XIM)
- Two-part epoxy tile coating or high-performance enamel
- High-density foam rollers (do not use long nap rollers)
- Painter’s tape and plastic drop cloths
- Microfiber cloths for dust removal
The transition between the floor and the wall is another critical area. If you are updating the tile, you should consider the baseboards. Old, water-damaged baseboards will make a fresh paint job look like a hack job. I always recommend pulling the baseboards before painting the tile, then reinstalling new ones once the floor is cured. This gives you a clean edge and prevents the paint from sealing the baseboard to the floor. You can find inspiration for these transitions at baseboards makeover ideas to elevate your space. It is the small details, the 1/8 inch gaps and the clean lines, that separate a professional job from a messy DIY attempt. Don’t let your hard work be undermined by a sloppy finish at the perimeter. The expansion gap must remain functional. If you fill the expansion gap with paint, the floor has nowhere to go when the house shifts, and your new finish will crack.
“Deflection is the silent killer of tile; if the subfloor moves, the surface fails.” – Master Flooring Axiom