
Most guys skip the leveling compound. They think the underlayment will hide the dip. It won’t. I spent three days grinding concrete on a job last month just so the floor wouldn’t click like a castanet. That same job had corners so packed with construction dust and overspray that the baseboards wouldn’t even sit flush. I could smell the oak dust and the sharp tang of my WD-40 as I worked. It is the same story with cleaning. People think a quick swipe with a damp rag works, but the real filth is hiding in the molecular bond between the paint and the atmospheric moisture. If you don’t address the physics of the corner, you are just moving dirt from one spot to another. I have seen fifteen thousand dollar floors ruined because the owner didn’t understand how moisture and grime interact at the perimeter. Cleaning baseboard corners is not about aesthetics. It is about preserving the structural integrity of your trim and preventing moisture wicking into your subfloor.
The physics of the ninety degree dust trap
Baseboard corners collect grime because of static electricity, lack of airflow, and the structural transition between the floor and the wall. Dust particles are not just sitting there; they are often bonded to the surface by moisture or oils. In the tight ninety degree angle of a corner, air velocity drops to zero, allowing heavy particulates like skin cells and pet dander to settle and stay. This is especially true if you have transitioned from showers or wet areas where humidity is high. The accumulation of these materials creates a biological layer that can eventually harbor mold if the grout and flooring interface isn’t sealed correctly. You need to understand that the corner is a dead zone for standard cleaning tools. Most vacuum attachments are too blunt to reach the actual apex of the angle. This leaves a microscopic layer of debris that builds up over years, creating a hard, crusty shell that resists basic detergents. To break this bond, you have to look at the chemistry of the finish on your baseboards. Most modern trim is finished with a semi-gloss or high-gloss latex paint. These coatings have microscopic pores. Over time, heat and humidity cause the paint to expand and contract, effectively ‘locking’ the dust into the surface of the film. You aren’t just cleaning the top; you are trying to extract material from the texture of the paint itself.
Why your mop is a delivery system for grime
Standard mopping often pushes dirty water into the gaps where the floor meets the baseboard, creating a concentrated sludge. This sludge settles in the corners and dries, forming a layer of ‘cleaner scum’ that actually attracts more dust. If you are cleaning tile or grout near your baseboards, this problem is even worse. The mop head cannot get into the corner, so it simply leaves a crescent of dirty water at the edge. Over months, this dries into a dark, grimy line. You should be looking at tile cleaning tips for a sparkling bathroom in 2025 to understand how to manage water flow. In my twenty five years of experience, I have seen more baseboards rotted out by ‘diligent’ cleaners than by actual floods. The water wicks into the end grain of the wood or the porous core of MDF. Once that happens, the trim swells, and the paint starts to flake. You aren’t just looking at a dirty corner anymore; you are looking at a structural failure of the trim. The solution is to stop using floods of water. You need targeted application of surfactants that break the surface tension of the grime without saturating the substrate. I always tell people to think about the ‘slop factor.’ If your cleaning tool is leaving a visible trail of water, you are doing it wrong. You are essentially feeding the expansion and contraction cycle that destroys your finishes.
“A floor is only as good as the subfloor beneath it; deflection is the enemy of every joint.” – Master Flooring Axiom
The 1/8 inch that ruins everything
Expansion gaps are required for almost every flooring type, but they are also the primary hiding place for deep-seated grime. Most installers leave a 1/8 inch to 1/4 inch gap between the flooring and the wall to allow for seasonal movement. If this gap isn’t covered perfectly by the baseboard, or if the baseboard is not caulked to the floor, it becomes a gutter for filth. In high-moisture rooms like showers, this gap can trap humidity, leading to ‘ghosting’ where dark lines appear on the baseboard. When you are planning baseboards makeover ideas to elevate your space, you must account for this gap. You cannot just shove the baseboard down tight against the floor if you have a floating floor. It will buckle. It will fail. Instead, you need a clean, manageable joint. The best way to clean these deep gaps is with compressed air or a high-static microfiber tool. You have to pull the dirt out before you introduce any liquid. If you spray a liquid cleaner into an expansion gap, you are creating a permanent mud trap under your trim. This can lead to the growth of odor-causing bacteria that you will never be able to reach without pulling the trim off the walls. I have had to replace entire rooms of expensive hardwood because the homeowners ‘deep cleaned’ their corners with a steam mop, forcing moisture into the expansion space and causing the planks to cup. The physics of wood cell expansion don’t care about your cleaning schedule.
The chemical reality of surfactant action
Surfactants are molecules that lower the surface tension of water, allowing it to penetrate the oily film that holds grime in corners. Not all cleaners are created equal. If you use a soap-based cleaner on your baseboards, you are leaving a sticky residue. This residue acts like a magnet for new dust. You want a pH-neutral cleaner that evaporates without leaving a film. When dealing with grout or tile intersections, the pH becomes even more important. Acidic cleaners can etch the tile and weaken the grout, while highly alkaline cleaners can strip the finish off your baseboards. You need to find the balance. I prefer a mixture of isopropyl alcohol and distilled water with a single drop of dish soap. The alcohol acts as a drying agent and solvent, while the surfactant breaks the bond of the oils. This prevents the moisture from sitting on the wood for too long. You should also consider the ‘dwell time.’ If you spray and wipe immediately, the chemical hasn’t had time to work. You need to let the solution sit for sixty seconds to penetrate the microscopic texture of the paint. This is the difference between a surface clean and a professional extraction. Most people are too impatient. They want the ‘magic’ spray, but the magic is in the timing and the mechanical agitation.
| Cleaning Method | Risk Level | Effectiveness | Best For |
|---|---|---|---|
| Steam Cleaning | High (Moisture) | High | Tile and Grout only |
| Dry Microfiber | Very Low | Medium | Weekly maintenance |
| Alcohol-Based Mist | Low | Very High | Painted Baseboards |
| Soap and Bucket | Medium (Residue) | Low | Heavy mud removal |
Tools that actually move the needle
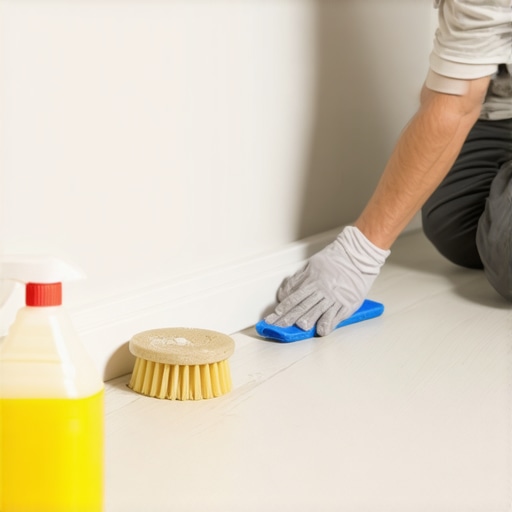
Professional detailing requires tools that can apply mechanical force in a space smaller than a quarter inch. Stop using old socks. You need a stiff-bristled detailing brush or even a high-quality artist’s brush with synthetic bristles. The goal is to ‘flick’ the debris out of the corner, not just smear it. I often use a vacuum with a brush attachment in one hand and a detailing tool in the other. This creates a closed loop where the debris is suspended and immediately captured. If you are dealing with baseboards near showers, you might even need to use a plastic putty knife wrapped in a microfiber cloth to get into the crevice between the tile and the wood. This is where the most dangerous grime lives. It is a mix of soap scum, skin cells, and humidity. If you don’t extract it, it will eventually stain the grout. For more on this, check grout restoration secrets for long-lasting results. The key is precision. You are an architect of your home’s cleanliness. You are not a janitor. You are a technician. Every stroke of the brush should be calculated to move the material toward the vacuum intake. [IMAGE_1]
- Vacuum the perimeter with a crevice tool first.
- Agitate the corner with a dry detailing brush to break the static bond.
- Apply a pH-neutral surfactant mist to the brush, not the baseboard.
- Scrub the corner in a circular motion to lift grime from the paint pores.
- Wipe dry immediately with a clean microfiber cloth.
“Moisture migration through the slab is the primary cause of finish failure at the perimeter.” – NWFA Field Manual
The final word on corner maintenance
The secret to clean corners is not a better chemical; it is a better understanding of the structural interface. If your baseboards are properly installed and caulked, there are fewer places for grime to hide. If you are dealing with outdated trim, you might consider chic baseboard designs that transform rooms in 2025 that feature simpler profiles. Complex ogee and cove moldings are beautiful, but they are essentially dust shelves. A flat, modern profile with a slight chamfer at the top is much easier to maintain. You also need to look at your HVAC filters. If your corners are getting black fast, your air filtration is failing. The corners are just the messengers. They are telling you that your home’s air is saturated with particulates. Clean your floors, but also look at the bigger picture. Your floor is a system. The baseboard is the gasket. Treat it with the same respect you would treat the engine of a fine car. Keep it clean, keep it dry, and never let the grime win the battle for the expansion gap.