
The subfloor secret that prevents shower failure
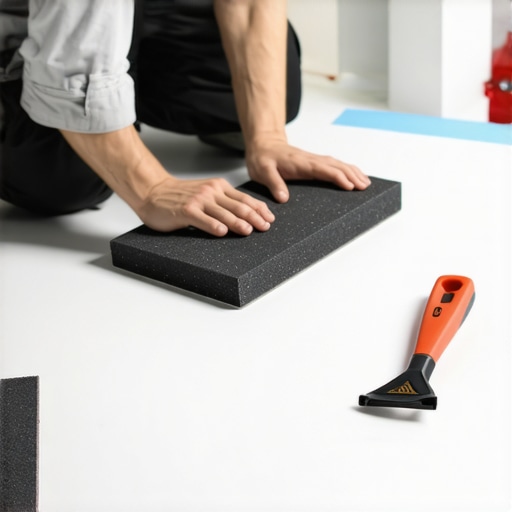
To prep an acrylic shower base for tile you must mechanically abrade the surface with 60-grit sandpaper to create a profile and then apply a high-performance bonding primer designed for non-porous substrates. This process ensures that the cementitious thin-set mortar can form a physical and chemical lock with the plastic resin surface of the shower pan flange. Most homeowners assume that the acrylic surface is ready for tile right out of the crate, but that glossy finish is a bond-breaker that will cause your tile to slide and your grout to crack within months. I spent three days grinding concrete on a job last month just so the floor wouldn’t click like a castanet, and preparing a shower base requires that same level of obsessive focus on the substrate. I once saw a guy try to thin-set directly onto a high-gloss acrylic flange without sanding. The tile practically fell off the wall two months later because the moisture in the shower caused the mortar to simply peel away from the smooth plastic. If you want showers that wow modern designs for 2025, you have to start with a surface that isn’t slicker than a skating rink. You are dealing with two completely different materials that do not want to talk to each other. Ceramic tile is an inorganic mineral product while acrylic is an organic polymer. They have different rates of expansion and different surface energies. To bridge that gap, you need to understand the physics of the bond. Stop thinking about how the tile looks and start thinking about how the mortar grabs the plastic.
The physics of the mechanical bond on plastic
Acrylic is a non-porous material with a very low surface energy which means it naturally repels water-based mixtures like thin-set. When you apply wet mortar to a smooth acrylic flange, the water in the mix creates a microscopic barrier that prevents the cement crystals from growing into the pores of the material. Since acrylic has no pores, the crystals have nowhere to go. By using a 60-grit or 80-grit sandpaper, you are essentially carving microscopic canyons into the surface of the plastic. This increases the surface area significantly and gives the polymer-modified thin-set a place to anchor itself. It is a gritty, dusty job that most installers skip because they are lazy. If you skip this, the vibration of the house or the simple weight of someone stepping into the shower will break the weak suction bond. We are looking for a total removal of the gloss. You want the flange to look dull and scratched. This is the only way to ensure the long-term stability of the tile assembly. For those looking for smaller layout inspiration, showers with a style trendy ideas for small bathrooms often rely on these integrated bases, making the prep work even more critical in tight spaces.
“A floor is only as good as the subfloor beneath it; deflection is the enemy of every joint.” – Master Flooring Axiom
Chemical adhesion versus mechanical friction
Once the surface is scuffed, you need to address the chemical side of the equation. Standard thin-set will not work here. You need a mortar that meets ANSI A118.15 standards, which is a highly polymer-modified cement. These polymers act like a glue that stays flexible even after the cement has cured. However, even the best mortar often needs a bridge. This is where a specialized bonding primer comes in. These primers are often made of synthetic resins that are suspended in a solvent or water base. When they dry, they leave behind a tacky, high-grit surface that is chemically fused to the acrylic. This creates a transition layer that the thin-set can actually grab onto. Without this layer, you are betting your entire bathroom renovation on the hope that the plastic won’t expand when the hot water hits it. Physics says it will. Acrylic has a much higher coefficient of thermal expansion than ceramic or stone. This means when the shower gets hot, the base grows faster than the tile. If the bond isn’t absolute, the two layers will shear apart. This is why you see grout restoration secrets for long-lasting results often emphasizing the stability of the underlying structure.
| Surface Condition | Bond Strength | Failure Risk |
|---|---|---|
| High Gloss Acrylic | Very Low | Extreme |
| Hand Sanded 60 Grit | Medium | Moderate |
| Sanded and Primed | High | Low |
| Chemical Etched | High | Low |
The expansion gap that saves your grout
One of the biggest mistakes I see in shower installations is running the tile directly down onto the floor of the acrylic pan without a gap. You must leave at least a 1/8 inch gap between the bottom of the wall tile and the surface of the shower base. This gap should never be filled with grout. Grout is rigid and will crack as soon as the pan flexes under the weight of a person. Instead, this joint must be filled with a 100 percent silicone sealant that matches your grout color. This allows the shower base to move independently of the walls. If you cram grout into that corner, it will crumble and turn into a mold trap. This is a primary reason why people look for how to refresh grout without replacing it later on. They are fighting a structural problem with a cosmetic solution. The same logic applies to where your tile meets the floor or where baseboards makeover ideas to elevate your space are implemented. Every transition between different materials requires a flexible joint to handle the structural movement of the home.
A step by step checklist for base preparation
- Protect the drain with a plug or tape to prevent debris from entering the plumbing system.
- Scuff the entire vertical and horizontal flange area using 60-grit sandpaper until no glossy spots remain.
- Vacuum the dust using a HEPA-filtered vacuum to ensure no microscopic particles interfere with the bond.
- Wipe the area down with denatured alcohol or a 70 percent isopropyl solution to remove body oils or factory residues.
- Apply a thin coat of a specialized bonding primer like Eco Prim Grip or a similar quartz-agitated primer.
- Allow the primer to dry completely until it is no longer tacky to the touch.
- Use a high-quality ANSI A118.15 polymer-modified thin-set for the first row of tile.
Regional climate and material stability
The humidity levels in your region play a massive role in how these materials behave. In a place like Houston or Miami, the constant high humidity means that wood framing behind the shower is always slightly swollen. When you turn on the air conditioning, the wood dries out and shrinks. This constant cycle puts immense stress on the bond between the acrylic pan and the tile. In dry climates like Phoenix, the wood is often so brittle that any moisture from a small leak will cause immediate and violent expansion. In these environments, using a waterproofing membrane like Kerdi over the transition between the pan and the wall board is not just a good idea, it is a requirement. This creates a continuous waterproof envelope that can stretch and contract without snapping. If you are interested in sustainability, look into eco-friendly tile solutions for sustainable homes in 2025 that offer better thermal stability than traditional materials. Proper prep ensures that tile cleaning tips for a sparkling bathroom in 2025 are the only thing you have to worry about rather than structural leaks.
“Water follows the path of least resistance; your job is to make that path impossible to find.” – TCNA Handbook Wisdom
Finalizing the transition to baseboards
When you finish the tile work around the shower base, you eventually have to transition to the rest of the bathroom. This is where chic baseboard designs that transform rooms in 2025 come into play. You must ensure that the baseboards are not pinned tightly against the tile or the shower pan. Leave a small gap and use a color-matched caulk. This prevents moisture from wicking up into the drywall or the baseboard material itself. Most guys just slam the baseboard down and caulk it, but you want to ensure the back of the board is primed if you are in a high-moisture environment. This attention to detail is what separates a master installer from a handyman. It is about the chemistry of the adhesives and the physics of the movement. If you have questions about specific materials, you can always contact us for more technical guidance. Protecting your investment means respecting the materials you are working with. Don’t let a simple piece of plastic ruin a five thousand dollar tile job. Sand it, prime it, and use the right mortar. Anything less is just a countdown to a demolition day.