
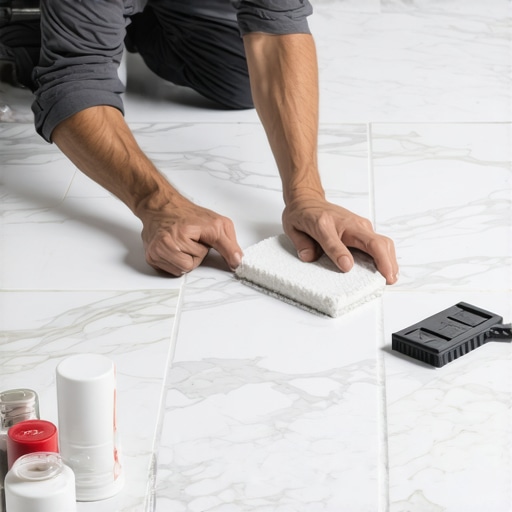
I spent three days grinding concrete on a job last month just so the floor wouldn’t click like a castanet, but even that grunt work pales in comparison to the heartbreak of a ruined marble floor. I once walked into a luxury master bath where forty thousand dollars of pristine white Carrara had been laid. The installer, a guy who probably learned his trade from a five minute video, skipped the pre-sealing step. He went straight in with a charcoal gray grout. The marble, which is essentially a dense sponge made of calcium carbonate, sucked that dark pigment right into its pores. The result was a permanent, muddy stain around every single tile edge. It looked like a graveyard. We had to tear the whole thing out. That is why I do not treat sealing as an option. It is a structural necessity. Marble is a metamorphic rock that remains chemically active. It reacts to acids, it absorbs oils, and it will definitely drink your grout water if you do not stop it first. If you want a floor that looks like the ones in those high end magazines, you have to respect the physics of the stone before you ever pick up a grout float.
Why marble acts like a geological sponge
Marble tiles contain millions of microscopic pores that absorb liquids through capillary action, making pre-grouting sealing mandatory to prevent permanent staining. Because marble is primarily composed of calcite, its molecular structure is naturally prone to fluid intake. When you apply wet grout, the water carrying the pigments travels deep into these channels. If the stone is not protected, these pigments lodge themselves where no cleaner can reach. This is the fundamental reason why professionals insist on a high quality impregnating sealer. We are not just coating the surface. We are filling the voids. The goal is to lower the surface energy of the stone so that it repels rather than attracts. When you look at a piece of marble under a microscope, you see a network of interconnected crystalline structures. These are the highways for stains. A proper sealer acts as a roadblock on these highways. It does not change the look of the stone if you do it right, but it changes how the stone behaves on a molecular level. This is especially important in high moisture areas like showers where the stone is constantly under hydraulic pressure from water. To understand the stakes, consider the density of different materials.
| Material Type | Porosity Level | Required Seal Cycles | Risk of Grout Burn |
|---|---|---|---|
| Polished Carrara | Low to Medium | 2 Coats | High |
| Honed Basalt | High | 3 Coats | Extreme |
| Tumbled Travertine | Very High | 3-4 Coats | High |
| Glazed Ceramic | Zero | 0 Coats | None |
The chemistry of the sacrificial barrier
A sacrificial barrier is a layer of penetrant sealer applied to marble to prevent grout pigments from locking into the stone surface during installation. This barrier is technically an impregnator, meaning it sinks below the surface rather than sitting on top like a wax. Most of these products use a solvent or water carrier to deliver fluoropolymers into the stone. Once the carrier evaporates, the polymers remain, creating a hydrophobic environment. You need a sealer that has a small enough molecular size to enter the tight grain of the stone. If the molecules are too big, they just sit on top and create a sticky mess. If they are too small, they might pass right through or evaporate. This is why I avoid the cheap stuff at the big box stores. You want professional grade chemistry. I prefer solvent-based sealers for dense stones because they penetrate deeper and dry faster, though they smell like a chemical plant for a few hours. Water based options are better for indoor environments with poor ventilation, but you might need more coats. This step is about controlling the rate of absorption. You want the grout to slide off the tile face while the water in the grout stays in the joint where it belongs. If the stone steals the water from the grout mix too fast, the grout won’t cure properly and it will crumble in six months. It is a delicate balance of moisture management.
“A floor is only as good as the subfloor beneath it; deflection is the enemy of every joint.” – Master Flooring Axiom
The nightmare of the picture frame effect
The picture frame effect occurs when marble absorbs grout pigments around its edges, creating a dark border that cannot be removed by surface cleaning. This happens because the edges of a cut tile are often more porous than the factory polished face. When you spread grout, the slurry sits on those edges and moves inward. By the time you wipe it off, the damage is done. The stone has been dyed. This is why I always tell people to check their grout restoration secrets for long lasting results early in the process. Preventing the stain is a thousand times easier than restoring a framed tile. To prevent this, you must ensure the sealer covers not just the top, but also the very top edge of the tile side. You have to be careful not to get sealer too deep into the joint, though, or the grout won’t bond to the side of the tile. It is a game of millimeters. I use a small microfiber pad or a high density foam roller. I apply the sealer until the stone stops drinking it. If it disappears in thirty seconds, it needs more. You keep going until it stays wet for at least five minutes. Then you buff off the excess. If you leave excess sealer to dry on the surface, it will turn into a white, gummy film that requires harsh chemicals to remove. You want the sealer in the stone, not on it. This is the difference between a pro job and a DIY disaster.
Selecting the right penetrant for the job
Choosing the right penetrant sealer requires matching the chemical base of the sealer to the specific mineral density of your marble variety. Not all marble is the same. A dense Nero Marquina has different needs than a soft, white Thassos. You need to check the technical data sheet of the sealer. Look for the vapor transmission rating. You want the stone to breathe. If you trap moisture under a topical sealer, the stone will eventually turn yellow or start to spall. This is called efflorescence, where salts from the mortar bed are pushed to the surface by moisture and then trapped by the sealer. It looks like white crusty scabs on your expensive floor. I look for sealers that offer oleophobic protection as well as hydrophobic. This means it repels oils from skin or soaps, which is vital for bathroom floors. When you are planning showers that wow modern designs for 2025, the sealing process is the most important part of the engineering. Without it, the steam and soap scum will turn your white marble into a gray, mottled mess within a year. I also consider the finish of the stone. Honed stone is much more porous than polished stone. If you have a honed finish, you might need three coats before the stone is truly saturated. It is about patience and observation. Watch how the liquid interacts with the surface. If it beads like water on a freshly waxed car, you are ready for grout. If it sinks in and darkens the stone, you are not done yet.
Mastering the pre-grout application process
Applying sealer before grouting involves cleaning the tile surfaces, applying the impregnator evenly, and allowing at least twenty four hours for full curing. You cannot seal a dirty tile. Any dust from the thin-set or the tile saw will be locked under the sealer forever. I vacuum the joints and wipe the faces with a damp microfiber cloth first. Then I let it dry completely. If there is moisture in the stone, the sealer cannot get in. I apply the first coat in a cross hatch pattern. I go left to right, then up and down. This ensures every microscopic pit is filled. After ten minutes, I wipe off any liquid that hasn’t soaked in. I wait about two hours and do it again. The second coat usually takes much less sealer because the first coat has already done the heavy lifting. I do not let anyone walk on the floor during this time. No shoes, no pets, no sawdust. You want a clean environment. After the final coat, I wait at least twenty four hours. The polymers need time to link up and harden inside the stone. If you grout too soon, the chemicals in the grout might interfere with the curing of the sealer. It is a slow process, but it is the only way to guarantee success. This is why good installers cost more. We are not just laying tile, we are managing chemical reactions.
- Clean the marble surface with a pH neutral cleaner to remove all construction dust.
- Ensure the tile and the grout joints are completely dry to allow maximum sealer penetration.
- Apply the sealer using a lint free applicator or a high quality foam roller.
- Allow the sealer to dwell on the surface for the time recommended by the manufacturer.
- Wipe away all excess sealer thoroughly to prevent a sticky residue from forming.
- Let the sealer cure for 24 hours before beginning the grouting process.
- Test a small area with water to ensure it beads up before applying grout.
When showers and baseboards complicate the seal
Sealing marble in showers or around baseboards requires extra attention to the perimeters where moisture and movement are most likely to cause failure. In a shower, the humidity levels are constantly shifting. This causes the stone to expand and contract. If your sealer is too rigid, it will crack. You need an impregnator that remains flexible. When I am working around the edges of a room, I pay close attention to how the tile meets the wall. People often overlook the transition to the baseboards. If you are installing chic baseboard designs that transform rooms in 2025, you want the marble beneath them to be perfectly sealed so that any moisture that drips down the wall doesn’t get sucked into the edge of the tile. I have seen many jobs where the center of the floor looks great, but the edges near the baseboards are dark and stained because the installer couldn’t reach them easily with the sealer. I use a small brush for the edges. It takes time. It hurts my back. But it is the only way to ensure the entire surface is protected. You have to think about the long term life of the installation. A floor is a system. The tile, the sealer, the grout, and the baseboards all work together to keep moisture out of the structure of your home. If any part of that system fails, the whole thing is at risk.
“Marble is not a product of a factory; it is a product of time. Treat it with the respect its history deserves.” – Master Flooring Axiom
Protecting your investment for the long haul
Long term maintenance of sealed marble requires avoiding acidic cleaners and re-applying a penetrant sealer every twelve to eighteen months depending on traffic. Just because you sealed it before grouting doesn’t mean you are done forever. Sealers break down over time. Foot traffic abrades the surface. Harsh cleaners strip the polymers away. I always tell my clients to throw away their bleach and their vinegar. Those are the enemies of marble. Use a dedicated stone cleaner that is pH neutral. If you start to notice that water no longer beads on the surface, it is time for a maintenance coat. This is much easier than the initial pre-grout seal because you don’t have to worry about grout pigment anymore. You just clean the floor and wipe on a fresh layer of sealer. If you stay on top of this, your marble will look as good in twenty years as it did the day I finished the job. If you ignore it, the stone will become dull and stained. It will lose its life. I take pride in my work. I want the floors I lay to outlive me. That only happens if the homeowner understands the chemistry of what they are walking on. If you have questions about your specific stone, you should contact us to get a professional opinion before you start pouring chemicals on your floor. Marble is a beautiful, natural material, but it requires a master’s touch to keep it that way. The extra effort you put in before the grout hits the floor is the best insurance policy you can buy.