
The 1/8 inch that ruins everything
To remove old thinset from a subfloor you must identify the bond type and use mechanical grinding or pneumatic chipping to achieve a flat surface within 1/8 inch over 10 feet. Most guys skip the leveling compound. They think the underlayment will hide the dip. It won’t. I spent three days grinding concrete on a job last month just so the floor wouldn’t click like a castanet. The owner had spent thousands on high-end planks but the previous installer left a mountain range of old mortar underneath. If that subfloor isn’t flat, your new floor is already failing. Thinset is a Portland cement based adhesive modified with polymers. Once it cures, it becomes part of the substrate. It does not just pop off because you ask it nicely. You are fighting a chemical bond that was designed to last a century. When you are prepping for new showers with a style or a fresh tile layout, that old residue is your primary enemy. You have to get down to the original slab or plywood to ensure your new thinset can actually bite into the pores of the surface. If you bond new mud to old, dusty mortar, you are building a house on sand.
The mechanical truth of modified mortar
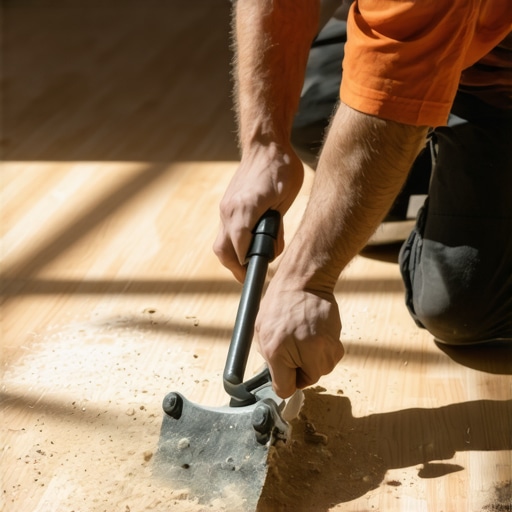
Modified thinset contains latex and polymer additives that create a flexible yet tenacious grip on the subfloor which requires high torque mechanical removal. These polymers wrap around the aggregates in the cement, making it denser and less prone to cracking. However, this also makes it a nightmare to remove. When you hit it with a hammer, it doesn’t always shatter like old-school mud. Sometimes it just dents. You need to understand the Mohs hardness of what you are hitting. Concrete is typically a 5 or 6 on the hardness scale. Thinset is often slightly softer but more brittle. This difference is what we exploit. If you are working in a bathroom getting ready for grout restoration secrets later on, you need a clean slate. Any hump in the floor will translate through your tile, causing lippage that no amount of grout can hide. You are looking for a surface profile of CSP 3 or CSP 4 as defined by the International Concrete Repair Institute. This means the surface should feel like medium-grit sandpaper. [IMAGE_PLACEHOLDER_1]
“A floor is only as good as the subfloor beneath it; deflection is the enemy of every joint.” – Master Flooring Axiom
Tools that actually get the job done
The most effective tools for thinset removal include the SDS plus rotary hammer with a wide scaling bit and a 7 inch angle grinder equipped with a turbo diamond cup wheel. If you try to do a 500 square foot room with a hammer and a hand chisel, you will end up in the hospital with carpal tunnel before you finish the first 50 feet. For smaller areas or tight corners near baseboards makeover ideas, a 4.5 inch grinder is more manageable. But for the main field, you want weight and power. The SDS hammer works by delivering thousands of blows per minute, driving the chisel under the edge of the mortar and popping it up in chunks. The angle grinder is for the stubborn remains, the ‘ghost’ of the thinset that the chisel couldn’t grab. It turns the cement into fine dust, which leads us to the biggest problem on any job site: silica.
| Tool Type | Ideal Application | Removal Speed | Mess Factor |
|---|---|---|---|
| SDS Rotary Hammer | Thick mortar beds | High | Moderate (Chunks) |
| 7 Inch Angle Grinder | Thin residue/Skim coats | Extreme | Very High (Fine Dust) |
| Pneumatic Scraper | Large open commercial spaces | High | Moderate |
| Hand Floor Scraper | Loose debris/Drywall mud | Low | Low |
Why your subfloor is lying to you
Subfloors often appear flat to the naked eye but hide structural undulations that manifest as floor failure once the new material is installed. I have seen slabs that looked like a mirror until I put a 10 foot straight edge on them. Suddenly, you see a 1/4 inch dip over a 3 foot span. If you are installing large format tile, that dip is a death sentence. The tile will bridge the gap, leaving a hollow spot underneath. One heavy step and the tile snaps. This is why removing the old thinset is only half the battle. You have to grind the high spots. The dust is brutal. I use a HEPA vacuum attached directly to the grinder shroud. Without it, you will be cleaning silica dust out of the HVAC vents for the next five years. This is especially vital when you are working near finished areas or prepping for showers that wow in a remodel. You cannot be reckless with the dust. It is a health hazard and a professional embarrassment.
The ghost in the expansion gap
Expansion gaps at the perimeter must be cleared of all old thinset and debris to allow the new floor to move naturally with temperature changes. Every structure moves. The house breathes. In the summer, the subfloor expands. In the winter, it contracts. If you leave old mortar jammed against the wall plates, you are creating a pinch point. This is where I see most LVP floors fail. The floor hits the old thinset, has nowhere to go, and starts to peak at the seams. You need at least a 1/4 inch gap, sometimes 1/2 inch for larger spans. While you are down there cleaning the perimeter, take a look at your trim. Using chic baseboard designs can help cover those wider expansion gaps that are necessary for a floating floor. It is a functional requirement disguised as a design choice. Don’t let a few pebbles of old cement ruin a $10,000 hardwood install.
The physics of the scaling bit
A scaling bit works on the principle of vibration and shear force to break the bond between the mortar and the substrate without gouging the subfloor. You have to hold the tool at a specific angle, usually around 30 degrees. Too steep and you dig into the concrete or chew up the plywood. Too shallow and you just slide over the top of the thinset. It is a rhythm. You feel the vibration in your forearms. You smell the heat coming off the bit. If the thinset is particularly soft, it might gum up the bit. If it is high-strength, it will spark. This is where the mechanic’s intuition comes in. You adjust the pressure and the angle until the mortar starts flying. You should be wearing knee pads, eye protection, and a respirator. If you aren’t sweating, you aren’t doing it right. After the heavy chunks are gone, you switch to the grinder to finish the job.
“Cementitious bonds reach their peak crystalline structure at 28 days; removing them after 20 years requires more than just luck.” – Structural Engineering Review
Handling the dust cloud
Silica dust is a regulated carcinogen and requires a dual-stage HEPA filtration system during any mechanical grinding of thinset. You cannot just use a shop vac with a paper filter. The fine dust will pass right through the motor and back into the air. You need a vacuum with a pulse cleaning system that knocks the dust off the filter every thirty seconds. If you don’t, the filter clogs, the suction drops, and the dust fills the room. I have seen guys try to mist the floor with water to keep the dust down. That just creates a caustic slurry that is even harder to clean up and can damage wood subfloors. Keep it dry, keep it contained, and keep the vacuum running. This is the difference between a pro and a hack. When you are done, the subfloor should be clean enough to eat off of before you even think about applying a primer or eco-friendly tile solutions.
- Check for loose subfloor panels and screw them down before grinding.
- Identify any radiant heat wires buried in the old mortar before using a chisel.
- Vacuum the floor three times to remove all micro-dust particles.
- Apply a high-quality primer to the bare concrete to ensure a bond for the new leveler.
- Verify the flatness with a 10 foot straight edge in multiple directions.
The final leveling phase
Once the thinset is removed, the subfloor must be assessed for levelness and often requires a self-leveling underlayment to meet the specifications for modern flooring. No slab is perfect. After the grinding is done, you will likely find low spots. I use a high-flow self-leveler. You mix it in buckets, pour it out, and use a spike roller to release the air bubbles. It finds its own level and creates a surface as flat as a lake. This is the only way to ensure your how to refresh grout projects in the future aren’t plagued by cracked tiles or shifting joints. A flat floor is a quiet floor. It doesn’t squeak. It doesn’t move. It just performs. If you take the time to do this prep work, the actual installation of the floor is the easy part. People always want to rush to the pretty stuff, the tile and the baseboards. But the money is made in the prep. If you fail the subfloor, the subfloor will fail you. Take the time to grind it right.