
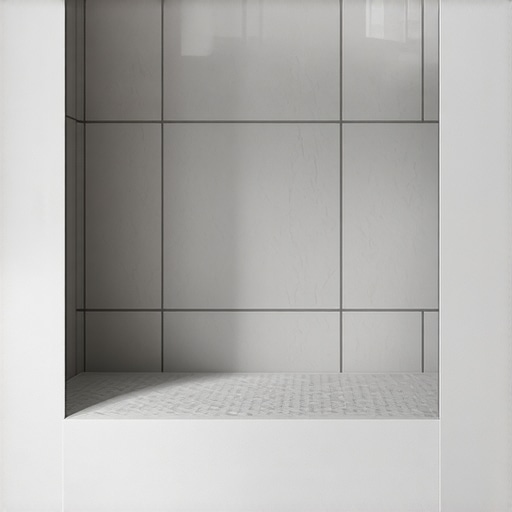
The Structural Reality of Shower Niche Waterproofing
I spent three days grinding concrete on a job last month just so the floor wouldn’t click like a castanet, and that same obsessive attention to detail is what keeps a shower from rotting your house from the inside out. Most guys skip the leveling compound on a floor, and they skip the proper flashing on a niche. They think the tile is the waterproof layer. It is not. Tile and grout are merely the aesthetic skin covering a complex structural engineering challenge. I once walked into a luxury master bath where a twenty thousand dollar marble shower was literally falling apart because the installer used regular thin-set and no membrane inside the niche. The water wicked into the wood studs like a sponge, turning the framing into mulch within two years. If you want a shower that lasts decades, you stop looking at the colors and start looking at the chemistry of your moisture barriers.
The physics of the shower niche
Effective shower niche waterproofing relies on high-density foam inserts or cement board treated with ANSI 118.10 liquid membranes to create a continuous barrier. Integrating this pocket into the primary wall membrane prevents vapor drive from saturating the wall cavity. Proper flashing and a five degree positive slope are required. Water follows the path of least resistance, and in a shower, that path usually leads directly into the corners of a poorly sealed niche. Gravity pulls moisture down the walls, where it pools on the horizontal surface of the shelf. If that shelf is dead level, the water sits. It finds microscopic pinholes in the grout. It undergoes capillary action, climbing up the backside of the tile. This is why we use pre-formed niches made of extruded polystyrene. These units are factory-sealed, meaning you only have to worry about the joints where the box meets the wall. When you build a niche from scratch using 2×4 blocks and scraps of backer board, you are creating twelve individual potential leak points. Each one of those points requires a liquid-applied or sheet-applied membrane that overlaps the field of the wall by at least two inches.
Why standard drywall fails behind tile
Standard gypsum drywall and green board lack the structural integrity to withstand constant moisture exposure and vapor pressure. Steam penetrates the porous grout and saturates the paper backing of the drywall, leading to anaerobic mold growth and total adhesive failure. Only cementitious backer units provide a stable substrate. Even if you slather it in a gallon of pink waterproofing goop, drywall is a risk I will not take. The gypsum core is chemically unstable when wet. It softens. When the core softens, the tile starts to shift. That shift breaks the bond of the thin-set. Now you have a shower that looks fine but sounds hollow when you tap it. For those looking at showers with a style trendy ideas for small bathrooms, remember that the smaller the space, the higher the concentration of steam. That vapor pressure pushes moisture through the smallest gaps. You need a substrate that is inorganic. Cement board does not rot. Foam board does not rot. These materials ensure that the moisture stays in the plumbing, not in the pantry on the other side of the bathroom wall.
“A floor is only as good as the subfloor beneath it; deflection is the enemy of every joint.” – Master Flooring Axiom
The liquid membrane versus sheet membrane debate
Liquid membranes provide seamless coverage for complex niche geometry while sheet membranes offer consistent mil-thickness across large flat wall surfaces. Combining liquid-applied products at the corners with sheet-applied products on the walls creates a hybrid system with superior longevity. Verify chemical compatibility between the adhesive and the barrier. I prefer liquid membranes for the actual interior of the niche. Trying to fold a thick sheet membrane into a six by twelve inch box is like trying to wrap a Christmas present with a tarp. You get bulk in the corners. That bulk makes the tile kick out, and suddenly your niche corners are out of square. A liquid membrane, applied with a brush in three heavy coats, conforms to the shape. You must measure the wet mil-thickness. If the manufacturer says thirty mils, they mean thirty mils. If it is too thin, it is just paint. If it is too thick, it can skin over and trap moisture inside the wet product, leading to a rubbery mess that never fully cures. We often integrate these systems with eco-friendly tile solutions for sustainable homes in 2025 to ensure the entire assembly is non-toxic and durable.
Achieving the perfect pitch for drainage
A shower niche shelf must have a positive slope of approximately one eighth to one quarter inch toward the shower floor to ensure gravity-fed drainage. Failure to pitch the bottom horizontal surface leads to standing water, which accelerates grout erosion and encourages the growth of biofilm and mildew. This is the 1/8 inch that ruins everything. I see guys install the bottom tile perfectly level because it is easier to cut. That is a mistake. When water sits on a flat surface, it dries through evaporation, leaving behind minerals and soap scum. This makes tile cleaning tips for a sparkling bathroom in 2025 useless because the damage is structural. The water should roll off the shelf the moment the shower head is turned off. I always shim the back of the niche tile slightly. Just a few hairsbreadths of thin-set extra in the back makes the difference. This prevents the grout from staying saturated, which is the primary cause of discoloration and eventual failure.
The ghost in the niche corners
Niche corners are the most frequent failure points in modern shower installations due to the lack of continuous flashing. Using pre-manufactured waterproof corners or reinforced fabric bands embedded in liquid membrane is the only way to guarantee a watertight seal at these ninety degree transitions. You cannot just butt two pieces of board together and hope for the best. The house moves. The wood framing shrinks and expands with the seasons. That movement will crack the grout in the corner of your niche. If your waterproofing is not flexible, it will crack too. We use a transition tape or a polyester fabric. You embed the fabric in the first coat of membrane while it is wet, then let it dry before applying the second coat. This creates a reinforced bridge. It is the same principle as rebar in concrete. It gives the waterproofing tensile strength. Without it, you are just waiting for a leak.
The hidden danger of the shelf edge
The leading edge where the niche tile meets the wall tile requires a specialized profile or a mitered joint sealed with high-performance silicone instead of rigid grout. This joint experiences the most stress from thermal expansion and must remain flexible to prevent water infiltration behind the wall assembly. Many people want to use the same grout here as they do everywhere else. That is a failure waiting to happen. Grout is rigid. It cracks. When you have two different planes meeting at a corner, you need a movement joint. I always recommend a metal profile or a bead of color-matched caulk. For those interested in chic baseboard designs that transform rooms in 2025, understand that the same logic applies to where your wall meets your floor. You need that expansion gap. In a niche, that gap is your last line of defense against water getting behind the tile and reaching the studs.
Grout and the illusion of waterproofing
Grout is a porous material that slows water penetration but does not stop it entirely. Standard cement-based grouts absorb moisture via capillary action, meaning the underlying waterproofing membrane is the only actual barrier between the shower and the home framing. High-performance epoxy grouts offer better resistance but still require a waterproof substrate. People think grout is like plastic. It is not. It is like a very dense sponge. This is why how to refresh grout without replacing it is such a popular topic. The grout gets dirty because it is absorbing water and everything in it. If your niche is not waterproofed behind the tile, the water will pass through the grout, hit the drywall or wood, and stay there. That damp environment is the perfect breeding ground for mold. I tell my clients that if they want their shower to look new for years, they should look into grout restoration secrets for long lasting results, but they must start with a waterproof foundation.
| Material Type | Waterproof Rating | Ease of Installation | Best Use Case |
|---|---|---|---|
| Extruded Polystyrene (Pre-formed) | High | Easy | Standard sized niches |
| Cement Board with Liquid Membrane | High | Moderate | Custom sized niches |
| Traditional Wood Frame with Drywall | Zero | Easy | Never use in showers |
| Stainless Steel Inserts | High | Easy | Modern minimalist designs |
- Always verify the niche is secured to the studs with stainless steel screws.
- Apply waterproofing membrane at least six inches beyond the niche opening.
- Check for a five degree slope on all horizontal surfaces.
- Use alkali-resistant mesh tape on all joints and seams.
- Allow forty eight hours of cure time before starting tile installation.
While most people want the thickest underlayment, too much cushion actually causes the locking mechanisms on LVP to snap under pressure, and in a similar vein, too much thin-set behind a niche tile can lead to shrinkage cracks. Balance is everything. You need enough material to create a bond but not so much that the physics of the drying process works against you. For a look at the future of bathroom aesthetics, check out showers that wow modern designs for 2025, but always keep the structural requirements at the forefront of your planning. If the bones of the shower are not right, the beauty is only temporary. I have seen too many beautiful tiles end up in a dumpster because someone saved fifty dollars on a waterproofing kit. Do not be that person. Build it like it is going to be there for a hundred years.
“Waterproofing is not a layer; it is a system of managed transitions.” – TCNA Handbook Guidance