
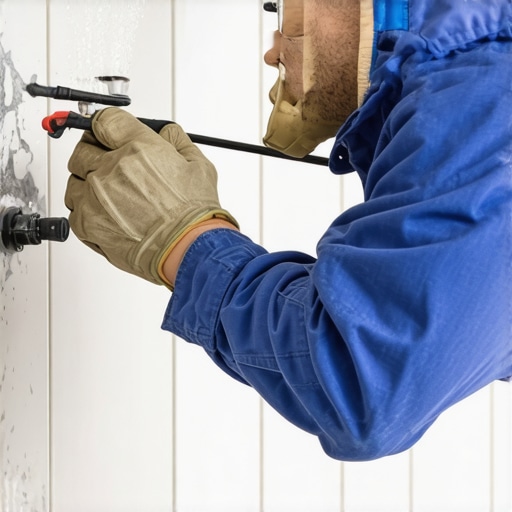
The Secret To Waterproofing A Shower Valve Rough-In Properly
I spent three days grinding concrete on a job last month just so the floor wouldn’t click like a castanet, and that same obsessive attention to detail is what most guys miss when they stare at a shower valve. Most installers see a brass fixture sticking out of a wall and think a little bead of caulk will save their reputation. It won’t. I have spent twenty five years cutting out moldy drywall and replacing rotted floor joists because someone failed to understand the physics of moisture migration around a mixing valve. Waterproofing is not a suggestion. It is a structural mandate. When you are dealing with pressurized water behind a wall of tile and grout, you are fighting a constant battle against capillary action. If you lose that battle, your showers become a breeding ground for failure that will eventually eat your baseboards and rot your subfloor. This guide is for the person who wants to do it right once so they never have to do it again.
The physics of the shower valve rough-in
Waterproofing a shower valve rough-in involves creating a permanent mechanical seal between the mixing valve body and the waterproofing membrane on the wall. This prevents moisture from entering the wall cavity through the rough-in hole, which is the most vulnerable point in any shower installation. You cannot rely on the trim plate or escutcheon to keep the water out. That plate is purely decorative. The real work happens at the microscopic level where the membrane meets the brass. We have to account for the thermal expansion of the pipes. When hot water hits that brass, it expands. When the water turns off, it contracts. If your waterproofing is rigid, it will crack. If it is too soft, it will peel. You need a system that offers both elasticity and a high bond strength to non-porous surfaces. I have seen guys try to use standard thin-set to bridge the gap between the valve and the cement board. That is a recipe for a callback in six months. The movement of the plumbing will snap that bond faster than a cheap piece of ceramic tile.
“A floor is only as good as the subfloor beneath it; deflection is the enemy of every joint.” – Master Flooring Axiom
The failure of traditional sealant methods
Traditional silicone sealants often fail at the shower valve because they lack the adhesive properties to maintain a watertight bond under constant thermal cycling. Most installers apply a topical bead of cheap caulk around the valve hole and assume the tiles will cover the rest. This ignores the reality of water vapor and splash back that inevitably finds its way behind the escutcheon plate. You need a flashing collar or a liquid-applied membrane that is specifically rated for plumbing penetrations. When we talk about the chemistry of these products, we are looking at the polymer density. A high-quality modified silane polymer provides the flexibility needed to handle the vibration of the pipes while maintaining a grip on the brass that would require a chisel to remove. If you are still using the same tube of caulk you used for the baseboards in the hallway, you are setting yourself up for a disaster. The environment inside a shower is hostile. It is a cycle of high heat, high humidity, and aggressive cleaning chemicals. Your seal needs to be chemically inert and physically robust.
Selecting the right waterproofing membrane
Selecting the right waterproofing membrane for a shower valve rough-in depends on whether you are using a sheet-applied system or a liquid-applied membrane. Both require a pre-fabricated pipe seal or a flexible gasket to ensure a watertight transition at the valve penetration. Sheet systems like those from Schluter or Laticrete offer a dedicated mixing valve seal. These are made of a fleece-lined rubber that bonds directly to the wall membrane using unmodified thin-set. The rubber gasket sits tight against the valve body. For liquid systems, you need a reinforcing fabric or a specialized sealant that is compatible with the liquid rubber. If you mix brands here, you are playing a dangerous game. The chemical compatibility between the liquid rubber and the sealant is what creates the bond. If they don’t play nice, the sealant will simply delaminate, leaving a microscopic gap that water will find. I always tell my guys to stick to one system from the studs to the grout. It is the only way to ensure the warranty actually means something when the homeowner starts complaining about a damp spot in the closet behind the bathroom. You can find more on high-end configurations at showers that wow modern designs for 2025 if you want to see how these systems look when finished correctly.
The structural cost of a loose rough-in
A loose shower valve will eventually destroy the waterproofing seal regardless of the materials used because the mechanical stress of turning the handle will tear the membrane. You must ensure the valve body is securely blocked between the studs using solid wood blocking and heavy duty screws. I have walked onto too many jobs where the plumber just let the copper pipes hold the valve in place. Every time the homeowner turns the water on, the valve moves a fraction of an inch. Over a year, that movement fatigues the waterproofing collar. It is like bending a paperclip back and forth. Eventually, it snaps. I make it a point to check the blocking before a single sheet of backer board goes up. If I can wiggle that valve with my hand, the job stops. We are building a performance surface, not a movie set. The integrity of the tile and the grout depends on the substrate being dead still. If the valve moves, the grout around the trim will crack, and then you have a direct highway for water to enter the wall. If you are worried about the aesthetics of the room, you should also consider how baseboards makeover ideas to elevate your space can be ruined by a slow leak that travels down the wall studs.
| Material Property | Liquid Membrane | Sheet Membrane | Silane Polymer Sealant |
|---|---|---|---|
| Elasticity | High | Moderate | Extreme |
| Ease of Application | Simple | Technical | Simple |
| Cure Time | 12 to 24 Hours | Immediate | 24 Hours |
| Chemical Bond | Excellent | Mechanical | Superior |
The 1/8 inch that ruins everything
The 1/8 inch gap between the tile edge and the shower valve is where most waterproofing failures begin to manifest as mold and structural rot. If the hole in the tile is cut too large, the escutcheon plate will not have enough surface area to provide a secondary seal against the finished wall. You want the tile to be close enough to the valve that you can bridge the remaining gap with a high-performance sealant, but not so close that the tile is touching the brass. If the tile touches the brass, the vibration from the plumbing can crack the tile. This is the kind of precision that separates a master installer from a weekend warrior. We are talking about microscopic tolerances here. When you apply your sealant, it needs to be a continuous bead that contacts both the waterproofing membrane and the valve body itself. This creates a redundant system. Even if the outer seal on the trim plate fails, the inner seal at the membrane keeps the water in the shower where it belongs. I have seen guys try to use grout to fill this gap. Never use grout for a change of plane or a plumbing penetration. Grout is rigid and porous. It will crack and it will suck up water like a sponge. For long term maintenance of your surfaces, check out tile cleaning tips for a sparkling bathroom in 2025.
The step by step sealing protocol
Sealing a shower valve requires a multi-stage approach that starts with substrate preparation and ends with a flexible secondary seal after the tile installation is complete. You cannot skip steps here. The process involves cleaning the valve body to remove any oils or construction dust that might interfere with the bond. If the brass is dirty, nothing will stick to it. I use denatured alcohol to wipe down the valve before I even think about applying a gasket. Then, you apply your primary waterproofing, ensuring it is feathered out perfectly flat. Any bumps or ridges in the membrane will make the tile sit unevenly, and then you have a lippage problem that no amount of grout can hide.
- Secure the valve body to solid blocking to prevent any mechanical movement.
- Clean the brass valve surface with denatured alcohol to ensure a chemical bond.
- Install the manufacturer-specific pipe collar or flexible gasket over the valve.
- Apply the wall waterproofing membrane over the collar flange to create a monolithic seal.
- Ensure the tile cut-out is precise, leaving a 1/8 inch expansion gap around the valve.
- Fill the gap between the tile and the valve with a 100 percent silicone or silane polymer sealant.
- Verify the escutcheon plate gasket is intact before final trim installation.
Managing the transition to baseboards and trim
The transition from the shower to the bathroom floor and the baseboards is where moisture often escapes if the valve waterproofing is compromised. Water that leaks behind a shower valve doesn’t just stay there; it travels down the studs and pools on the subfloor, often showing up first as swelling in the baseboards outside the shower. This is why I am so obsessed with the rough-in. A failure at the valve is a failure of the entire room. If you see your baseboards starting to pull away from the wall or the paint starting to bubble, don’t just repaint them. Get your moisture meter out. You likely have a leak at the valve or the grout lines. It is all connected. The showers are the engine of the bathroom, and if the engine is leaking oil, the whole car is going to stop eventually. You can learn more about protecting your trim at baseboards makeover ideas to elevate your space. Also, if you find your grout is already looking rough, you might need grout restoration secrets for long lasting results to get things back in order.
“A floor is only as good as the subfloor beneath it; deflection is the enemy of every joint.” – Master Flooring Axiom
The molecular reality of waterproof bonds
The molecular bond between a waterproofing agent and a brass valve is determined by the surface energy of the materials and the viscosity of the sealant during application. Brass has a high surface energy, which generally makes it easy to bond to, but only if it is pristine. Construction sites are filthy. There is drywall dust, copper flux, and oils from the installer’s hands everywhere. If you don’t clean that valve, you are bonding to the dirt, not the brass. When the water pressure hammers through the pipes, that layer of dirt will act as a release agent, and your seal will pop off. This is what we mean by zooming into the physics of the install. It is not about the tile you see; it is about the chemistry you don’t see. You want a sealant that has a high solids content and low shrinkage. Many cheap caulks are 50 percent water or solvent. When they dry, they shrink. If they shrink, they pull away from the valve. A 100 percent solids sealant stays the same size it was when you applied it, ensuring the gap stays filled forever. This is the level of detail required to build a shower that lasts fifty years instead of five. If you care about the planet as much as your plumbing, look into eco-friendly tile solutions for sustainable homes in 2025.