
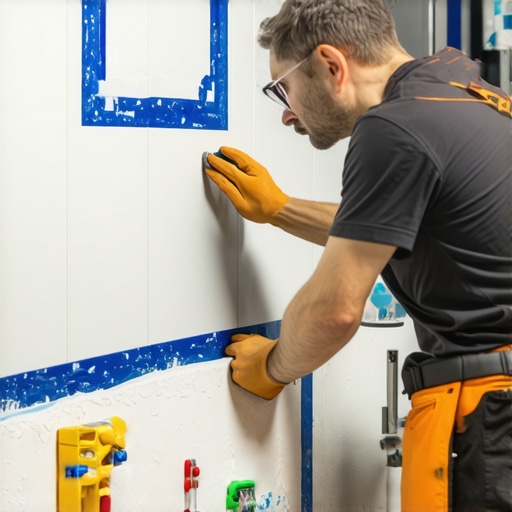
The invisible barrier that stops floor rot
Applying waterproofing tape to interior corners requires a thin layer of modified thin-set or liquid membrane to bed the fabric into the substrate. The installer must press the tape firmly with a flat knife to eliminate air bubbles and ensure full contact. This process creates a flexible, watertight bridge that handles structural expansion without compromising the shower envelope.
Most guys skip the leveling compound. They think the underlayment will hide the dip. It won’t. I spent three days grinding concrete on a job last month just so the floor wouldn’t click like a castanet. When it comes to showers, that same laziness leads to catastrophic failure. I once walked into a luxury master bath where the homeowners had spent thirty thousand dollars on marble. Six months later, the baseboards in the hallway were fuzzy with black mold. The installer had simply overlapped the tile over a butt-joint in the cement board without using any tape or membrane at the interior corners. Water followed the laws of physics. It found the gap. It migrated into the 2×4 studs. The entire shower had to be gutted. That is a heartbreak that could have been avoided with a twenty dollar roll of fleece-backed tape and thirty minutes of patience.
The structural anatomy of a waterproof corner
Waterproofing tape acts as a reinforcement for the most vulnerable points of a shower assembly where two planes meet and move independently. It must provide enough tensile strength to resist tearing while remaining flexible enough to bridge the inevitable shift in a home foundation. Proper installation ensures that moisture remains within the tile layer and reaches the drain.
When you look at a corner, you are looking at a hinge. Houses breathe. They expand when the humidity hits eighty percent in the summer and they shrink when the furnace kicks on in January. If you just fill that corner with grout or a bead of cheap caulk, it will fail. Grout is rigid. It has zero movement capability. To understand the chemistry of the bond, you have to look at the fleece on the tape. High-quality waterproofing tape is not just plastic. It is a non-woven fabric designed to mechanically lock into the thin-set. The thin-set penetrates the fibers, creating a composite material that is stronger than the sum of its parts. This is why the choice of mortar is vital. You need a polymer-modified mortar that meets ANSI A118.11 standards to ensure that the bond to the cement board or gypsum-based moisture-shield is permanent. If the mortar is too thick, you create a hump. If it is too thin, the tape will delaminate. You are looking for the consistency of creamy peanut butter. Anything thicker and you are fighting the physics of the tile layout.
“A floor is only as good as the subfloor beneath it; deflection is the enemy of every joint.” – Master Flooring Axiom
The thin-set thickness trap that ruins tile layouts
Maintaining a low profile with waterproofing tape is essential for a professional tile finish in shower corners. Excess mortar behind the tape causes the tile to kick out, creating an uneven surface that is difficult to grout and visually unappealing. Installers should use a V-notch trowel to control the volume of the bedding material for a flat transition.
I see this mistake on every amateur job. The installer slops a giant mound of thin-set into the corner, slaps the tape over it, and calls it a day. Now you have a three-millimeter bump in the corner. When you go to set your first row of tile, the edge of the tile hits that bump and cocks forward. Your vertical grout lines will be crooked from the start. You will be fighting that bump all the way to the ceiling. To do this right, you apply the mortar with a small trowel and then use the flat side of a six-inch taping knife to scrape away the excess. You want just enough to fill the fleece. The goal is a surface that is nearly flush with the rest of the wall. This precision is what separates a master from a handyman. It also ensures that your tile cleaning tips actually work later on, because you won’t have deep, recessed pockets of grout that trap soap scum and hard water deposits. A flat wall is a cleanable wall.
| Material Type | Movement Capability | Installation Method | Best Use Case |
|---|---|---|---|
| Fleece-Backed Tape | High | Thin-set Bedded | Interior Corners and Seams |
| Liquid Membrane Only | Moderate | Paint-on | Flat Wall Surfaces |
| Butyl Adhesive Tape | Low | Peel and Stick | Temporary Repairs |
| Rubberized Strip | Very High | Hybrid Sealant | Commercial Steam Rooms |
The chemistry of the bond between tape and substrate
Chemical adhesion in waterproofing relies on the polymer chains in the thin-set interlocking with the synthetic fibers of the tape. This creates a hydrophobic barrier that prevents capillary action from pulling water into the wall cavity. The curing time of the mortar must be respected to ensure the bond reaches full hydraulic strength before tile application.
In high-humidity regions like Florida or the Gulf Coast, the moisture in the air can actually slow down the evaporation of the water in your thin-set. If you tile over wet tape, you trap that moisture. It can lead to a sour smell or even weaken the bond over time. I always wait at least twelve hours, regardless of what the bag says. You want to see the color shift in the mortar. It should be a uniform gray or white with no dark damp spots. While you wait for the corner to cure, you can focus on the other details like your baseboards makeover ideas for the rest of the bathroom. The transition from the wet area to the dry area is where most people fail. You need a solid moisture break where the shower curb meets the floor. This is where you double-wrap the tape. You fold it like an envelope. No gaps. No shortcuts. If you are working on showers with a style that involves small mosaic tiles, this flatness is even more critical. Mosaics will follow every lump and bump in your waterproofing like a map.
Geometric precision in the vertical transition
Vertical corners must be plumb to ensure the waterproofing tape sits flat without bunching or wrinkling. A wrinkle in the tape is a potential leak path where water can bypass the membrane through the void. Proper folding techniques at the floor-to-wall transition are the most critical aspect of the entire installation process.
- Clean the substrate of all dust and debris using a damp sponge.
- Apply a thin layer of mortar to both sides of the corner extending three inches out.
- Fold the waterproofing tape in half to create a sharp crease before applying.
- Embed the tape into the mortar using a flat plastic or metal spreader.
- Force all air bubbles out from the center toward the edges of the tape.
- Apply a second thin coat of mortar or liquid membrane over the edges of the tape to feather it out.
If you don’t have a sharp crease, the tape will “bridge” the corner. This creates a hollow triangle behind the tape. When you push your tile into the corner, you will pop the tape or crack the tile. It is a simple physics problem. You cannot have a void behind a structural surface. I’ve seen guys try to fill that void with grout later. It never works. The grout eventually falls out, and then you’re looking for how to refresh grout because your corners look like a mess. Do it right the first time. Spend the extra two minutes to get that tape tight into the corner. Your future self will thank you when you aren’t dealing with a leaking ceiling in the kitchen below the bathroom.
“Waterproofing is not a suggestion; it is the fundamental requirement of a functional wet environment.” – TCNA Handbook Standards
Materials that fail when the house moves
Rigid materials like standard cement or cheap silicone often fail in interior corners due to the lack of elasticity needed to accommodate structural shifting. Waterproofing tape provides the necessary bridge that maintains its integrity even when the walls move up to an eighth of an inch. This durability is the key to a long-lasting shower system.
People love to talk about eco-friendly tile solutions and the beauty of natural stone, but nobody wants to talk about the mud. The mud is what stays. If you use a cheap organic mastic in a shower corner, you are asking for trouble. Mastic is basically organic glue. When it gets wet, it turns back into glue. It rots. You need cement-based products. And you need the tape. The tape is your insurance policy. Even if the house settles and a tiny crack forms in the grout line of the corner, the tape behind it remains intact. The water might get past the grout, but it won’t get past the fleece. That is the secret to a shower that lasts fifty years instead of five. When you are designing showers that wow, remember that the most important parts are the ones you will never see. The tape, the thin-set, and the prep work are the soul of the room.
Maintenance of the secondary barrier
While the waterproofing tape is a permanent part of the wall assembly, the grout and caulk in front of it require regular inspection to prevent excessive water loading on the membrane. Replacing cracked grout promptly reduces the stress on the interior corner tape and extends the life of the shower.
Don’t think that because you have a waterproof corner you can ignore the maintenance. If your grout starts falling out, fix it. Check out grout restoration secrets to keep the surface layer in good shape. The tape is the secondary barrier. It is the safety net. You still want the primary barrier, the tile and grout, to shed as much water as possible. If you notice your chic baseboard designs outside the shower are starting to peel or discolor, you might already have a problem. It means moisture is wicking through the subfloor. Most likely, it’s a corner failure. Always check the corners first. They are the weakest link in the chain. If you have questions about a specific installation or a failing floor, you can always contact us for professional advice. Just remember, a level floor and a taped corner are the two things I will never compromise on. If an installer tells you they don’t need tape because they use “special grout,” fire them on the spot. They are lazy and they are going to cost you thousands of dollars in the long run. Stick to the standards. Stick to the physics. That is how you build a floor that stands the test of time. “