
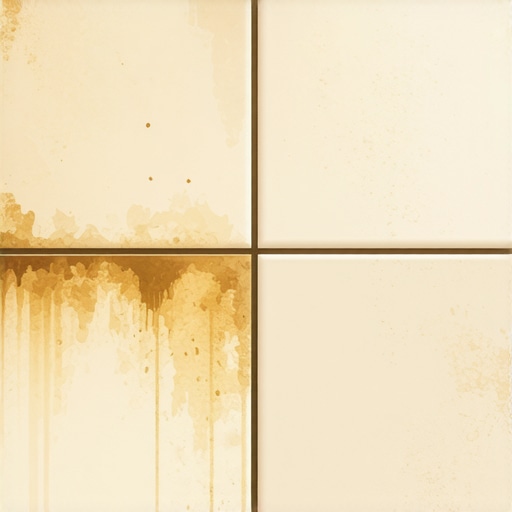
I spent three days grinding concrete on a job last month just so the floor wouldn’t click like a castanet, and that same level of obsession applies to your grout. Last week, a homeowner walked into my shop clutching a piece of light gray porcelain. She was nearly in tears because a leaking radiator had bled a dark, orange-red streak across her pristine floor. She had tried bleach. She had tried vinegar. She had even tried a wire brush she found in the garage. All she did was etch the tile and drive the iron oxide deeper into the cementitious pores. Most guys skip the leveling compound and most homeowners skip the chemistry. They think the underlayment or a bit of soap will hide the dip or the stain. It won’t. Rust is not a surface problem. It is a molecular invasion of the grout matrix that requires a specific, surgical approach to reverse without destroying the structural integrity of your shower or kitchen floor.
The microscopic anatomy of a grout stain
To remove rust stains from light grout, you must use a pH-balanced phosphoric acid cleaner or a specialized iron-out solution that chelates the iron particles. These chemical agents break the ionic bond between the iron oxide and the cement grout. Avoid abrasive scrubbing which permanently damages the grout seal and creates microscopic pockets for future debris to lodge.
Grout is essentially a hard sponge. When you look at it under a microscope, you see a jagged landscape of calcium silicate hydrate. It is filled with tiny voids and capillaries. When water containing iron or a rusting metal object sits on that surface, the oxidation process forces ferric oxide deep into those capillaries. You cannot simply wipe this away. You are dealing with a mineral deposit that has become part of the floor. If you are working in showers, the constant cycle of heat and moisture accelerates this. The humidity in places like Florida or the Gulf Coast makes this even worse, as the moisture never fully leaves the grout line, allowing the rust to bloom like a fungus. You need to understand the moisture content of your slab. If your subfloor is damp, that moisture can pull minerals up through the grout from below, a process known as efflorescence, which often carries metallic salts that mimic rust.
“A floor is only as good as the subfloor beneath it; deflection is the enemy of every joint.” – Master Flooring Axiom
Why your tap water is a chemical weapon
Hard water is the primary delivery system for iron oxide in the modern home. When the mineral content of your water exceeds 0.3 parts per million, you are essentially painting your tile with liquid rust every time you mop or shower. This is particularly prevalent in regional areas with high limestone or iron deposits in the soil. The water evaporates, leaving the heavy metals behind. Over time, these metals oxidize. You see a light yellow tint first. Then it turns to a burnt orange. By the time it is brown, the iron has crystallized inside the grout. This is why tile cleaning tips for a sparkling bathroom in 2025 focus so heavily on water quality and filtration. If you do not fix the water, you will be cleaning the rust every month until the grout eventually crumbles from chemical fatigue.
The physical failure of the scrubbing brush
Stop using wire brushes. I see it every day in my shop. A customer comes in looking for replacement baseboards or matching tile because they used a steel wool pad on a grout line. Steel wool leaves behind microscopic shards of metal. Those shards then rust. You create a self-perpetuating stain. Even stiff nylon brushes can be problematic if used with too much downward pressure. You want to agitate the chemical cleaner, not sand down the grout. If you remove the top 1/16th of an inch of grout through abrasion, you have compromised the height of the joint. This leads to water pooling, which leads to more rust. It is a cycle of destruction. Use a soft-bristled grout brush and let the chemistry do the heavy lifting. If the stain is stubborn, you might need to look into how to refresh grout without replacing it before the damage becomes structural.
| Cleaner Type | pH Level | Effectiveness on Rust | Risk to Tile |
|---|---|---|---|
| White Vinegar | 2.5 | Low | High (Etching) |
| Bleach | 12.0 | Zero | Medium (Yellowing) |
| Phosphoric Acid | 1.5 | Extreme | Low (if diluted) |
| Lemon Juice | 2.0 | Moderate | Low |
| Baking Soda | 8.0 | Low | Zero |
Chemical warfare in the shower stall
When you are dealing with showers, the chemistry changes. You have soap scum, which is a fatty acid, layered over the rust. If you apply a rust remover directly onto soap scum, the chemical cannot reach the iron. You must first strip the oils using an alkaline cleaner. Only then can you apply your acidic rust remover. This two-stage process is what separates the professionals from the DIYers who give up after ten minutes. I tell my customers that cleaning a shower is like prepping a subfloor. You have to remove every layer of contamination before you address the core issue. If you are interested in modern aesthetics, you might check showers that wow modern designs for 2025, but remember that even the most beautiful design fails if the maintenance is handled incorrectly. The chemistry of the bond is everything.
The miracle of acid based chelating agents
Chelation is a process where a large molecule surrounds a metal ion and pulls it into solution. This is the secret to removing rust from light grout. You are not bleaching the color away. You are physically removing the iron. Citric acid and oxalic acid are common chelators. They are safer than muriatic acid, which I have seen melt baseboards and ruin stainless steel fixtures in seconds. Never use muriatic acid in a residential setting. It is too volatile. Instead, look for a dedicated grout restoration product. These products are designed to dwell on the surface. You apply the liquid, let it sit for ten minutes, and watch the orange turn to a clear or pale yellow liquid. That is the iron being suspended. Once it is suspended, you must extract it immediately with a wet vacuum or a clean microfiber cloth. If you let it dry, the iron just redeposits back into the pores, and you are back at square one.
“Grout is the most vulnerable component of a tile installation; its porosity is its downfall.” – Tile Industry Standard 402
Protection before the oxidation returns
Once the grout is clean, it is naked. It is more porous than ever because the acid has opened up the capillaries. If you do not seal it immediately after it dries, the next time you drop a shaving cream can, the rust will return instantly. You need a high-quality penetrating sealer. Not a topical sealer that sits on top like a piece of plastic. You want a silane or siloxane-based sealer that chemically bonds to the grout particles. This creates a hydrophobic barrier. Water will bead up on the surface instead of soaking in. This is the same logic we use when installing eco-friendly tile solutions for sustainable homes in 2025. Sustainability isn’t just about the material. It is about making the installation last for fifty years instead of five. Protecting your grout lines preserves the baseboards and the subfloor from moisture wicking, which is where the real structural rot begins.
- Test the cleaner on an inconspicuous corner near the baseboards first.
- Ensure the room is ventilated to prevent acid fume buildup.
- Use a vacuum to remove all loose dust before applying liquids.
- Apply the rust remover and allow a dwell time of exactly 8 to 12 minutes.
- Agitate gently with a nylon brush in a circular motion.
- Rinse with distilled water to ensure no new minerals are introduced.
- Dry the area completely with a high-speed fan before sealing.
The ghost in the expansion gap
Rust often hides where the tile meets the baseboards. This is the expansion gap. Often, installers fill this gap with grout instead of color-matched caulk. This is a violation of industry standards. Grout in a change of plane will crack. Those cracks become highways for water to reach the wall studs and the bottom plate of your framing. If you see rust bleeding out from under your baseboards, you don’t have a cleaning problem. You have a plumbing leak or a flashing failure. No amount of phosphoric acid will fix a pipe that is weeping behind the drywall. You have to be a detective. Look at the chic baseboard designs that transform rooms in 2025 and you will see that they all rely on a dry, stable environment. If your baseboards are swelling at the bottom, stop cleaning and start calling a plumber. For more on this, look at baseboards makeover ideas to elevate your space to see how to properly integrate trim with moisture-prone flooring.
Why your subfloor is lying to you
If you have light grout and it keeps turning orange in specific spots, your subfloor might be the culprit. In older homes, installers used iron nails to secure the wire lath for the mortar bed. If moisture penetrates the grout, it hits those nails. The nails rust. The rust then travels up through the mortar and stains the grout from the bottom up. This is a nightmare scenario. You can clean the surface a hundred times, and the stain will return every single week. This is why we emphasize the importance of a proper moisture barrier and the use of stainless steel or galvanized fasteners. If you are struggling with long-term discoloration, you may need to investigate grout restoration secrets for long-lasting results which often involve epoxy colorants that act as a total vapor barrier over the grout line.
The 1/8 inch that ruins everything
The width of your grout line dictates how difficult it is to remove rust. Narrow 1/16 inch joints are incredibly hard to clean because the surface tension of the water prevents the cleaner from penetrating. Wider 1/4 inch joints are easier to reach but contain more volume of porous material to hold stains. If you are at the point where cleaning is no longer effective, you might consider color sealing. This is essentially a specialized epoxy paint for your grout. It is a tedious process. You have to scrub the lines, neutralize the acid, and then hand-apply the colorant with a tiny brush. It is the only way to achieve a truly uniform look on a floor that has been ravaged by iron stains. It also makes the floor much easier to maintain, similar to the techniques found in showers with a style trendy ideas for small bathrooms where space is tight and every detail is visible. Don’t let a small stain dictate the feel of your entire home. Tackle the chemistry, respect the physics of the subfloor, and keep your grout lines as clean as the day the thin-set cured.