
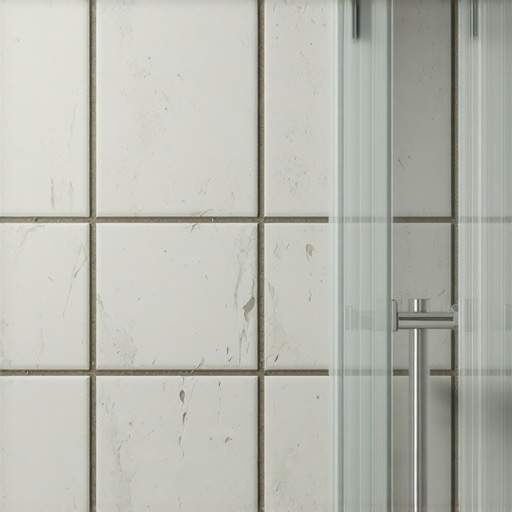
I spent three days grinding concrete on a job last month just so the floor wouldn’t click like a castanet. The homeowner was furious, not at me, but at the guy who came before. That previous installer had used a premixed adhesive in a walk in shower. By the time I arrived, the bottom three rows of tile were literally sliding down the wall. I could peel them off with my bare hands. The adhesive behind the tile looked like grey oatmeal. It was wet, slimy, and smelled like a damp basement. That is the reality of using premixed products in wet environments. Most people think a bucket labeled as adhesive is ready for anything. They are wrong. Flooring is a structural engineering challenge, and in a shower, the chemistry of your bond is the only thing standing between a beautiful bathroom and a total structural failure.
The bucket of lies in the plumbing aisle
Premixed thinset is usually an organic mastic or a synthetic polymer adhesive that relies on evaporation to cure and harden. These products are not true cementitious mortars. In a wet environment like a shower, the lack of airflow behind dense porcelain tiles prevents the evaporation process. This leads to a permanent state of softness that will eventually fail under the weight of the tile or the pressure of daily use. Real professionals avoid these buckets for any area where water is present. You need a product that cures through a chemical reaction, not one that just dries out like a bottle of school glue. When you look at showers that wow modern designs for 2025, remember that the beauty is only skin deep. The strength is in the mortar bed.
“A floor is only as good as the subfloor beneath it; deflection is the enemy of every joint.” – Master Flooring Axiom
Why air drying is a myth behind tile
Evaporation cannot occur effectively behind large format tiles because the dense material acts as a vapor barrier. When you spread a premixed adhesive on a wall and slap a 12 by 24 inch porcelain tile over it, you are essentially sealing that adhesive in a tomb. The moisture has nowhere to go. In a dry hallway, the moisture might eventually migrate through the grout joints, but in a shower, the humidity is constantly replenished. This creates a cycle where the adhesive stays in a semi liquid state. This is why we see so many failures in modern renovations. People want the look of high end stone but use the logic of a craft project. If the moisture cannot escape, the bond cannot form. This is especially dangerous when you consider the weight of modern tile. A single large tile can weigh several pounds, and without a rigid cementitious bond, gravity will eventually win the battle.
The molecular breakdown of organic mastics
Organic mastics are composed of long chain polymers that remain water soluble even after they appear to be dry. This is the fundamental flaw in using them for showers. When water penetrates the grout, it hits the mastic layer. Because the mastic is water soluble, it begins to re emulsify. It turns back into a paste. This process destroys the shear strength of the bond. True thinset mortar uses Portland cement. When you mix that powder with water, a chemical reaction called hydration begins. It creates calcium silicate hydrate crystals that grow and lock into the microscopic pores of the tile and the substrate. This crystal structure does not care if it gets wet. In fact, cement continues to gain strength in the presence of moisture. That is why bridges are built with concrete and not with buckets of premixed glue.
| Feature | Premixed Mastic | Polymer Modified Thinset |
|---|---|---|
| Cure Method | Evaporation | Chemical Hydration |
| Water Resistance | Low (Re-emulsifies) | High (Waterproof Bond) |
| Tile Size Limit | Small (under 6 inches) | No Practical Limit |
| Substrate Compatibility | Drywall and Plywood | Concrete, CBU, Membrane |
The danger of large format porcelain
Large format porcelain tiles have a water absorption rate of less than point five percent which makes them nearly waterproof. While this is great for keeping water out of your walls, it is a nightmare for premixed adhesives. Since the tile won’t absorb any of the water from the adhesive, and the waterproof membrane behind the tile won’t absorb it either, the moisture is trapped. It stays there for months or even years. I have seen jobs where the mastic was still wet three years after installation. When the homeowner finally noticed the tiles shifting, we found black mold growing in the wet adhesive. This is why the TCNA standards are so specific about mortar coverage and type. You need a mortar that hardens regardless of airflow. If you are aiming for showers with a style that lasts, you have to respect the physics of the materials.
Why your baseboards might be hiding water damage
Water that seeps behind failing shower tile often travels down the wall studs and pools behind the baseboards. By the time you see a stain on your bathroom floor, the structural framing inside the wall is already rotting. This is a common sight in homes where the installer skipped the proper waterproofing and used the wrong adhesive. The baseboard acts like a mask, hiding the swelling drywall and the mold. If you are looking at baseboards makeover ideas to elevate your space, make sure you aren’t just covering up a moisture problem. A professional will always check the moisture levels at the floor to wall transition before installing new trim. The intersection of the shower pan, the tile, and the chic baseboard designs must be handled with precision to ensure a watertight seal.
“Cementitious mortar is the only acceptable bond for submerged or high-moisture environments; organic adhesives fail where water prevails.” – TCNA Handbook Standards
The master installer shower prep list
- Check the wall studs for plumb and the subfloor for deflection levels.
- Install a certified waterproof membrane or backer board system.
- Select a high performance polymer modified thinset mortar (ANSI A118.4 or A118.15).
- Mix the mortar with a low speed drill to avoid entraining too much air.
- Apply mortar using the correct notched trowel to ensure at least 95 percent coverage.
- Back butter every tile to eliminate voids where water can collect.
- Allow the mortar to cure for at least 24 to 48 hours before applying grout.
The bottom line on adhesive selection
Choosing the wrong adhesive is the fastest way to turn an expensive renovation into a total loss. Do not be seduced by the convenience of the premixed bucket. It might save you ten minutes of mixing time, but it will cost you thousands of dollars in repairs when the tiles start falling off the wall. Stick to Portland cement based thinsets. Use a product that is rated for the specific tile you are installing. If you are using large format porcelain, look for a medium bed mortar that can support the weight and handle the limited evaporation. Real flooring work is about the things you never see once the job is done. It is about the chemistry, the structural integrity, and the refusal to take shortcuts. If you need more information on how to maintain your surfaces after a proper install, check out tile cleaning tips for a sparkling bathroom in 2025 or how to refresh grout without replacing it to keep your work looking new. And always remember, if you have questions about your specific project, you can contact us for expert guidance. Quality lasts. Shortcuts are temporary.