
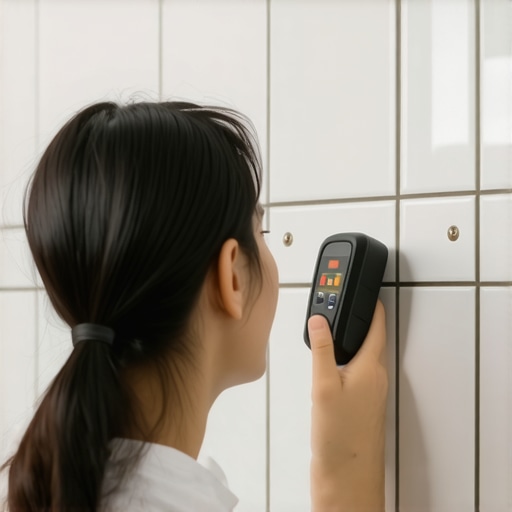
The Magnet Trick for Finding Studs Behind Tiled Walls
Most guys skip the leveling compound. They think the underlayment will hide the dip. It won’t. I spent three days grinding concrete on a job last month just so the floor wouldn’t click like a castanet. That same obsession with the structural skeleton of a room applies to the walls. When you are staring at a high-end porcelain install in a shower and you need to mount a heavy glass door or a grab bar, you cannot guess. You cannot use a $20 electronic stud finder from a big-box store and expect it to see through a half-inch of cementitious backer unit and another 3/8 inch of dense tile. The dielectric constant of the wall is too chaotic for consumer sensors. You need to understand the physics of the fasteners holding that wall together. You need a rare earth magnet and a steady hand.
Why electronic stud finders fail behind tile
Electronic stud finders measure capacitive changes in the wall to identify density spikes that suggest a vertical stud. In a standard drywall installation, this is effective. However, the high density of porcelain tile, thin-set mortar, and cement board creates a mineral barrier that absorbs and scatters ultrasonic or capacitive signals, resulting in false positives or no reading at all.
The science of a tiled wall is a layering of different materials. You have your 2×4 or 2×6 timber framing. Over that, there is likely a moisture barrier or a topical waterproofing membrane. Then comes the cement backer board, which is essentially a sheet of concrete reinforced with fiberglass mesh. On top of that, the installer applied a layer of modified thin-set mortar, which is a complex blend of Portland cement, fine sand, and polymer additives designed to create a tenacious chemical and mechanical bond. Finally, you have the tile itself. If you are working with a porcelain product, you are looking at a material with a water absorption rate of less than 0.5 percent, meaning it is incredibly dense. Trying to send a weak electronic signal through this sandwich of materials is a fool’s errand. This is where the physics of magnetism saves your reputation.
The science of rare earth magnetism and hidden fasteners
A neodymium magnet, specifically a grade N52, generates a magnetic flux density strong enough to penetrate non-ferrous substrates like ceramic and cement. By sliding this magnet across the tiled surface, you are searching for the steel screws or galvanized nails that secure the substrate to the wood studs. Once the magnet finds a ferrous fastener, it will lock onto the spot, giving you a 100 percent accurate location of the framing member.
I have seen guys try to knock on the tile to hear a hollow sound. That is a joke. A well-installed tile wall should sound solid everywhere. If it sounds hollow, you have bigger problems, like a lack of thin-set coverage which leads to cracking. I always look for the grout lines first. If the original installer was worth his salt, he put his fasteners every 8 inches along the edges of the backer board. Because the backer board is 3 feet wide, those fasteners are guaranteed to be in the studs. When the magnet clicks against the tile, you have found the center of your target. This is the only way to ensure that the heavy hardware you are installing for showers that wow modern designs for 2025 actually stays on the wall for the next twenty years.
“A floor is only as good as the subfloor beneath it; deflection is the enemy of every joint.” – Master Flooring Axiom
Mapping the vertical timber skeleton
Mapping a wall requires a systematic grid search using a magnetic tool to identify at least two vertical points on a single stud. Once the neodymium magnet sticks to a fastener, you move vertically to find a second screw head. This confirms the plumb line of the timber framing and prevents misalignment during heavy hardware installation.
| Substrate Material | Typical Thickness | Magnetic Success Rate | Recommended Magnet Grade |
|---|---|---|---|
| Drywall Only | 1/2 inch | 100% | N42 or higher |
| Cement Board | 1/2 inch | 95% | N52 |
| Ceramic Tile + CBU | 7/8 inch | 85% | N52 (Large Disk) |
| Natural Stone + CBU | 1 inch+ | 65% | N52 (Double Stack) |
When you are working near the floor, you have to be careful with your chic baseboard designs that transform rooms in 2025. Often, the baseboard is nailed into the bottom plate of the wall, which is a horizontal member. If you are using the magnet trick near the floor, don’t mistake a nail in the baseboard for a stud. You need to move the magnet at least six inches above the baseboard to ensure you are hitting the vertical stud. If you find you need to clean up the area after drilling, refer to tile cleaning tips for a sparkling bathroom in 2025 to keep the surface pristine.
The ghost in the expansion gap
In every installation, there is the risk of meeting a obstacle. Modern bathrooms often use complex waterproofing systems. If you are working on showers with a style trendy ideas for small bathrooms, you might be dealing with a foam-core backer board. These boards use specific washers with their screws. These washers are larger and actually make the magnet trick easier because there is more steel for the magnet to grab. However, you must be careful not to puncture the waterproofing membrane if you aren’t planning to seal the hole immediately. A leak behind the wall is a slow death for a house. It starts with a little mold in the grout and ends with a rotted subfloor that I have to come in and tear out. I have seen $20,000 bathrooms destroyed because someone didn’t realize they had punctured a pipe or a liner while looking for a stud.
- Always use a N52 Grade Neodymium magnet.
- Wrap the magnet in a thin microfiber cloth to avoid scratching the tile glaze.
- Mark the spot with blue painter’s tape, never a permanent marker.
- Find at least two fasteners per stud to verify the angle.
- Check for electrical interference if the magnet behaves erratically.
Why your subfloor is lying to you
The relationship between the wall and the floor is absolute. If your floor is out of level, your tile rows will be skewed, and your stud locations might seem tilted. I always check the floor first. If the subfloor has too much deflection, the movement will eventually crack the grout joints on the wall. If you see cracking already, you might need grout restoration secrets for long lasting results before you start mounting new hardware. You can also look into how to refresh grout without replacing it if the damage is purely aesthetic and not structural.
“Standard subfloor thickness for 16-inch on-center joist spacing must be a minimum of 19/32-inch tongue-and-groove plywood to prevent tile fatigue.” – Tile Council of North America Guidelines
The chemistry of the bond is another factor. In high-moisture environments, some installers use stainless steel screws. While stainless is better for corrosion, it is less magnetic than standard galvanized screws. If your magnet is barely sticking, you might be dealing with high-quality stainless fasteners. In this case, you need a larger magnet or a more sensitive touch. If you are looking to upgrade the rest of your room, consider baseboards makeover ideas to elevate your space to match your newly secured wall fixtures. For sustainable options, check out eco-friendly tile solutions for sustainable homes in 2025. If you have questions about a specific installation, you can always contact us for professional guidance. Privacy concerns regarding your data can be reviewed in our privacy policy.