The structural reality of your bathroom floor
Preparing a concrete floor for bathroom tiling requires a perfectly flat, clean, and dry slab to ensure long-term adhesion and prevent grout cracking. Most guys skip the leveling compound. They think the underlayment will hide the dip. It won’t. I spent three days grinding concrete on a job last month just so the floor wouldn’t click like a castanet. This is the reality of floor prep that many installers ignore because it is back-breaking work. If you ignore the subfloor, the tile is just a countdown to failure. Most homeowners focus on the aesthetics of showers and stone patterns, but the physics of the installation happens in the millimeter of space where the thin-set meets the concrete. I have seen countless jobs where high-end tile was wasted because the installer didn’t check for laitance or moisture drive. You can find beautiful inspiration at showers that wow modern designs for 2025, but without the right foundation, those designs will fail within two years. Concrete is not a static material. It is a porous, breathing sponge that reacts to humidity and temperature. If you treat it like a piece of plastic, you will lose the bond. My knees have the scars from 25 years of grinding out the mistakes of builders who poured slabs that were more like waves than floors.
The 1/8 inch that ruins everything
A subfloor must be flat within 1/8 inch over a 10-foot span to prevent tile lippage and structural failure of the grout joints. This standard is set by the TCNA and for good reason. When a tile bridges a dip in the concrete, it creates a hollow spot. Every time you step on that tile, it flexes. Eventually, the grout will crumble or the tile itself will snap. I always carry a 10-foot straightedge. If I see daylight under that bar, I am not laying tile until the floor is ground down or filled. I once walked into a house where a $15,000 wide-plank floor was cupping, and the same principles apply to tile. If the base is uneven, the finish will mirror those flaws. You can try to hide it with thick-set mortar, but that only works to a point before the shrinkage of the mortar pulls the tile out of alignment.
“A floor is only as good as the subfloor beneath it; deflection is the enemy of every joint.” – Master Flooring Axiom
This is especially true when you are working around baseboards. If the floor is wavy, you will see huge gaps under your trim that no amount of caulk can fix. For better results with trim, check out baseboards makeover ideas to elevate your space. Precision starts at the slab level.
Grinding concrete is not optional
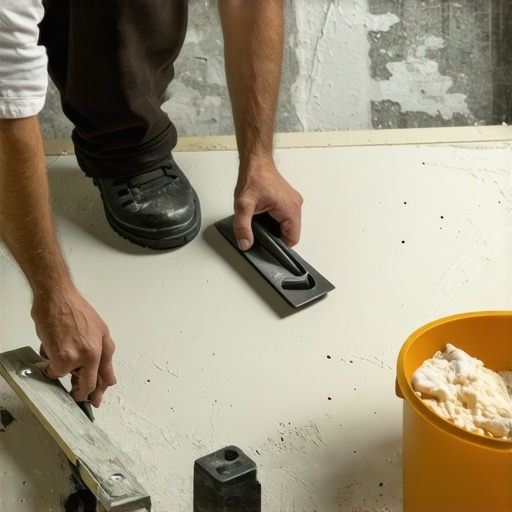
Removing laitance and old adhesives through mechanical grinding is the only way to ensure a chemical bond between the concrete and the thin-set. Concrete often has a weak, milky layer on top called laitance. If you thin-set over it, you are bonding to a powder, not a slab. I use a 30-grit diamond cup wheel on an angle grinder for small bathrooms. For larger areas, I bring in the walk-behind grinder. The goal is to reach a Concrete Surface Profile (CSP) of 2 or 3. This feels like medium-grit sandpaper. It provides the mechanical key needed for the mortar. Many people try to use chemical strippers to remove old paint or thin-set, but those chemicals often soak into the concrete and act as a bond-breaker for the new install. Stick to mechanical removal. It is loud. it is dusty. It makes you smell like lime and old dust for a week. But it is the only way the tile stays down. I have spent decades cleaning grout lines from floors that failed because the installer thought a quick sweep was enough. If you want a floor that lasts, you look into grout restoration secrets for long-lasting results and realize that the secret is always in the bond. A clean slab is the only slab worth tiling.
Measuring the moisture hidden in the slab
Moisture testing with a calcium chloride test or a relative humidity probe is mandatory to prevent hydrostatic pressure from blowing the tile off the slab. Concrete looks dry on the surface long before it is dry in the middle. For a new pour, you need at least 28 days, but usually much longer depending on the humidity. I have seen slabs that were six months old still throwing off 5 pounds of moisture per 1,000 square feet. If you trap that water under a tile, it will build up pressure. Eventually, it will find a way out, usually through the grout or by de-bonding the tile. I use an ASTM F2170 probe. It tells me the truth. If the RH is over 75 percent, I am applying a moisture vapor barrier. Most guys skip this because it adds $300 to the job. I don’t skip it because a callback costs $5,000. In damp environments, you also need to think about maintenance later. You can learn more about tile cleaning tips for a sparkling bathroom in 2025 to keep things looking good, but no cleaner can fix a moisture failure from below. Moisture is a silent killer in this industry.
| Metric | Requirement | Tool Needed |
|---|---|---|
| Surface Flatness | 1/8 inch per 10 feet | 10-foot Straightedge |
| Surface Profile | CSP 2 to CSP 3 | Diamond Grinder |
| Moisture Level | < 75% Relative Humidity | RH Probe |
| PH Level | Between 7 and 9 | PH Test Kit |
The chemical bond of thin-set
Selecting the correct modified thin-set depends on the tile porosity and the specific concrete additives used during the pour. Not all thin-sets are the same. If you are laying large format tile, you need a medium bed mortar that won’t shrink. If you are using porcelain, you need a high polymer content to grab onto that glass-like surface. I always mix my thin-set with a slow-speed drill. If you whip it too fast, you introduce air bubbles. Air bubbles mean less coverage. Less coverage means failure. I aim for 95 percent coverage in wet areas like showers. I back-butter every single tile. It is a pain. It takes longer. But it ensures there are no voids. Voids collect water. Water breeds mold.
“Tiles are only as permanent as the mortar that holds them; air is the enemy of adhesion.” – TCNA Guidelines
This meticulous approach is what separates a master from a handyman. When you finish the tile, you will need to think about the transition to the walls. See chic baseboard designs that transform rooms in 2025 for ideas on how to finish the look. The bond is the soul of the floor. Without it, the floor is just a pile of expensive ceramics.
The ghost in the expansion gap
Leaving a 1/4 inch expansion gap at the perimeter and around all vertical obstructions is required to allow for the natural movement of the concrete slab. Concrete expands and contracts with the seasons. If you butt the tile tight against the wall, it has nowhere to go. It will tent. It will pop. I see this most often in bathrooms where the installer tiled right up to the tub or the toilet flange without a gap. I use spacers at the walls and cover that gap with my baseboards or a bead of 100 percent silicone. Never use grout in a change of plane. Grout is rigid. It will crack. Use color-matched caulk. This allows the floor to move independently of the walls. It is a small detail that saves the whole job. If you are doing a small space, check out showers with a style trendy ideas for small bathrooms for layout tips that incorporate these gaps without looking messy. A floor needs to breathe. If you choke it, it will scream.
- Check slab for cracks and apply isolation membrane.
- Vacuum the floor twice to remove all micro-dust.
- Prime the concrete to prevent the slab from sucking water out of the thin-set.
- Map out the high spots with a laser level before you start.
- Use a notch trowel that corresponds to the tile size for proper ridges.
Proper preparation is an investment in time. It is about the chemistry of the primer, the physics of the flat surface, and the patience of the installer. I have spent more time on my knees with a grinder than I have actually laying tile. That is the secret to a floor that lasts fifty years. Do not trust a guy who starts laying tile an hour after he walks onto the job site. He is building a failure. You want a craftsman who respects the concrete. You want someone who understands that the prep is the project. Everything else is just the icing on the cake. Treat your showers and floors with the respect they deserve by starting from the bottom up.