
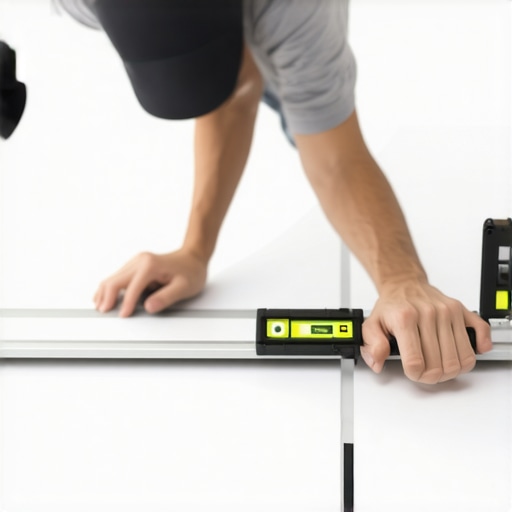
I once walked into a house where a $15,000 wide-plank walnut floor was cupping so bad it looked like a potato chip because the installer didn’t check the crawlspace humidity, and it taught me that the surface is a liar. But wall tile is a different beast entirely. Most guys skip the leveling compound. They think the underlayment will hide the dip. It won’t. I spent three days grinding concrete on a job last month just so the floor wouldn’t click like a castanet, and that same obsessive attention to the substrate is what saves a shower wall from becoming a crooked mess. If you do not respect the first row, the rest of the wall will punish you. I smell like WD-40 and oak dust most days because I do the hard work of prep that the aesthetic-focused designers ignore. A floor or a wall is a performance surface, a structural engineering challenge that requires more than just a pretty pattern. It requires a level. It requires a plan.
The gravitational pull of a bad start
A perfectly level first row of wall tile depends on ledger boards, laser levels, and proper substrate preparation to prevent vertical slippage. You cannot trust the bathtub or the shower pan to be level because settling and framing errors often create a sloped surface that ruins grout alignment. When you start at the bottom and work up, you are fighting gravity. If the floor is off by even an eighth of an inch, by the time you reach the ceiling, that gap has grown into a glaring mistake. I have seen guys try to shim their way out of a bad start, and it always looks like a hack job. You need to find the lowest point of the floor, measure up the height of one tile plus the grout joint, and then snap a line. That is where your second row starts. You screw a straight piece of lumber, a ledger board, into the studs along that line. This board carries the weight of the entire wall while the thin-set cures. It is the only way to ensure the top rows stay straight while you worry about the complex cuts at the bottom later. This is fundamental for showers that wow and provide a lasting structural bond. Without that ledger, the weight of the ceramic or porcelain will cause the tiles to slide down, compressing the grout joints and creating a zigzag pattern that no amount of grout restoration can ever truly fix.
Why your subfloor is lying to you
The subfloor or concrete slab often contains heaves and dips that cause large format tiles to lippage or crack under mechanical stress. You must use a straightedge to identify low spots and fill them with self-leveling underlayment before the first tile is set. I have spent years on my knees with a moisture meter and a ten-foot level. I know that a house is a living thing that breathes and moves. If you are installing tile over a wooden subfloor, you need to check the deflection. If the floor bounces, the grout will crack. It is physics. The TCNA (Tile Council of North America) has strict standards for this. They do not care about your paint color; they care about the shear strength of the bond.
“A floor is only as good as the subfloor beneath it; deflection is the enemy of every joint.” – Master Flooring Axiom
This rule applies to walls too. If the studs are bowed, your wall will be wavy. I often have to sister new studs to the old ones or use a topical leveling system to get the wall flat. It is tedious. It is dusty. But it is the difference between a floor that lasts fifty years and one that fails in five.
The 1/8 inch that ruins everything
Small measurement errors in the first row of tile expand exponentially as you move toward the baseboards or the ceiling. Using tile spacers and a calibrated laser is the only way to maintain geometric integrity across large shower walls. When you are working with thin-set mortar, the open time is your enemy. If you move too slowly, the mortar skins over and the bond fails. If you move too fast, you miss the tiny shifts in the tile. I prefer a modified thin-set with a high polymer content. It gives you a bit more grab, which is vital when you are doing vertical work. You should also be thinking about how the wall meets the floor. If you are planning a baseboards makeover, you need to know exactly where that transition happens. A poorly placed first row means you might end up with a tiny sliver of tile at the bottom that looks terrible and is nearly impossible to cut. I always dry lay my tiles first. I want to see where the cuts fall. If I see a sliver, I shift the whole layout. It is better to spend two hours thinking than two days fixing.
| Substrate Material | Water Absorption | Shear Strength | Deflection Limit |
|---|---|---|---|
| Cement Backer Board | 8-12% | High | L/360 |
| Gypsum Board (Green) | High | Low | Not Recommended |
| Waterproof Membrane | Less than 0.5% | Medium | L/720 |
The ghost in the expansion gap
An expansion gap at the perimeter of a tile floor or the corners of a shower prevents tented tiles and cracked grout caused by thermal expansion. You must fill these movement joints with 100% silicone caulk rather than rigid grout to allow the structure to shift safely. People think tile is solid. It is not. It moves. In the winter, the house shrinks. In the summer, it expands. If you butt your tile tight against a wall, it has nowhere to go but up. I have seen floors pop up in the middle of a room like a little mountain because the installer forgot the gap. This is especially true in areas with high humidity. If you are doing showers with a style that uses dark, heavy stone, that stone is going to hold heat and expand more than a light ceramic. You need to respect the chemistry of the materials. Even the chic baseboard designs you see in magazines have to account for this. The baseboard covers the gap, but the gap must exist. If you don’t leave it, you’re just waiting for a failure. I always use a 1/4 inch spacer at the perimeter. It is a small thing, but it is a fundamental one.
“The installation of ceramic tile is a system, and each component must be compatible with the environment and the substrate.” – TCNA Handbook
The structural cost of ignoring grout lines
Proper grout spacing ensures that mechanical stresses are distributed evenly across the tile surface. Using high-performance grout and sealing the joints prevents moisture intrusion which leads to mold growth and adhesive failure in wet areas. I have seen homeowners try to do “zero-grout” lines because they like the look. It is a disaster. Grout is not just for looks. It acts as a shock absorber. When the house moves, the grout takes the pressure. If there is no grout, the tiles hit each other and chip. I tell my clients that if they want their bathroom to last, they need to follow tile cleaning tips and maintain their grout. If the grout starts to crumble, you need to know how to refresh grout without replacing it before the water gets behind the tile and rots the studs. Once the mold starts, you are looking at a full tear-out. There is no shortcut. I use a power mixer for my grout to ensure the color is consistent and the polymers are fully activated. If you hand-mix it, you get streaks. It is all about the details. I also advocate for eco-friendly tile solutions because modern manufacturing has made sustainable tiles more durable than the old chemical-heavy versions. Sustainability is not just about the planet, it is about a floor that does not need to be replaced in ten years.
- Verify the floor is within 1/8 inch over 10 feet.
- Snap a chalk line at the second-row height using a laser.
- Fasten a straight-edged ledger board into the wall studs.
- Mix thin-set to a peanut butter consistency using a high-torque drill.
- Back-butter large format tiles to ensure 95% coverage.
- Place tiles with a slight twisting motion to collapse the mortar ridges.
- Use leveling clips to eliminate lippage between adjacent tiles.
The legacy of a straight line
A professional tile installation is measured by the longevity of the bond and the precision of the layout. You must prioritize substrate flatess and correct mortar selection to ensure the installation withstands daily traffic and moisture exposure. I do not care about the latest trends. I care about the physics of the installation. When I finish a job, I want to know that the first row I set is as level as the day I put it in. That requires patience. It requires a willingness to stop and fix a mistake before it gets buried. Most people are in a hurry. They want the finished product. But the finished product is only a shell. The real work is in the thin-set, the ledger board, and the level. If you follow these steps, your tile will not just look good, it will stay there. That is what being a master installer is about. It is about the things people do not see. It is about the grit, the dust, and the perfect 90-degree angle. Check your work. Trust your level. And never, ever trust a subfloor that you have not measured yourself.