
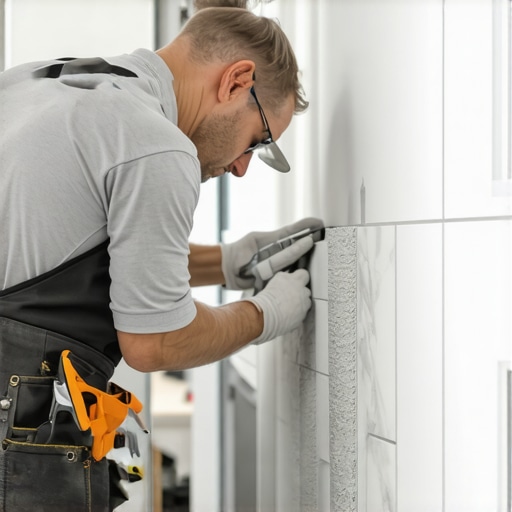
Mastering the Alignment of Wall and Floor Grout Lines for Structural Perfection
Most guys skip the leveling compound. They think the underlayment will hide the dip. It won’t. I spent three days grinding concrete on a job last month just so the floor wouldn’t click like a castanet. When you are trying to match a wall to a floor, that floor has to be a dead-level plane, or your vertical lines will wander like a drunk in the dark. I have seen guys try to cheat this by opening up the grout joints. It never works. If the base is off by even a sixteenth, that error is going to double every three feet until your bathroom looks like a funhouse mirror. Flooring is not just something you walk on. It is a structural engineering feat that depends on the chemistry of the bond and the physics of the substrate.
The mathematical reality of continuous grout lines
Achieving a continuous grout line from floor to wall requires the installer to measure the actual dimensions of both tile sets including their fired shrinkage rates. You must use the larger grout joint of the two tiles to compensate for any manufacturing size variations while aligning the centerlines of the room. This calculation is the only way to ensure the visual lines do not drift over large spans. When you pick out showers that wow, the beauty comes from the geometry, not just the glaze. If you have a 12×24 tile on the floor and a 4×12 on the wall, the math has to work. You are dealing with nominal versus actual sizing. A tile labeled 12 inches might actually be 11 and 7/8 inches. If you do not pull a tape on every box, you are dead before you even mix the thin-set. I use a digital caliper on every single job. I want to know the exact mil-thickness and the exact width. If I see a variation of more than 0.5 millimeters, I am sorting those tiles into different stacks. You have to be that obsessive. This is why grout restoration secrets often start with fixing bad spacing from the original install. If the joints are not aligned, they catch dirt differently, and the eye will find every flaw.
“A floor is only as good as the subfloor beneath it; deflection is the enemy of every joint.” – Master Flooring Axiom
Why your subfloor is lying to you
Subfloors often contain subtle dips and crowns that are invisible to the naked eye but will throw off wall tile alignment by several degrees. A subfloor that is not flat within 1/8 inch over 10 feet will cause tiles to kick out or dive, ruining the vertical grout lines. You cannot fix a bad subfloor with extra mortar. That is a rookie mistake. Thick mortar beds shrink as the water evaporates from the mix. As the mortar shrinks, it pulls the tile down. This is called lippage. If one tile sinks and the one next to it stays high, your grout line is no longer a straight path. It is a series of tiny steps. This is why I spend so much time with a 10-foot straightedge and a grinder. I am looking for the L/360 deflection rating. If that floor bounces when you walk on it, the grout will crack. It is physics. You need a rigid environment. In high-humidity areas like Florida, the wood subfloor will expand and contract. If you do not account for this with the right uncoupling membrane, your perfect alignment will be a memory within a year. You might need to look into eco-friendly tile solutions that offer better stability in shifting climates. I always tell homeowners that the prep work is where the money is spent. The tile is just the skin.
The 1/8 inch that ruins everything
Small discrepancies in tile sizing, known as caliber variations, can accumulate over a 10-foot run to create a massive misalignment. Professional installers use calipers to sort tiles by size before starting, ensuring that the wall tiles match the floor tiles precisely to the tenth of a millimeter. Most people think a 1/8 inch grout joint is standard. It is not. The joint size should be at least twice the maximum variation in the tile size. If you are using cheap tiles from a big-box store, they are going to be all over the place. Rectified tiles are better because they are sawn to size after firing, which gives them a much tighter tolerance. But even then, you have to watch the corners. If the wall is not perfectly plumb, you cannot just start tiling. You have to shim the wall or use a mud bed to create a true 90-degree angle. If that corner is at 89 degrees, your grout lines will slowly close up as you go up the wall. It is a geometric trap. You also have to think about how chic baseboard designs will cover your expansion gap. You need that gap at the perimeter. If the tile is tight against the wall, it has nowhere to go when the house moves. It will tent and pop. I have seen entire floors lift off the slab because someone forgot a quarter-inch gap at the edge.
| Tile Type | Tolerance | Grout Joint Size | Expansion Needs |
|---|---|---|---|
| Rectified Porcelain | 0.005 inches | 1/16 inch | Every 20 feet |
| Hand-Pressed Ceramic | 0.125 inches | 3/16 inch | Every 12 feet |
| Natural Stone | Variable | 1/8 inch | Every 15 feet |
The ghost in the expansion gap
Movement joints are the most overlooked part of tile alignment because they require breaking the pattern to allow for the natural expansion and contraction of the building. These joints must be filled with 100 percent silicone sealant rather than hard grout to prevent stress fractures. People hate the look of a silicone joint. They want everything to be hard grout. But grout does not stretch. If the house settles, the grout will crumble. If you align your wall and floor joints, you must also align your movement joints. This is especially true in showers with a style where water and heat are constant. The heat from a hot shower causes the tile to expand. If there is no soft joint in the corners, the tiles will crush each other. I always use a color-matched sealant that mimics the grout texture. It keeps the lines looking continuous while providing the necessary flexibility. I also look at how the baseboards makeover ideas can hide these essential structural gaps. A good baseboard is not just for show, it is a cover for the movement joint that keeps your floor from self-destructing.
“Tile shall not be installed on surfaces that vary more than 1/4 inch in 10 feet from the required plane.” – TCNA Handbook Standards
Chemistry of the bond coat
The chemical bond between the tile and the substrate is formed through the hydration of portland cement, which creates microscopic crystals that grow into the pores of both surfaces. Using the correct thin-set mortar with polymer additives is essential for maintaining alignment during the curing process. Not all thin-sets are equal. If you are using a large format tile, you need a medium bed mortar that can support the weight without sagging. If the tile sags even a fraction, your grout lines are ruined. The polymer additives in modern mortars are there to provide shear strength. This allows the tile to handle the different rates of expansion between the floor and the wall. In dry climates, the water in the mortar can evaporate too fast. This stops the crystal growth and leads to a weak bond. I always damp down the substrate before I spread my mud. It is a simple step, but it makes the difference between a floor that lasts 50 years and one that pops up in five. You also need to know how to refresh grout properly because even the best install will need maintenance. Grout is porous. It breathes. If you seal it too early, you trap moisture in the mortar bed, which can lead to efflorescence. That is the white salty powder that ruins the look of your clean lines. Wait at least 72 hours before sealing.
- Check subfloor for L/360 deflection before starting
- Sort tiles by caliber to ensure uniform sizing
- Use a laser level to establish a primary center point for both planes
- Verify wall plumbness and adjust with mortar or shims
- Plan movement joints every 20 to 25 feet
- Mix thin-set to a peanut butter consistency for maximum suction
The final reality of a professional tile job is that it is won or lost in the first hour of layout. I spend more time with a chalk line and a laser than I do with a trowel. If you do not have a perfectly square starting point, your grout lines will never align. I use the 3-4-5 rule to find a true square corner. I measure 3 feet one way, 4 feet the other, and if the diagonal is not exactly 5 feet, the room is out of square. I will adjust the layout to split the difference so the eye does not catch the taper. This is the level of detail that separates a master from a handyman. Once the tile is set, you should follow tile cleaning tips to keep those lines sharp. Dirt in a grout line makes the alignment look crooked even if it is perfect. Keep it clean, keep it level, and keep it structural.